R-Series 4K NVR Setup and Interface Overview

Introducing our New R-Series Recorders
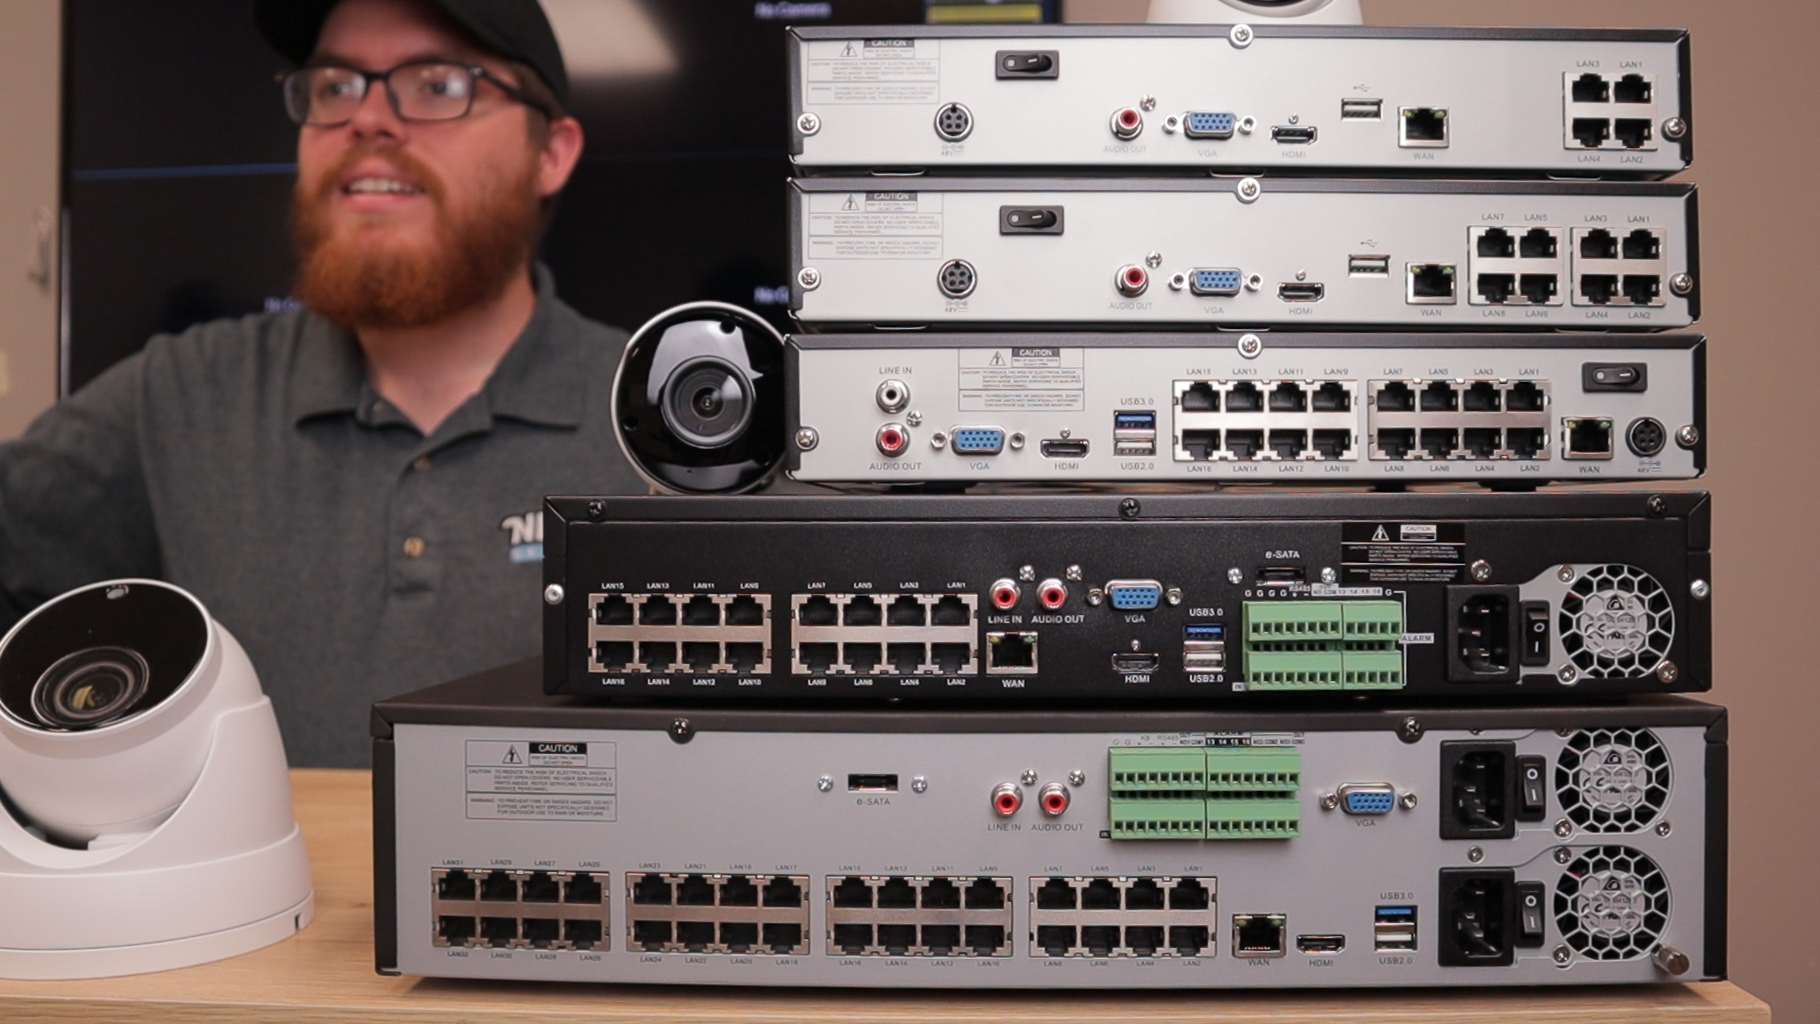
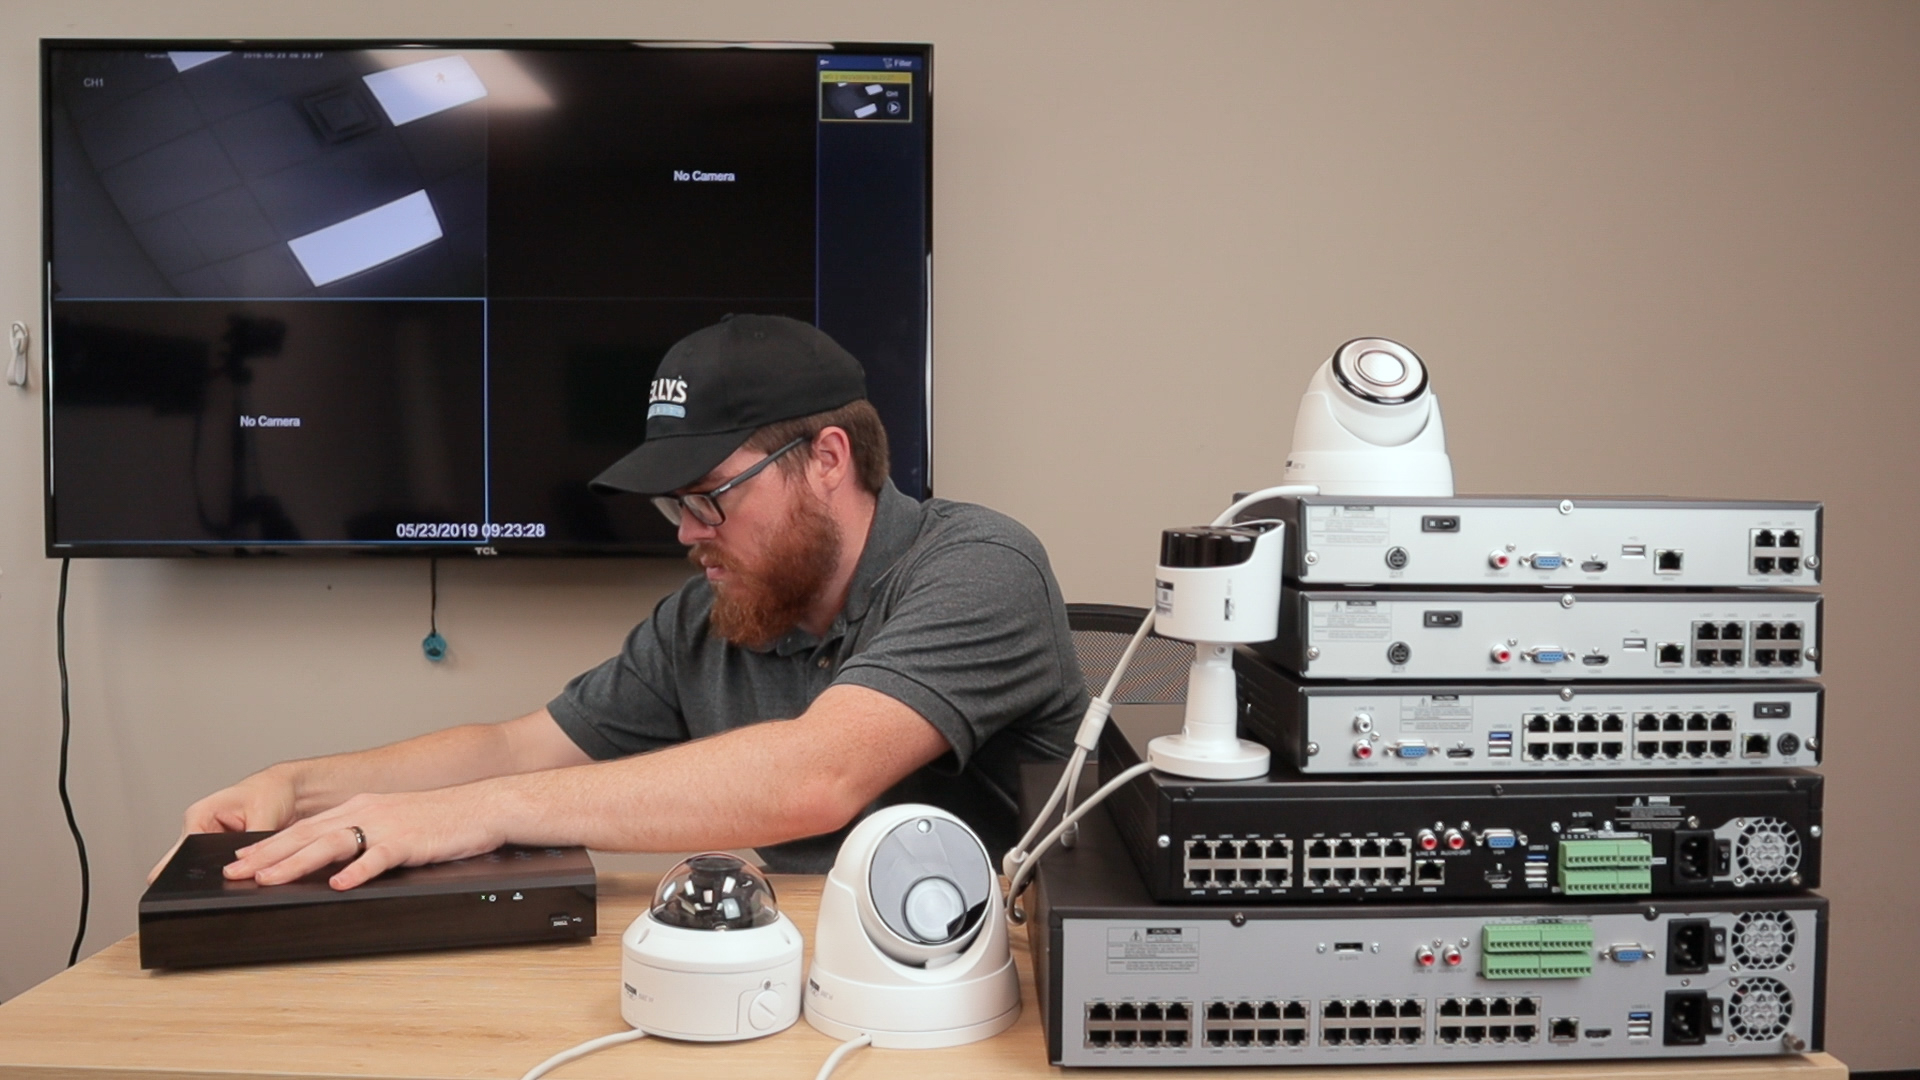
Recently we released our new R-Series line of surveillance equipment, geared toward lower costs and easier operations. We've taken a look at several of our new cameras, but we also have five awesome new 4K NVRs! Here's a quick overview of their features.
- All five recorders support IP Cameras up to 4K (8MP) Resolution
- Available in five different models, ranging from 4-32 channels
- 4-32 PoE ports, depending on the number of channels
- Free and super simple remote viewing software for PC, Android, and iPhone
- Simple, straightforward, and userfriendly interface
- ONVIF Compatible
In this blog post, we're going to walk you through everything you need to know to set up your R-Series NVR, navigate the HDMI interface, and access your feeds and recordings remotely. If you'd rather watch it all in action, you can also check out the video below. Alright, let's get started!
Setting Up Your NVR
These NVRs were designed to work best with our R-Series cameras. However, since it's ONVIF compatible, you can add just about any camera to these recorders, as long as they're ONVIF compliant. If you have one of our H-Series camera, for instance, you'll still be able to use it with these recorders. However, we recommend sticking with the same brand if possible, especially if this is your first surveillance system. If you use the R-Series cameras with the R-Series NVRs, you get the easiest setup possible and the best user experience.
Adding and R-Series Camera: Plug and Play
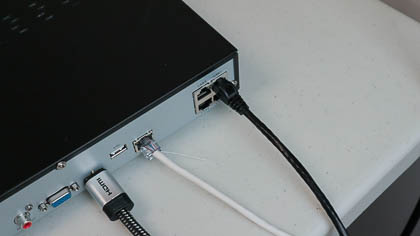
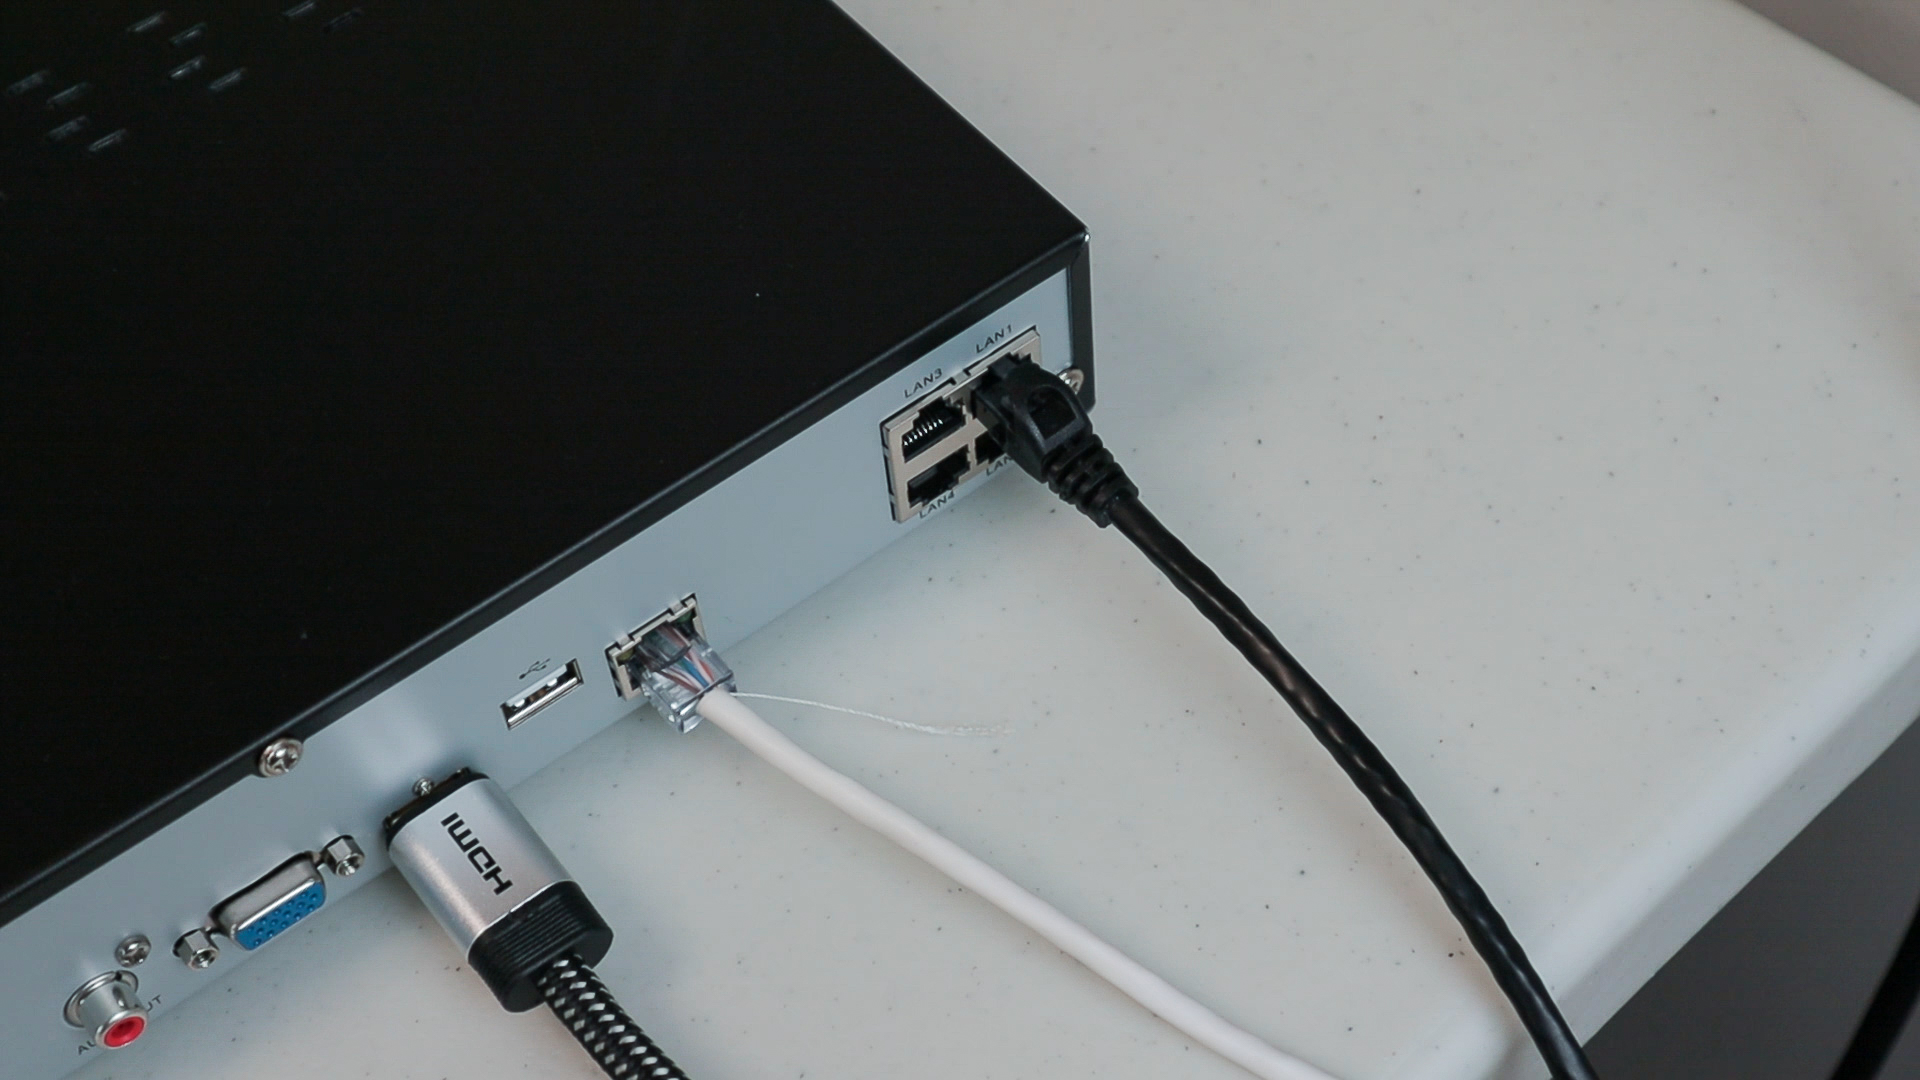
Your NVR comes with a PoE switch in the back, with the number of ports matching the number of channels. This allows for the easiest possible setup with your R-Series cameras. Connect your NVR to a power outlet and to your Internet router. Then connect your cameras to the PoE switch with a cat5 Ethernet cable. Not only will this provide data and power to your camera simultaneously, allowing you to power your camera without a separate DC power connection. But it will also instantly and automatically add your camera to the NVR. You won't have to edit any information, search for any IP addresses, or input any passwords. Simply plug and play for instant video.
Adding the R-Series Camera: Edit Manually
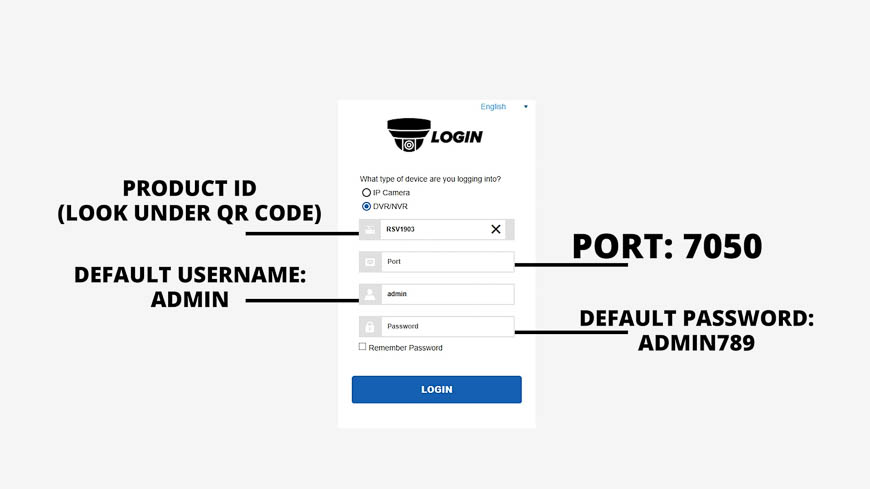
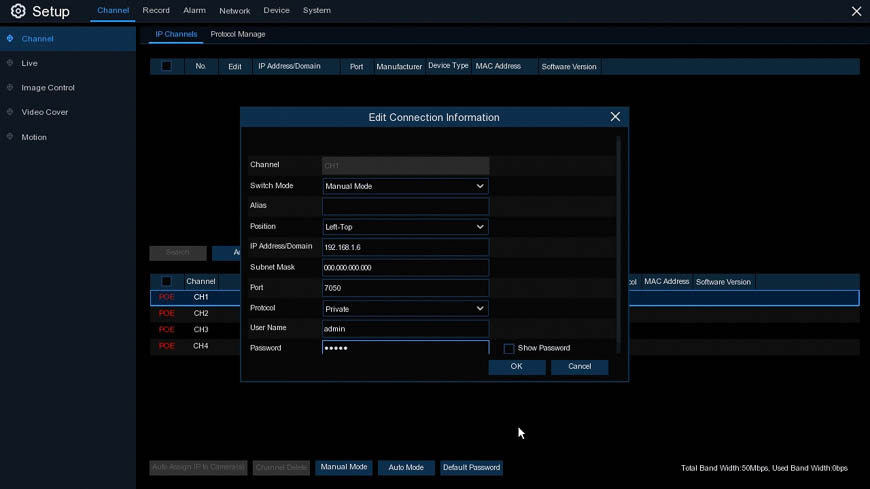
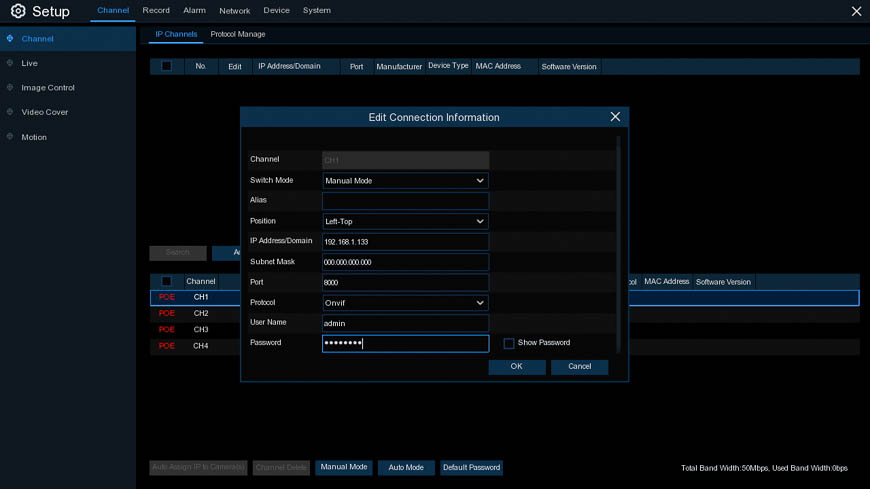
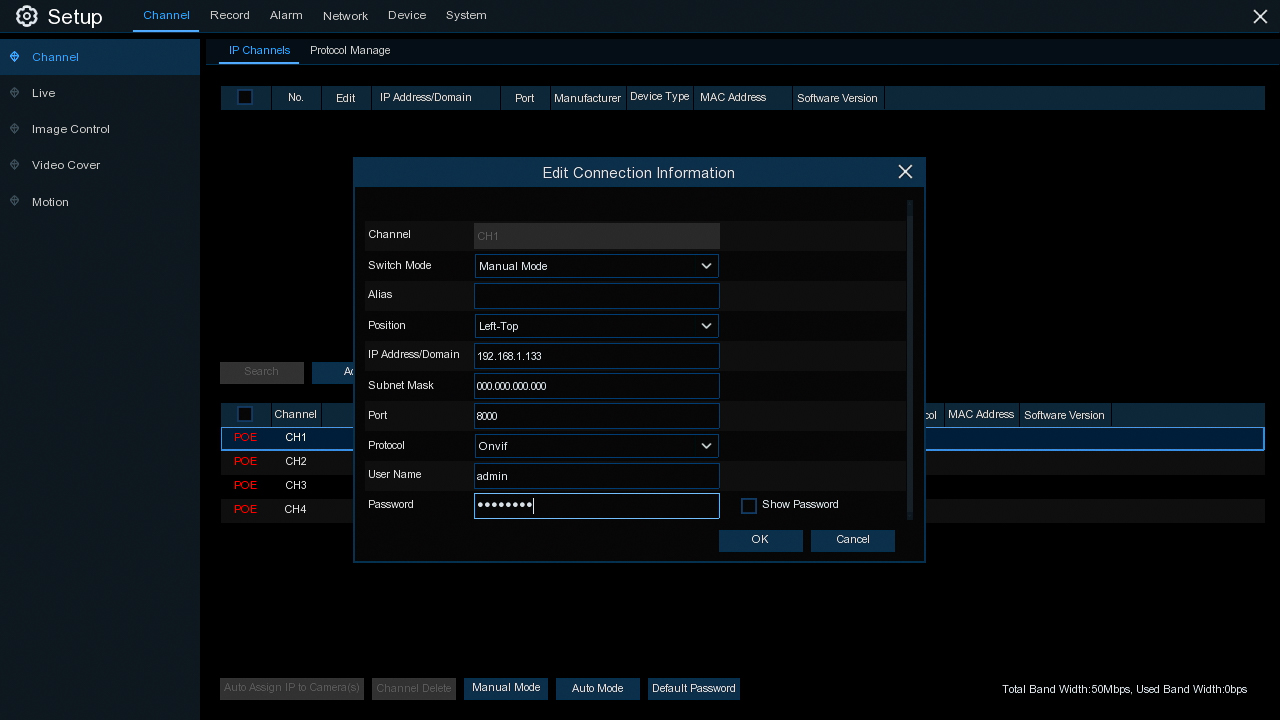
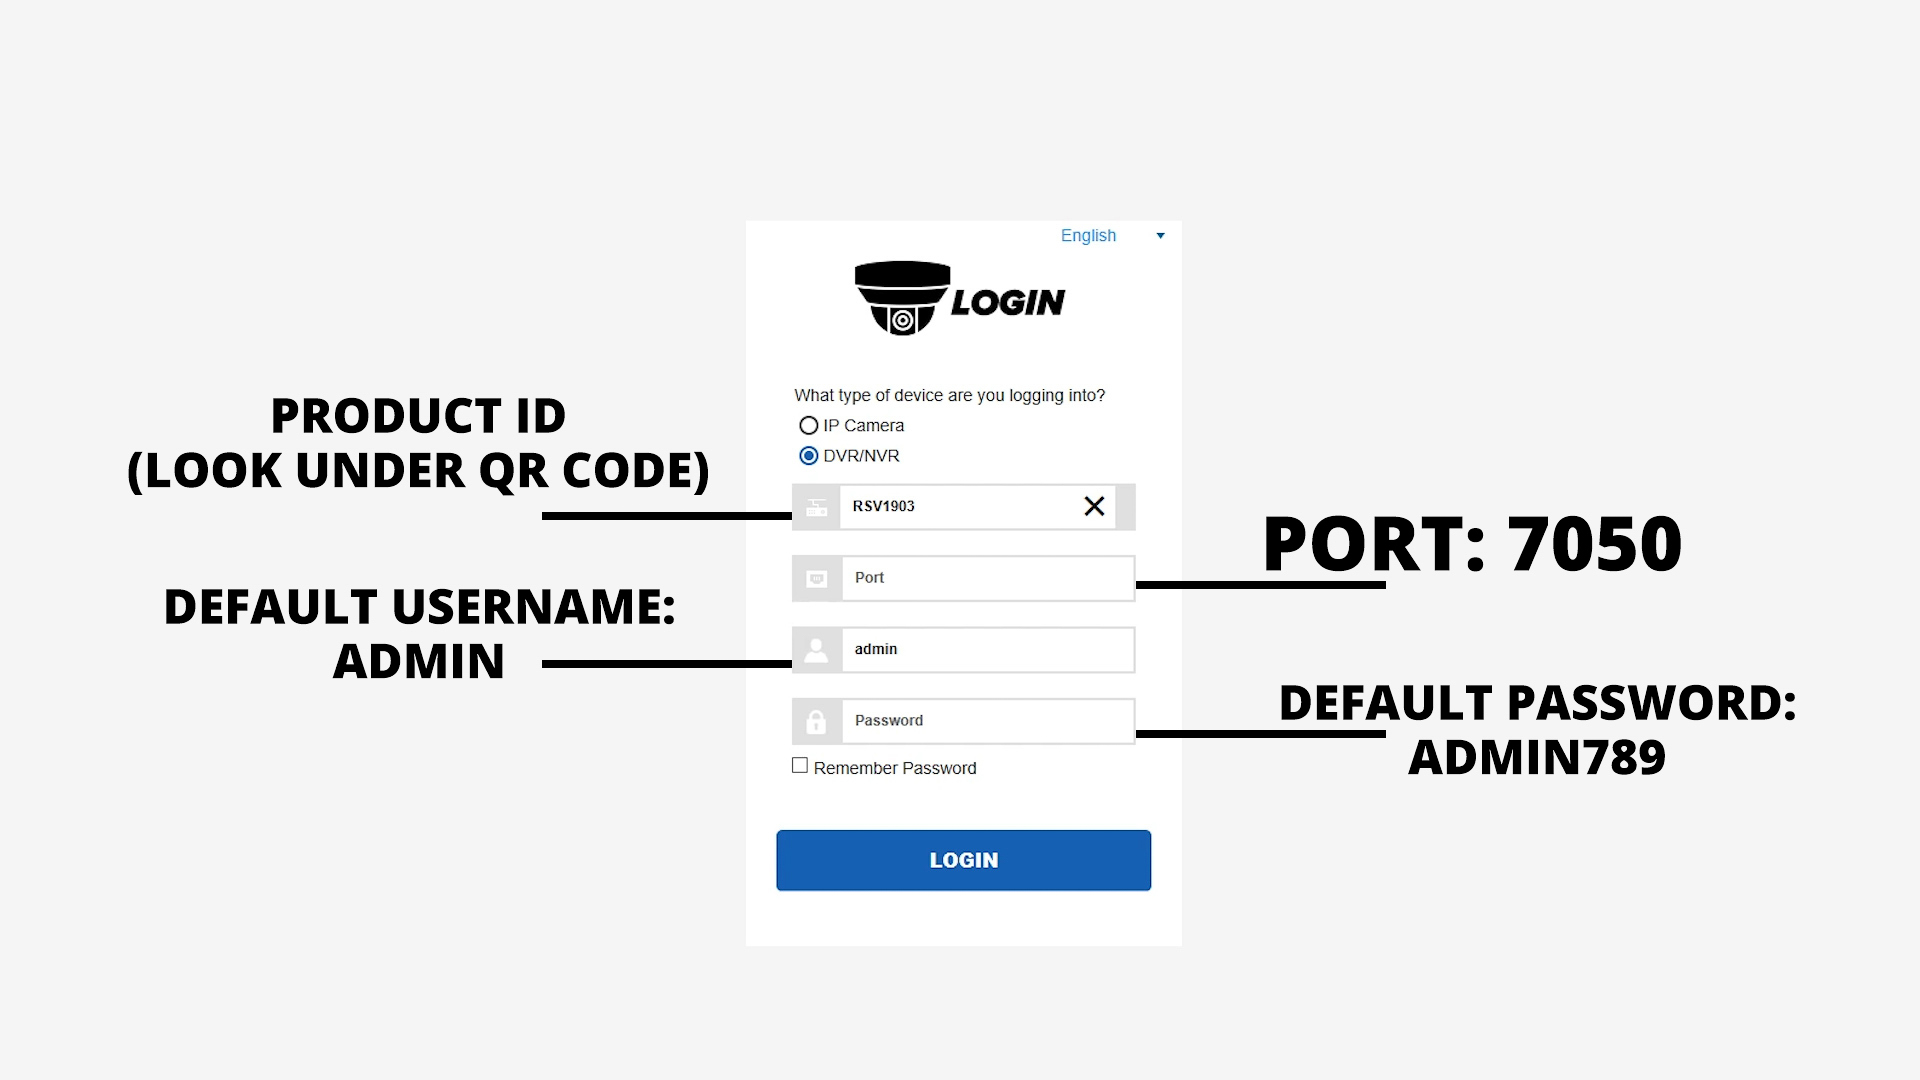
For some reason or another, you may find it more convenient to connect your camera to another PoE switch on your property rather than running cables to your NVR. In this case, you won't be able to plug and play, but you still shouldn't have any issues getting your NVR set up. Navigate to the menu screen, click the "Channel" tab under the "Channel" menu. Next to the channel you want to add, click "Edit." Change the "Switch Mode" to "Manual." Input the IP Address (which you can find using the ConfigTool in your software CD), Port (7050), and the camera's username and password (both of which are "admin" by default). Once you navigate back to the live view, you should have video footage from your manually-added camera.

Adding Another Camera: ONVIF Protocol
If you wish to add a camera to your NVR that isn't one of our R-Series cameras, you'll have to use the ONVIF protocol. It's easier than it sounds. Follow the same steps as above to edit your NVR's channels manually. Input all the information (note: the port number, default username, and default password will vary depending on your camera's brand). Make sure you change the protocol to ONVIF. And that's it! Your camera should now be set up and ready to go.
Navigating the Interface
Our R-Series recorders boast a userfriendly interface with an elegant design. With other recorders, the menu systems tend to be bulky and difficult to navigate if you don't know what you're doing. With the R-Series NVRs, it only takes a few clicks to accomplish pretty much any task. Even if you've never used an NVR before, you'll become familiar with this system in no time.
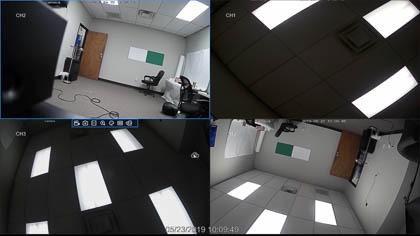
Live View
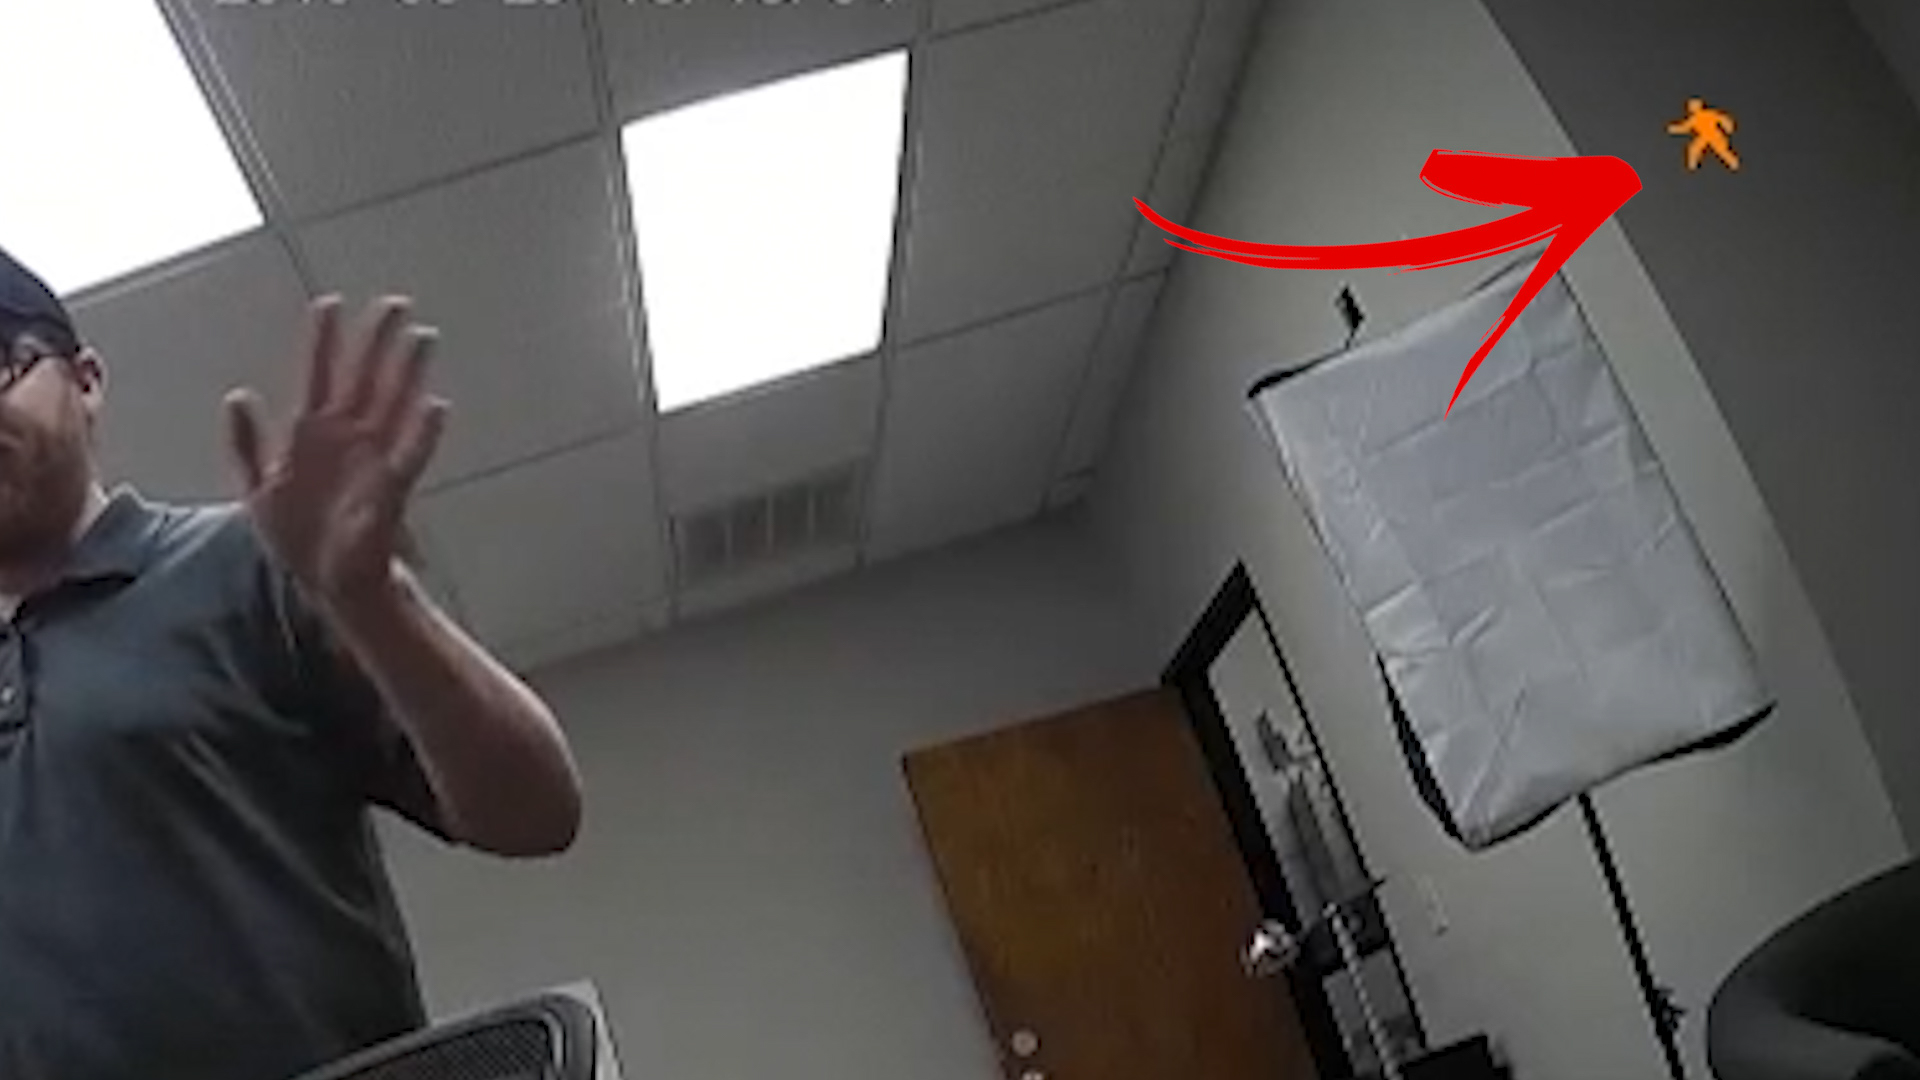
The main screen on your NVR is the live view of all your cameras. You can click and drag the channels to rearrange the layout on the screen. Double-click a channel to make it full screen. You can zoom in and pan around the image using your mouse-wheel. You can even tell when motion is detected on each channel, as you'll see a symbol pop up on the screen.
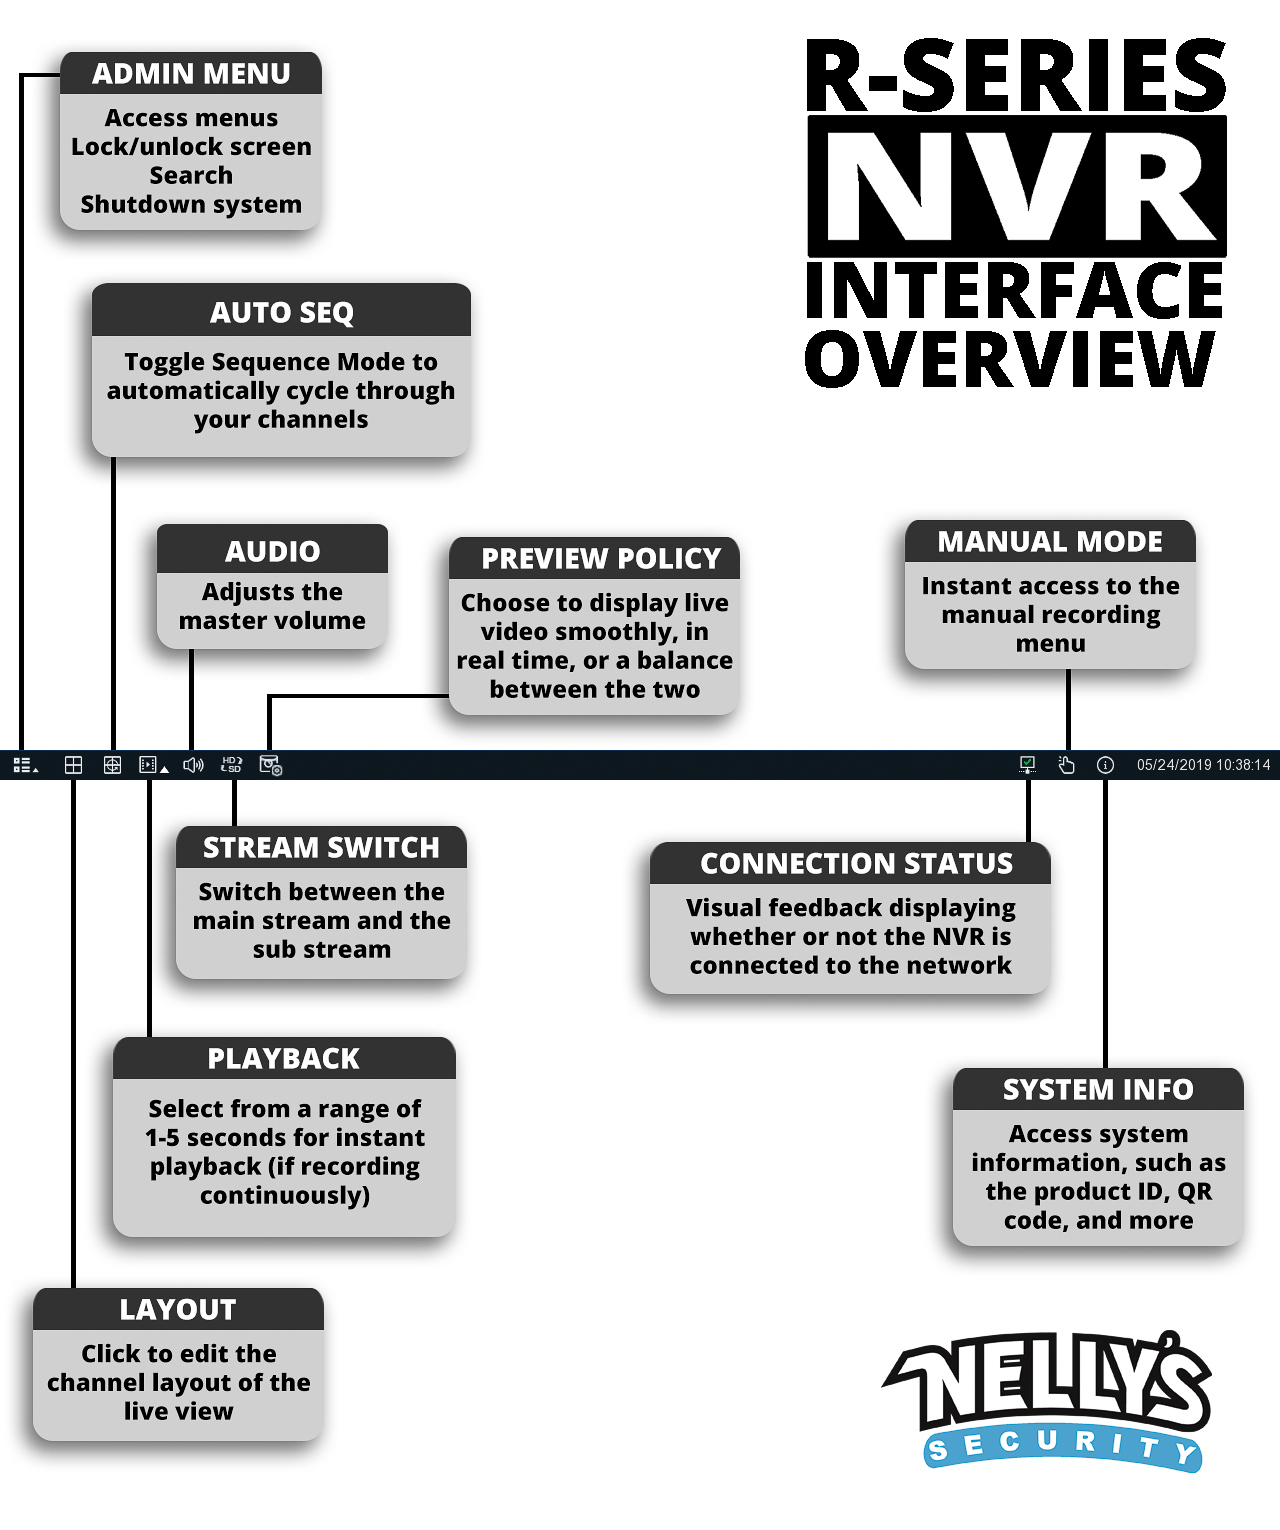
With the menu bar across the bottom, you can access a few simple functions, such as editing the channel layout and toggling the sequence mode. Take a look at the diagram below to see all the functions on this toolbar.

Menus
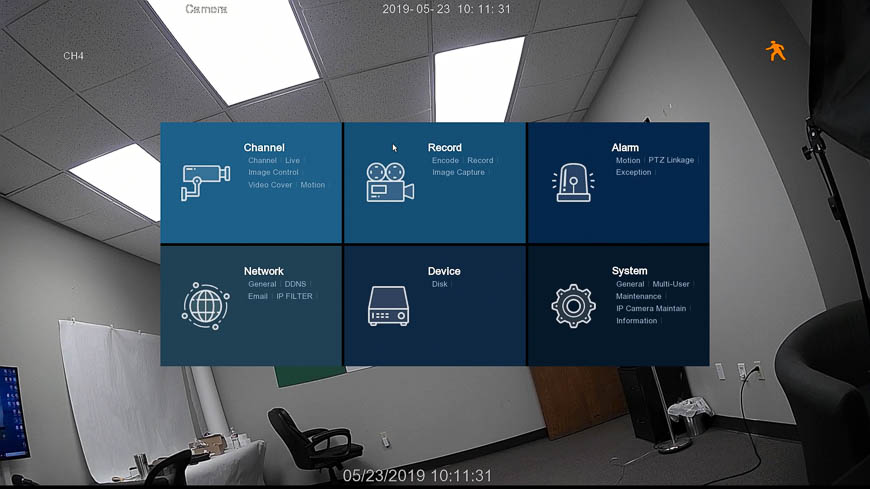
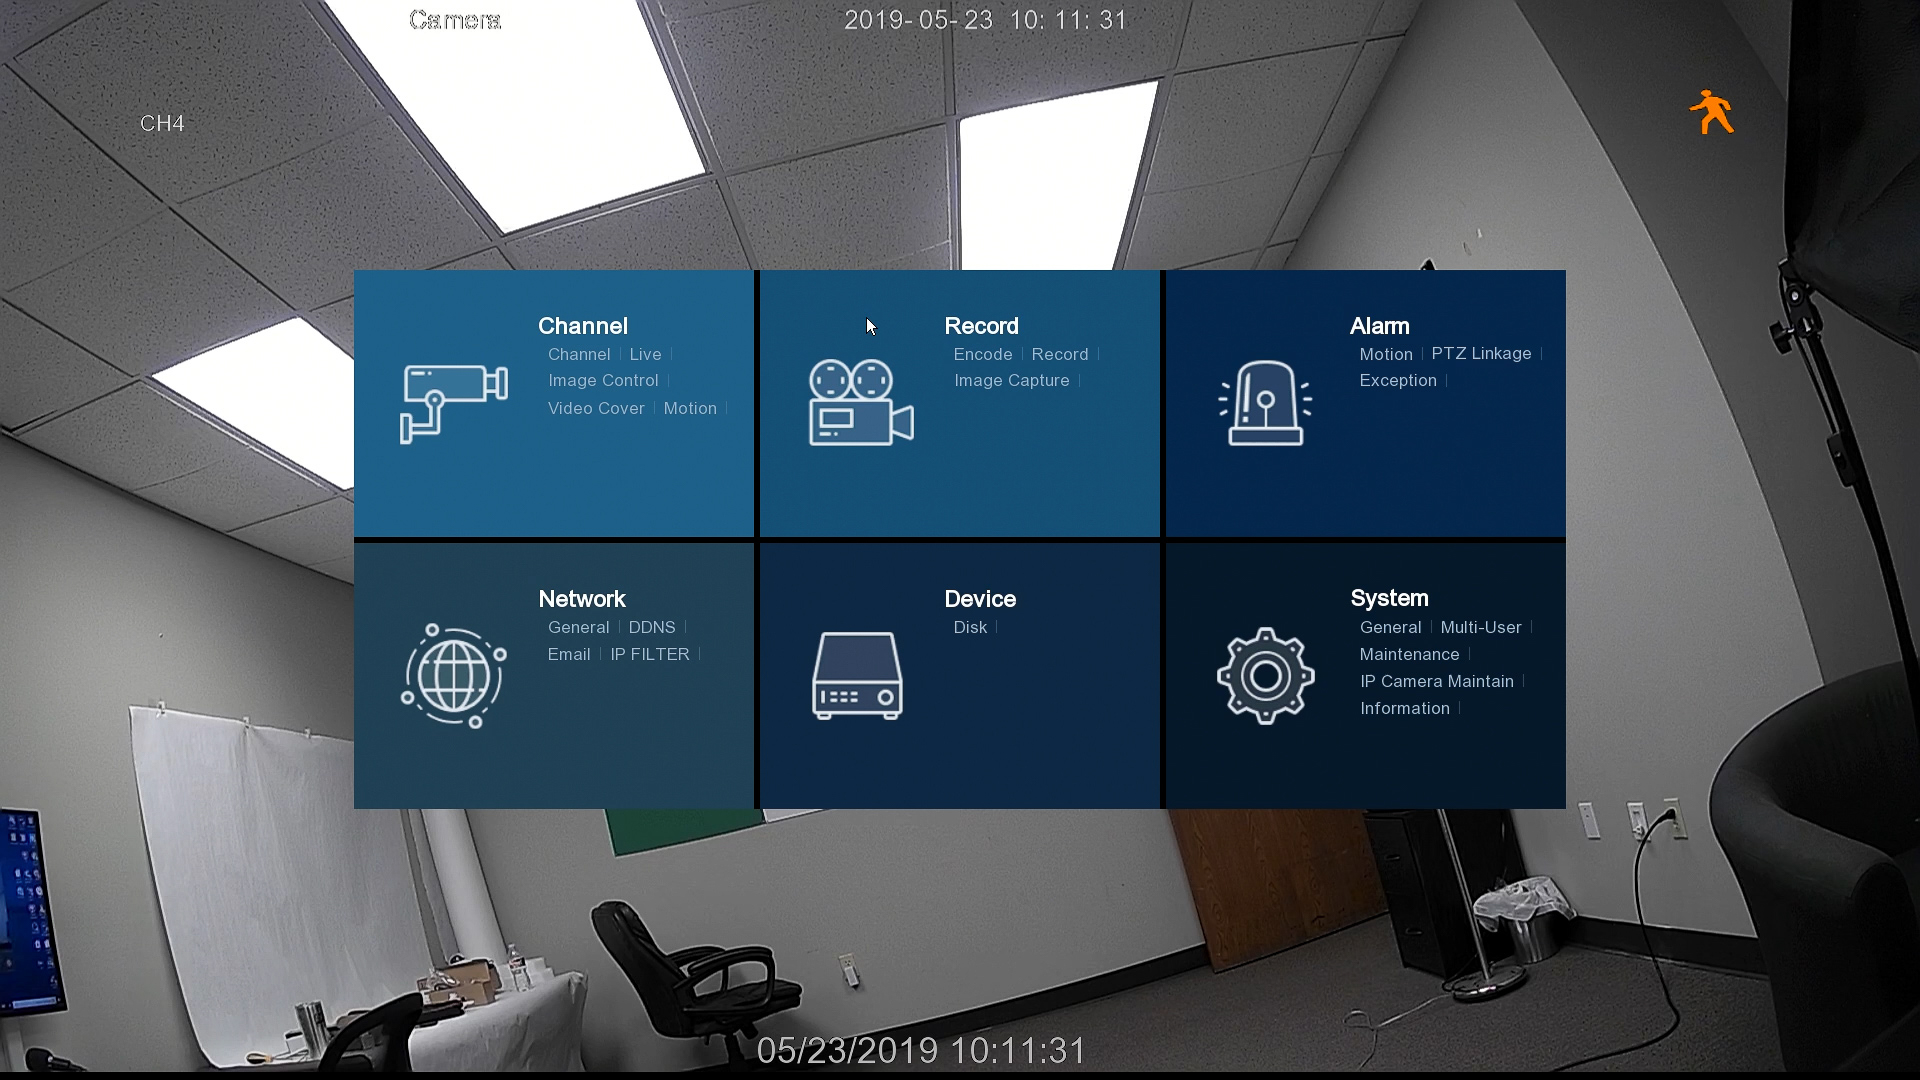
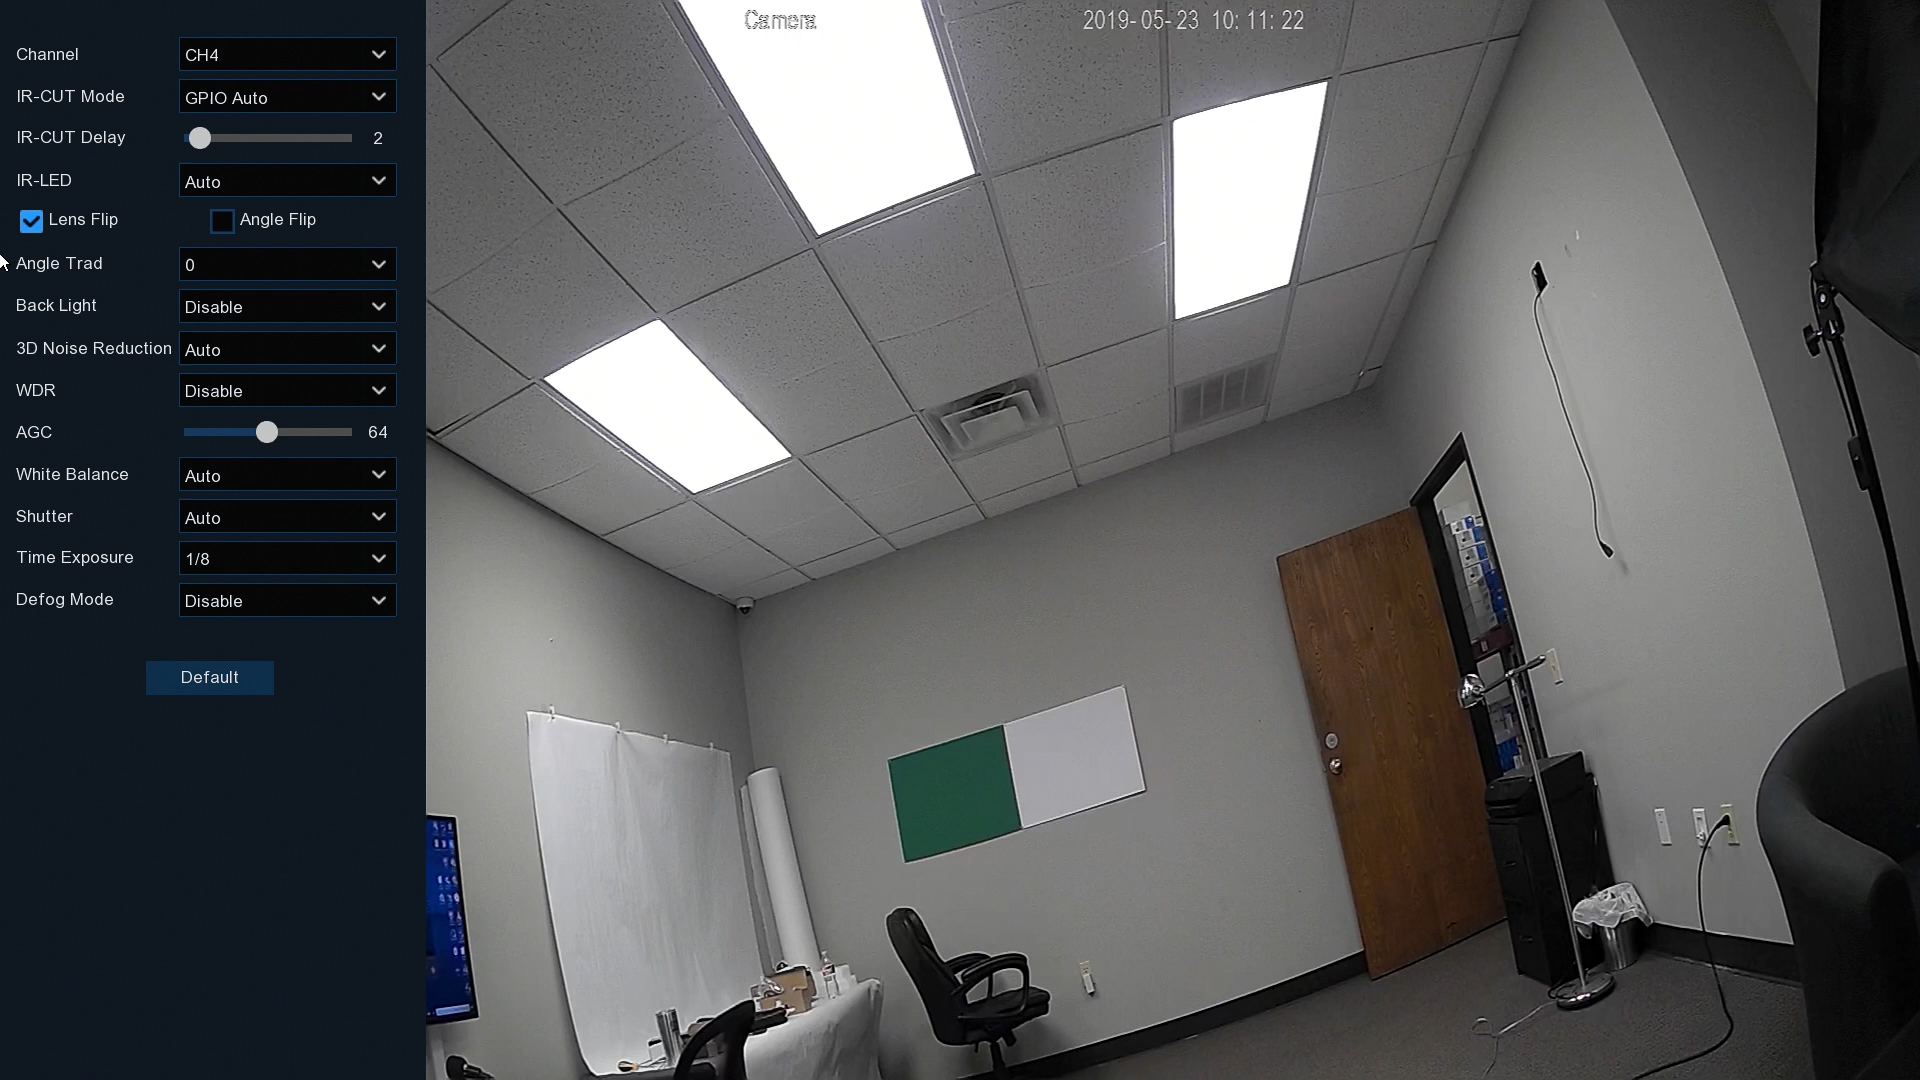
To access the menu system, click on the admin menu in the toolbar, then click "Settings." Unlock the screen using your username and password (default username: admin; default password: admin789). From here you can edit and add IP addresses to the channel menu, adjust the image settings, edit the motion detection fields, add privacy zones, create recording schedules, format your hard drive, and so much more.
Here's a screenshot of the menu, to give you an idea of everything that you can do within each of the tabs.

There's a lot to explore when it comes to the R-Series NVR menu system. If you ever get stuck on a particular issue, feel free to open a support ticket or give us a call. Our experts will be able to walk you through anything that may come up.
Remote Access
If you've ever tried to set up port forwarding in order to access your NVR remotely, you know how much of a pain it can be. Luckily, you don't need to worry about that with these R-Series recorders. You can instantly access your NVR from your mobile device or computer in just a few simple steps.
Mobile Device Access
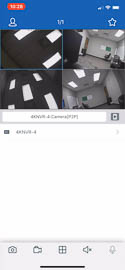
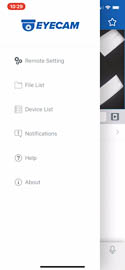
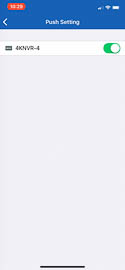
If you want to view and manage your NVR from your mobile device, you're in luck. All you need is the free Eyecam application (from Google Play or the App Store). When you launch the app for the first time, it will take you to the "Device List," which will be blank. Tap the plus sign in the top right-hand corner, scan the QR code on your NVR box or information screen, and you will instantly have access to your NVR from anywhere in the world.
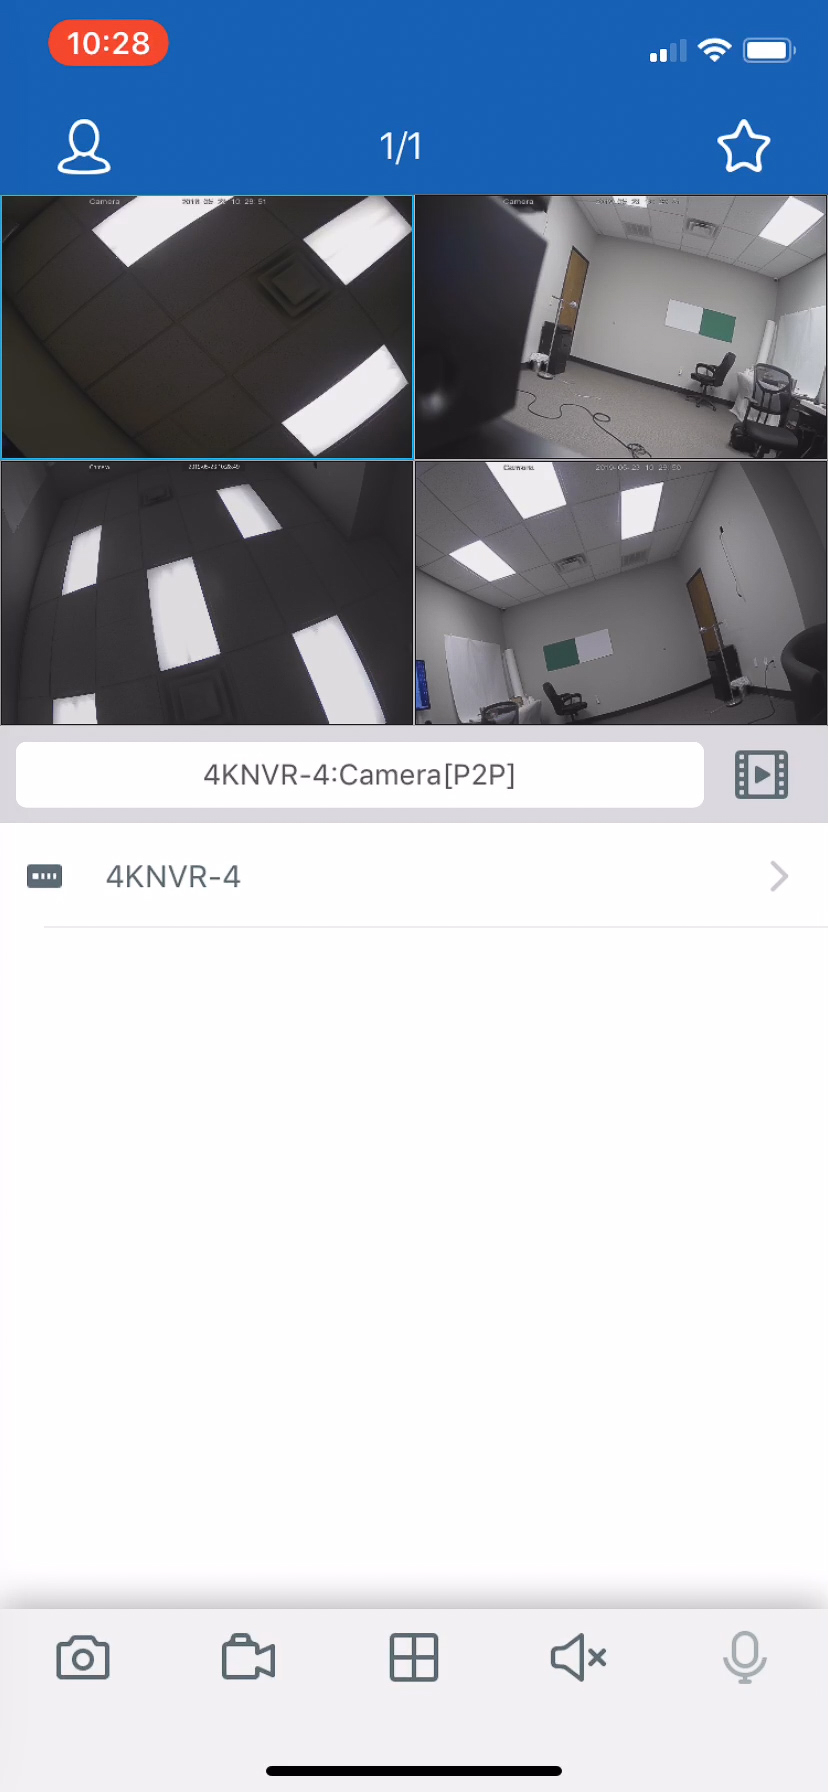
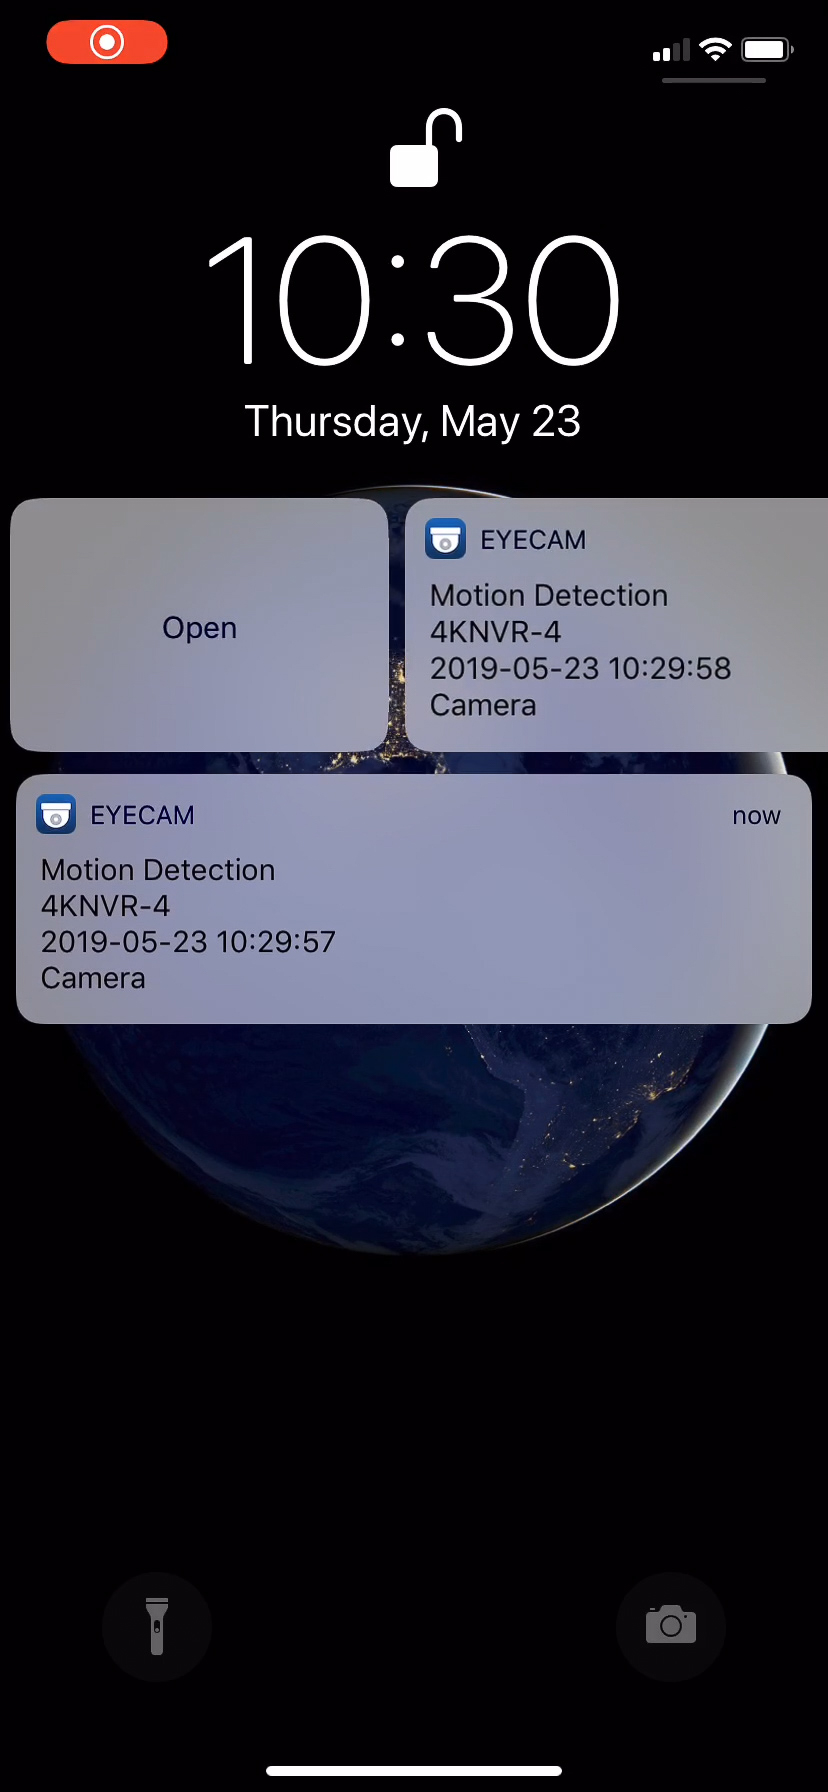
View your live feeds, take manual recordings or screenshots, review past recordings straight from your recorder's hard drive, enable push notifications for motion detection alerts, and more. This is the simplest way to remotely manage your NVR and camera feeds. Plus, you can add multiple NVRs to your device list and view them all simultaneously. (Click each image below to see full size.)


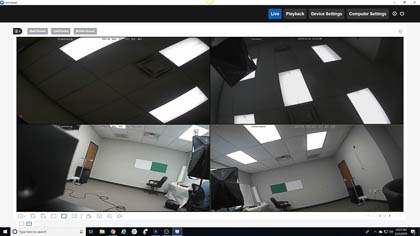
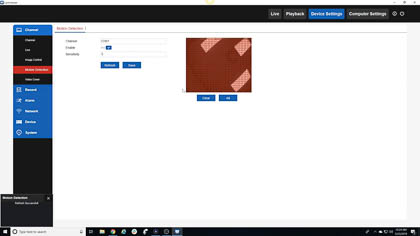
Computer Access
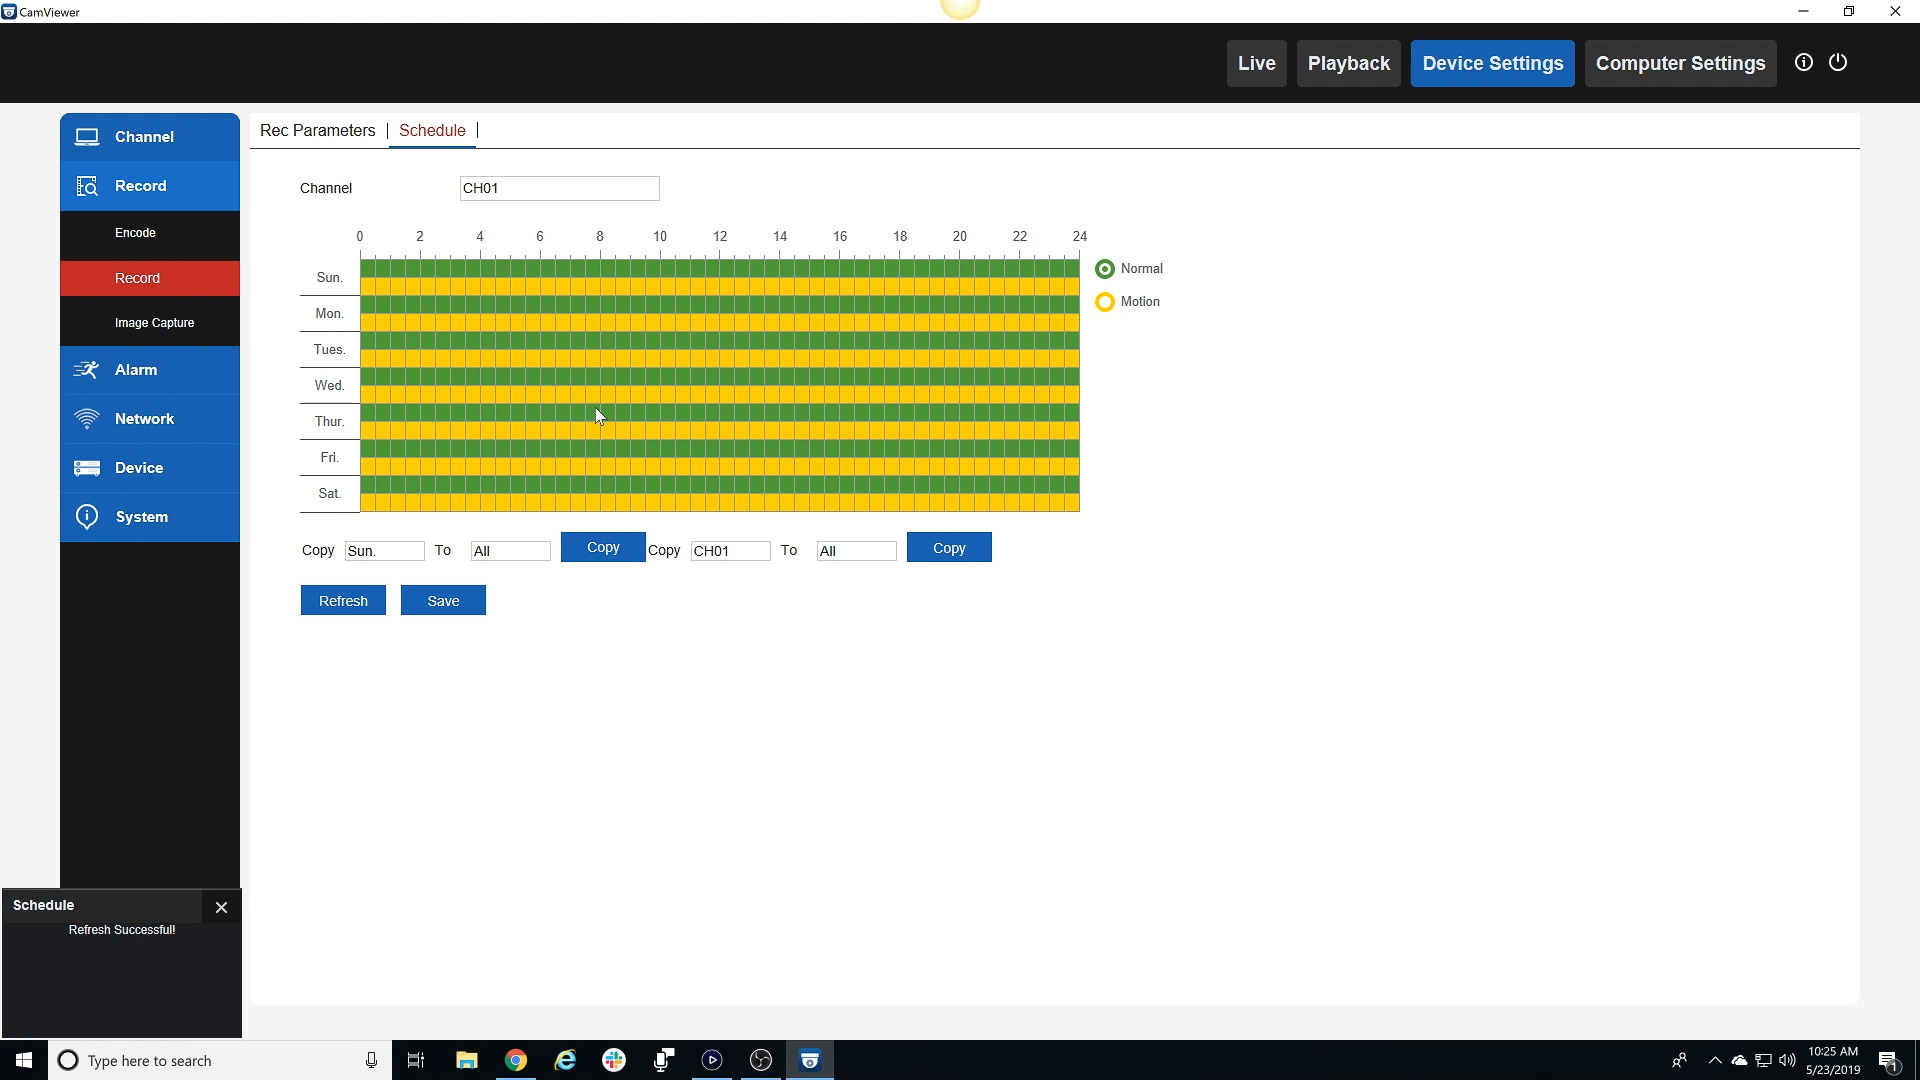
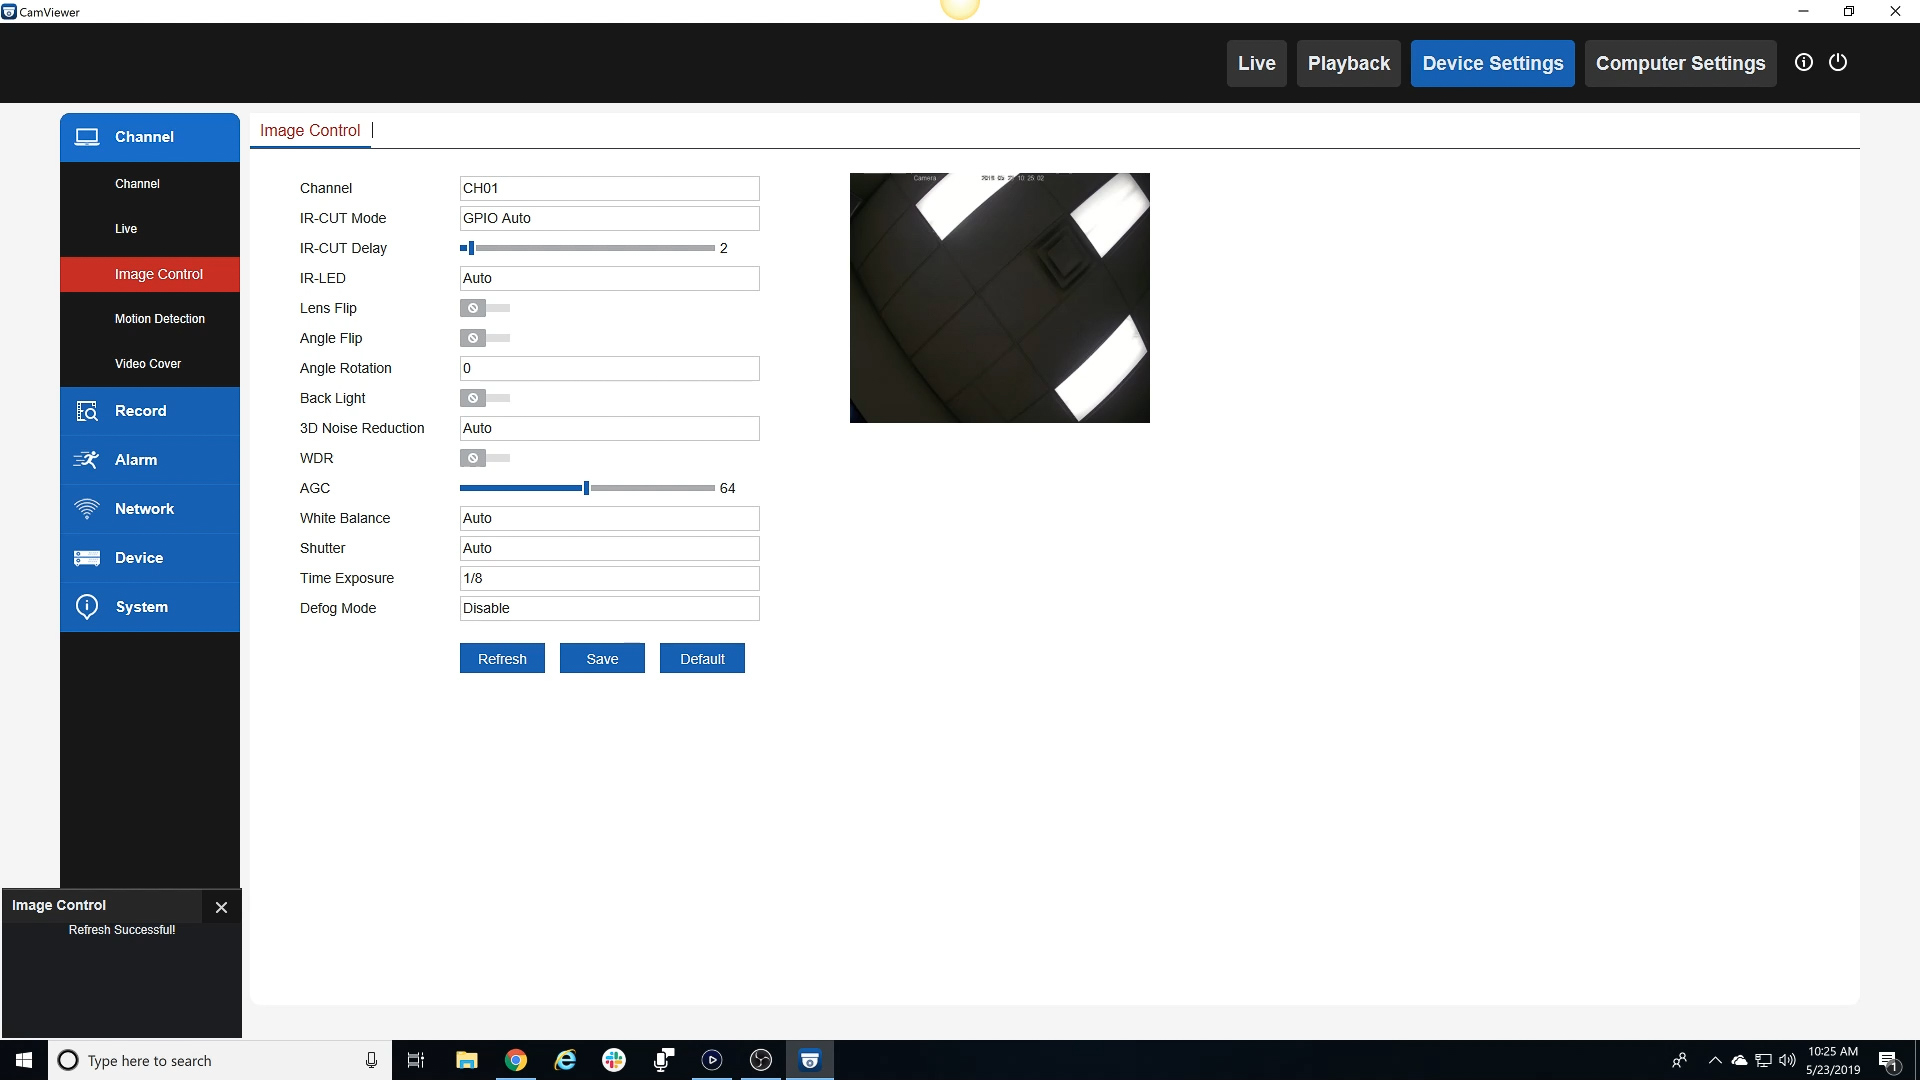
You can also view and manage your NVR from your computer using the CamViewer software. Download the software from your NVR's product page or from the software CD that came in your box. Open the software and input all the information for your NVR. Again, you have instant remote access. Here you can view your feeds just like you can on your HDMI interface. You also have access to the playback menu and a few basic settings, such as recording schedules, motion detection fields, and image control. Keep in mind that the computer software is a single viewer, so you'll only be able to manage one NVR at a time.


Final Thoughts
If you haven't already, you really should try our new R-Series line of products at Nelly's Security. As you can see from this post, accessing your cameras through these beautiful NVRs is simple, painless, and efficient. The more you use these NVRs, you'll wonder how you ever got by with another brand. Pick yours up today and take your surveillance experience to the next level.