Three Ways to Setup a Dual NIC NVR
One NVR with two Network Interface Controllers… What could that be for? Obviously the first NIC is for connecting the NVR to the main network, but what the heck is the other one for? Dual NIC NVRs are typically going to be found on larger NVRs that have upwards of 16 channels. We even have some NVRs that support up to 128 channels, which is a lot. When you’re talking about that many channels, and needing to support that many cameras, you might be thinking your NVR could use some extra support. That’s exactly what this second NIC can provide, and there are several ways to utilize it. We’re going to break down three different ways you can use the other port to get the most out of your NVR.
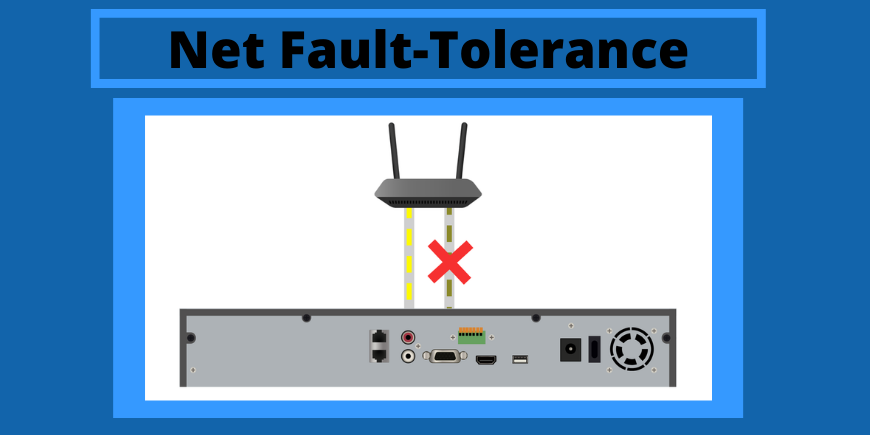
Net Fault-Tolerance
With this use of the NICs, both ports are going to be connected to the same network and will be doing the exact same thing. That sounds a little redundant doesn’t it? Well it is, but that’s the point. You won’t notice a difference in your setup when you use both NICs this way. The point of setting up your NVR this way is to ensure you’ll never lose connection, even if one of the ports does fail. If you’re in a situation where you cannot be disconnected from the network, this setup gives an extra layer of protection.
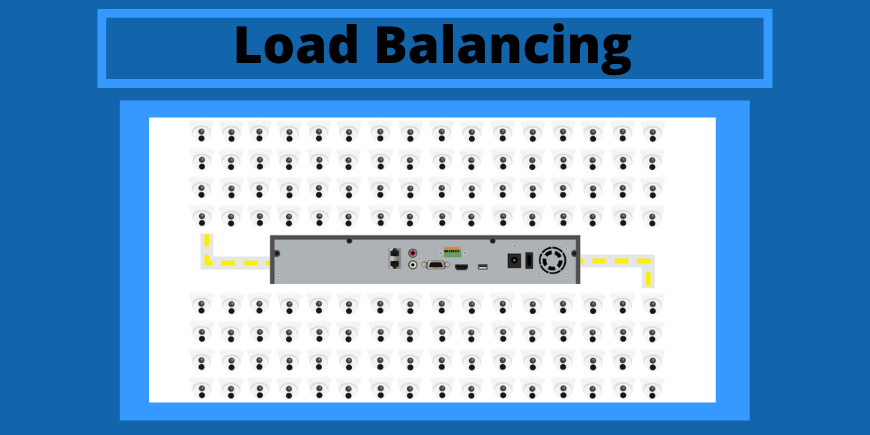
Load Balancing
The setup for this method is going to look the same as it did for net-fault tolerance. Both ports will still be connected to the same network. However, this time they won’t be doing the exact same work. With this setup, the two NICs will be splitting the workload. Why would they need to split it if one will cover it? Even if your NVR can handle that many cameras, it still takes up alot of bandwidth and it’s working overtime to keep up with all that processing. This oversized load is ultimately going to lead to some lagging and you’ll have a slower connection. That’s where load balancing comes in. If you set up your NVR to split the load, it will balance it between both ports and you won’t have one trying to do all the work. You’ll be able to add cameras and it will automatically split the load up. If you’re experiencing any performance issues, this is a great option to try out, and you may be able to give your equipment a little bit of relief.

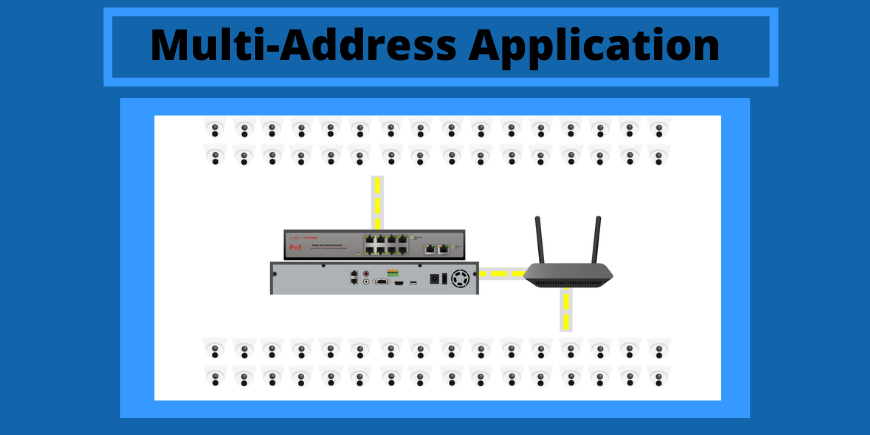
Multi-Address Application
This method is where your NICs finally split up. Both ports will be on separate networks and you’ll be able to customize the settings for each individually. This will allow you to segregate your cameras and get them on a separate gateway, which will free up even more bandwidth. This keeps your camera setup from interfering with your other devices and keeps everything running smoothly. You can do this by connecting the main port to your network and connecting the second port to another powersource, like a secondary PoE switch. Then you can go into the settings and change the gateway for the second port. Any camera you install after this can be put on either gateway and you can keep them all off of your main network if you’d like. Even if they’re not connected to the main network, they’ll still be recorded and managed by the same NVR.

Which Solution is Right For Me?
Your specific needs will vary depending on the project you’re working on, so you’ll have to determine which solution will work best for you. In most situations, we are going to recommend you use the Multi-Address application. This application tends to be the most useful because it gives you a lot of freedom with your equipment. You’ll be able to remove all of your cameras from your main network and get them to that segregated network, which will free up a lot of bandwidth. You can also utilize the multi-address application similarly to the load bearing method, by splitting your cameras between networks. This keeps everything balanced out and helps split up the load on both your network and your NVR.
Hopefully you have found some new uses for your Dual NIC NVR, or you’ve found out that you need to invest in one! If you have any questions or if you’d like to see more of the settings in action, check out our Youtube video!