
The NSC-PVM is a public view monitor that comes with a built-in IP camera, a feature called Ad Mode that allows you to display whatever photo or video you choose onto the monitor, and is easy to set up thanks to only needing a Power over Ethernet cable and a place to mount it. To understand what makes the NSC-PVM so special, you first need to understand why a public view monitor is so vital for retailers.
Get your NSC-PVM today!
What is a Public View Monitor and Why Do You Need One?
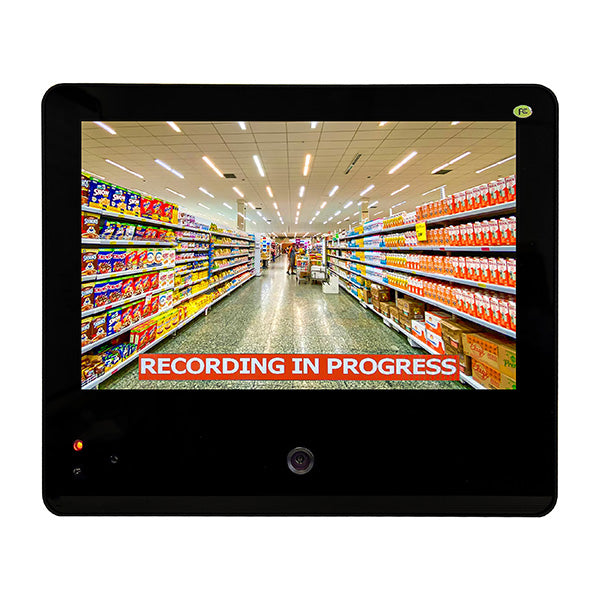
Ever look up at the Walmart checkout line and see yourself on a large screen with the words RECORDING IN PROGRESS flashing across it? THAT my friend is what we call a public view monitor or PVM for short. A PVM is the camera + monitor combination that displays what the camera is recording on a live view monitor for the whole public to see.

PVM Camera

PVM Monitor
Why a PVM? Why not just a normal security camera? Unlike many cameras, PVM's are in your face, meaning you can’t miss them. And in turn, every move you make is made public via the live view monitor.
PVM's are meant to deter someone who wants to commit a crime because not only can they see they are being recorded, but they also see that everyone in the vicinity can also watch what they are doing. When you look at a PVM, you are looking at a live recording of yourself. A little reminder that: YES, you are being watched; and NO, you can’t hide. There is a sense of self accountability that is brought with the presence of a PVM. It is a proven crime deterrent for retail stores especially in places such as checkout lines, aisles, and other high traffic areas.
Have I piqued your interest? Allow me to introduce to you the NSC-PVM.
Overview of the NSC-PVM
The NSC-PVM is a PoE-powered public view monitor with a built-in 5MP IP Camera. It is NDAA-compliant and ONVIF-compatible, so you can hook up the NSC-PVM to your already existing NVR with ease. Here at Nelly’s, we offer a wide assortment of NVR’s ranging from R-Series, Uniview, and VIVOTEK. If you would rather record straight to the PVM, there is up to 1 TB of footage storage allowing for that as well! Let’s take a look at this camera’s unique features.
Video Features
The NSC-PVM has a 3 millimeter lens and can capture footage ranging up to 5MP HD Resolution. The out-of-box resolution is 2MP. With a 10” diagonal LED screen, video looks crispy in 2MP and even crispier with 5MP. Add on top of that the buttery smooth 30fps video, and you got a recipe for an extremely clean viewing experience. The reason the video is 2MP out-of-box is to save on bandwidth and storage space, so if the customer is okay with lower quality footage they can get more of it; however, if they really want that 5MP they can have that too, just be aware that it’ll take up more space on their NVR or the MicroSD card.
Passive Infrared Sensor (PIR)
The PVM comes with a built-in PIR or “Passive Infrared” sensor so it is able to recognize when humans move in front of it and will begin recording. Since this isn't pixel-based, you won't have tons of irrelevant footage to comb through. You'll cut down on your false alarms. But, we understand PIR doesn’t fit every scenario. Say you want to mount your PVM higher up away from people so you can record down an entire aisle. That's why with the NSC-PVM, you can also opt for grid based motion for wider fields of motion.

PVM Physical Interface
The NSC-PVM comes with two MicroSD card slots. One for the media files needed for “Ad Mode” and another for footage storage. The max capacity storage for the video recording card slot is 1TB. The PVM comes with a preinstalled 64 Gigabyte microSD card builtin for footage storage but you can always switch that card out if you need to.

Media Card Slot
 Recording Storage Card Slot
The Monitor has a built-in microphone alongside speakers for capturing audio and sounding an alarm. It also comes with HDMI and CVBS inputs so you can use this monitor to display other inputs as well, such as your NVR or anything else you can imagine.
Configuring Your NSC-PVM
At this point you might be thinking a camera with this many features might be too difficult to manage. Well, think again! The NSC-PVM actually comes with a remote that controls monitor configurations and the toggling between HDMI and CVBS. There is no need to log into a complicated web interface to change your monitor configurations. Easy breezy. You can switch from recording only mode to Ad mode and you can put texts onto the live view monitor all at the touch of a button.

For those that prefer the more in depth control given through a web interface, never fear for there IS a web interface available! You can access the PVM through the web interface via your network so you can watch recorded footage or the live view. The NSC-PVM gives a lot of options so it’s really all up to your preference.

Get your NSC-PVM today!
Ad Mode & Premium Branding
At Nelly’s Security, you know that we’re not just about selling products. We’re also about increasing your brand and moving your business forward!. One thing that sets Nelly’s apart is our fantastic branding program. We’re always looking for ways to brand your stuff, so of course we have the option to brand your NSC-PVM as well. There are two ways to brand your company using the NSC-PVM: Premium Branding and Ad Mode.
Premium Branding: With premium branding, you can have whatever logo you can imagine printed right onto the PVM. We use high quality color ink so your logo will be brilliant and exploding with color. If this is something you would be interested in, you can add premium branding to your order for an additional cost.

Ad Mode: The PVM has a feature called Ad Mode which allows you to display any logo, image, or video you so choose via MicroSD card. When motion is detected by the PVM’s PIR sensor, the camera live view will display on the monitor. In order to get your media to display on the monitor you will need to insert a microSD card with your uploaded media files into the media card slot. Ad mode has a max capacity of 32GB and takes AVI, MP4, MOV, JPEG, and BMP files. The max supported resolution is 1920 X 1080 @ 30fps. It is important to note that the MicroSD Card MUST be formatted FAT32 before putting your media files onto the card in order for them to show up correctly.


Installation and Setup
Now that you have an extensive knowledge of the NSC-PVM, let's talk about how easy it is to install. All you will need is a PoE cable, a mount, and a place to put the monitor. Once you have the system placed where you want it, just use the remote to turn it on. Really, it's that simple.


Everything can be crafted to your needs. If you already have a collection of security cameras and are looking to add a few public view monitors to your arsonal, the NSC-PVM will plug right into your already existing NVR or PoE switch. It should be noted whenever the PVM is plugged directly into the NVR, you won't be able to log directly into the camera from the local network. If you are working with a DVR, the PVM supports AV alongside 12vDC power. If you want to record right to the PVM without an NVR you can do that as well with the preinstalled MicroSD card! Recording to an NVR is a popular route for recording so let's hop into that. Take a look at our walkthrough showing how to connect your PVM to an NVR.
Connecting to an NVR
In order to connect to an NVR, you will need to make sure the NSC-PVM is first connected to a POE switch that is hooked up to the NVR. Next, you will need to get to a computer to find the IP address. Download the config tool from our website.

Once you have the config tool downloaded, you will be able to see the IP address. Type the IP address into your browser’s address bar. The default login for the NSC-PVM’s web interface is admin / admin. After logging in, you will then be prompted to change the password. Now that you have the IP address, username, and new password, you can then jump onto your NVR and add a new camera. Protocol should be set to ONVIF. Go ahead and type in the IP address, username, and password. And there you go! Your NVR is now connected to your PVM and ready to record.
In Conclusion
The NSC-PVM might be exactly what your retail store needs. Hopefully this post was informative and helpful. Subscribe to our newsletter to be notified for more security content like this!
Sign up for our email newsletter to get security content just like this sent to your inbox every week!