How to Export Video from your R-Series Recorder

In this guide, we will show you how to export saved video from your R-Series recorder hard drive.
Sections in this Guide
Exporting Video from the HDMI Interface
If you’d like to have the most control over the exporting process, you can export video saved to your hard drive directly from your NVR’s HDMI interface with more advanced features at your disposal for exporting video.
Before you being, insert a USB flash drive into the back of your NVR. There is no need to format your flash drive beforehand. If you'd like to format it, the HDMI interface does give you that option before you save your files.
Subsections:
Exporting a Selected Clip
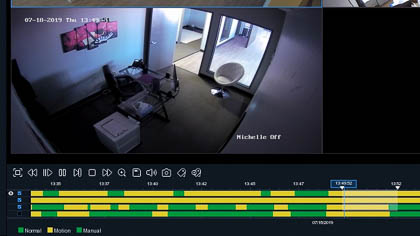
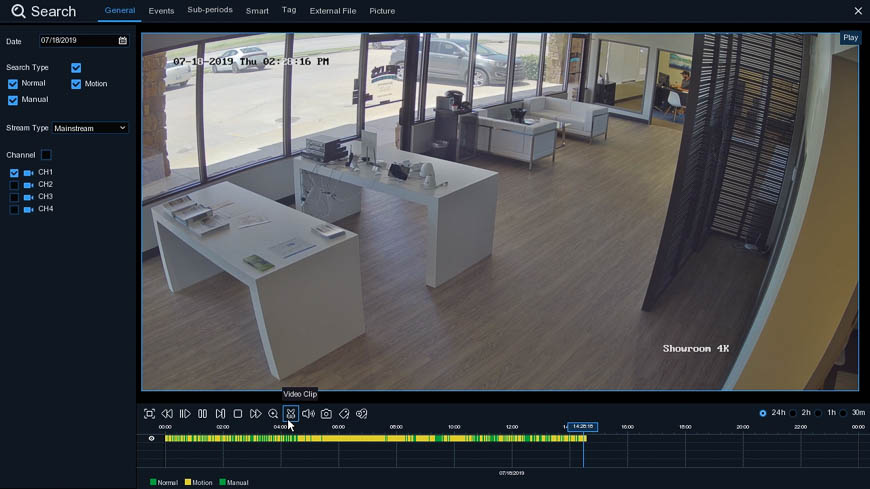
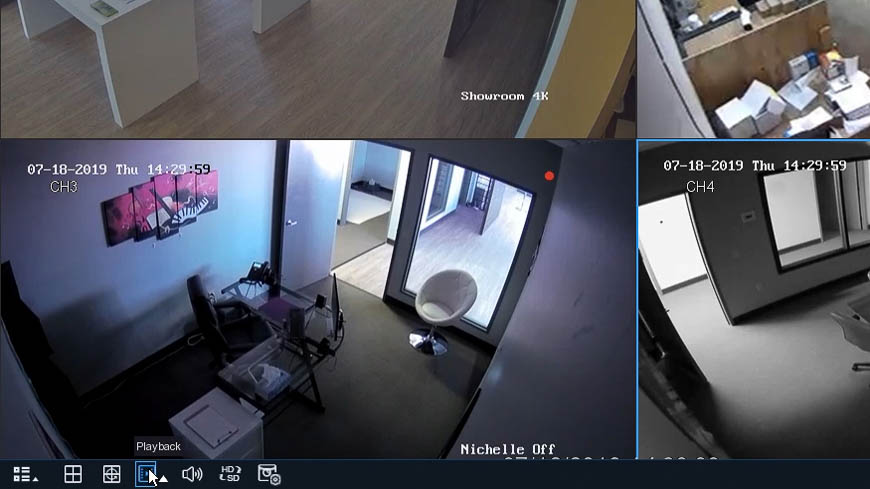
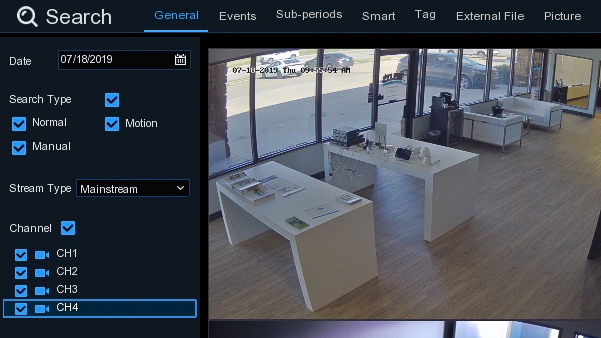
Step 1: Navigate to the Playback Menu

Step 2: Search for the clip you’d like to export
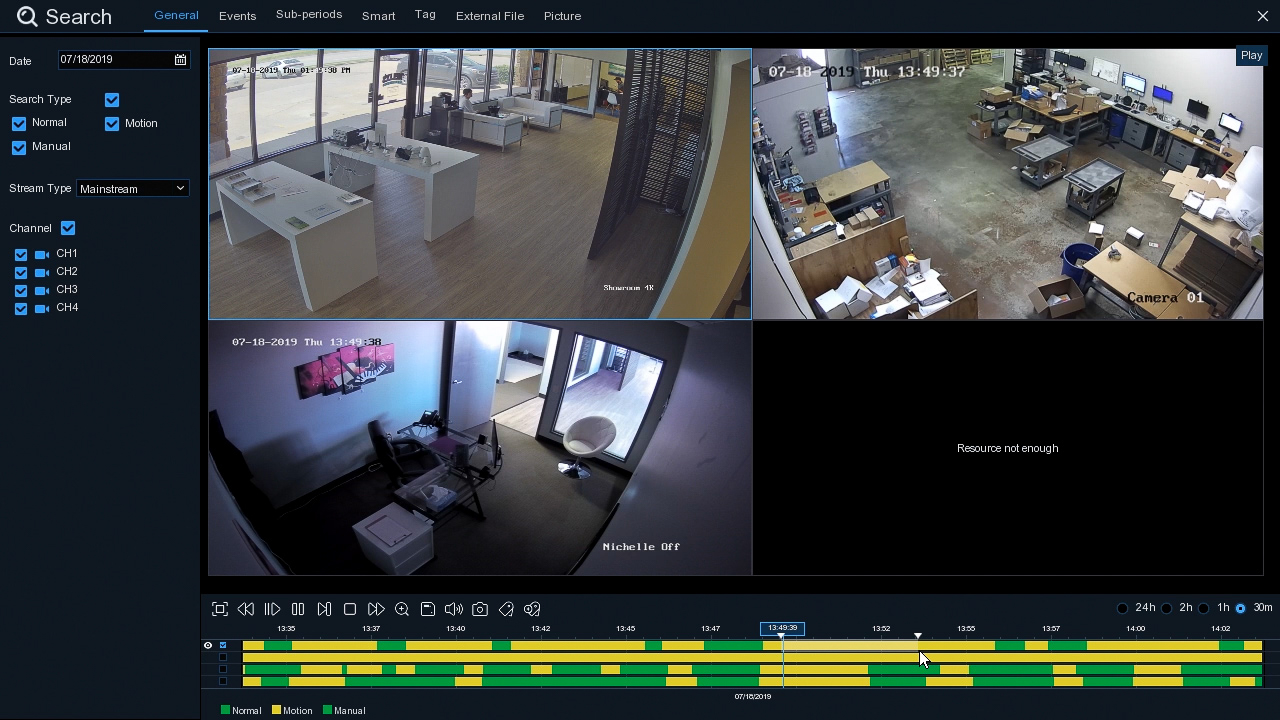
Using the filters in the playback menu, select a time, date, and channel(s) to search for a video clip.
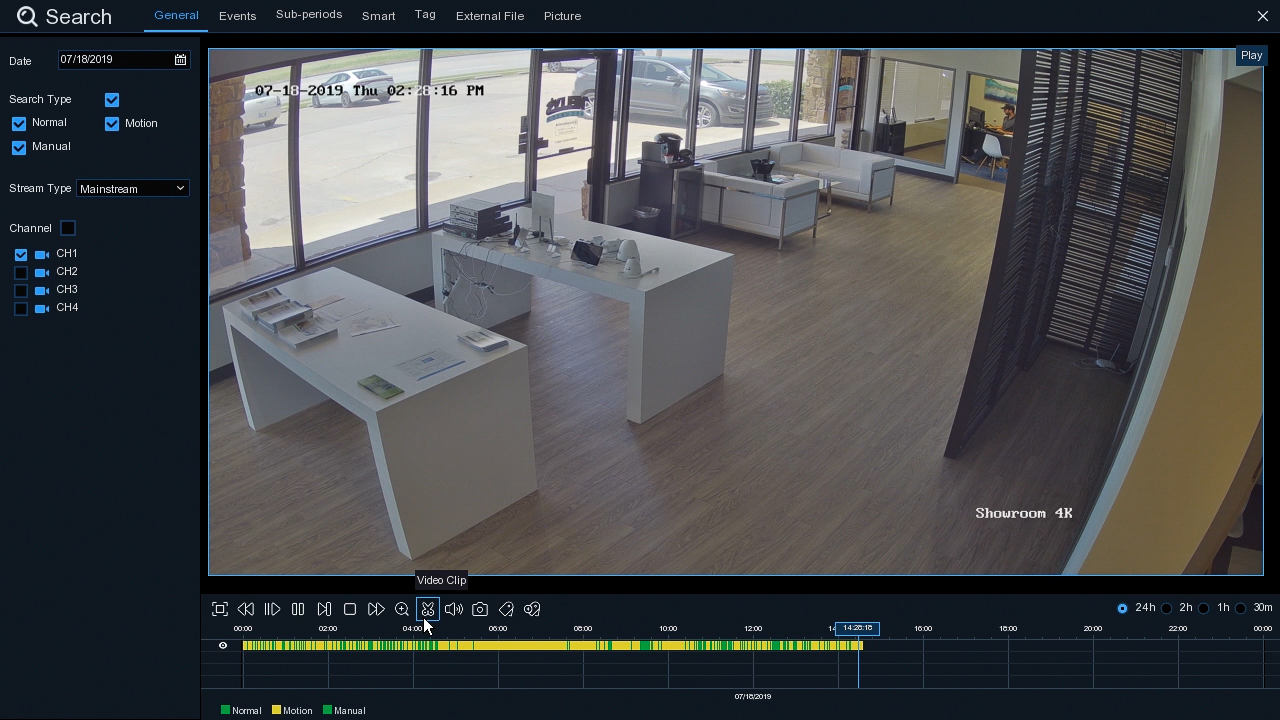
Step 3: Click “Video Clip”
The icon looks like a pair of scissors. Once you click it, it will change to the “Backup” icon, which looks like a floppy disk.

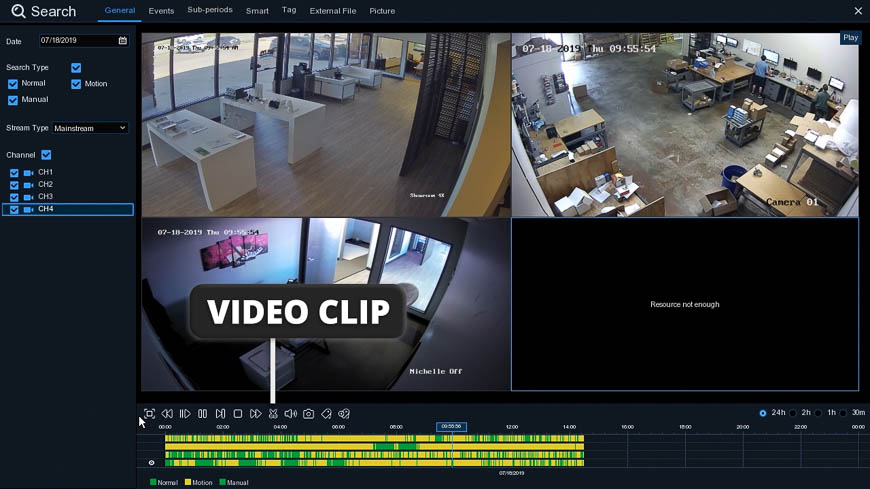
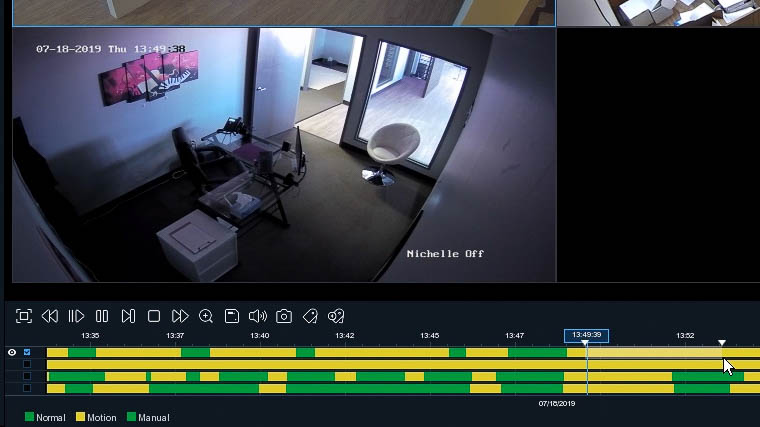
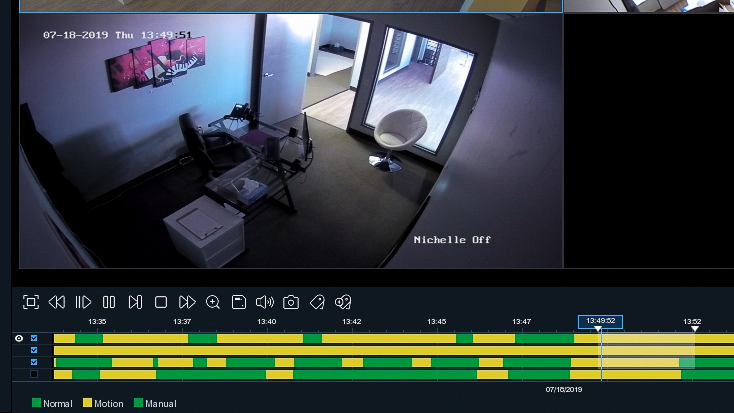
Step 4: Highlight the clip(s) and click “Backup”
Click and drag over the playback timeline on the channel or channels you’d like to select. Then click the Backup icon (the floppy disk) to export the selected video clip or clips.

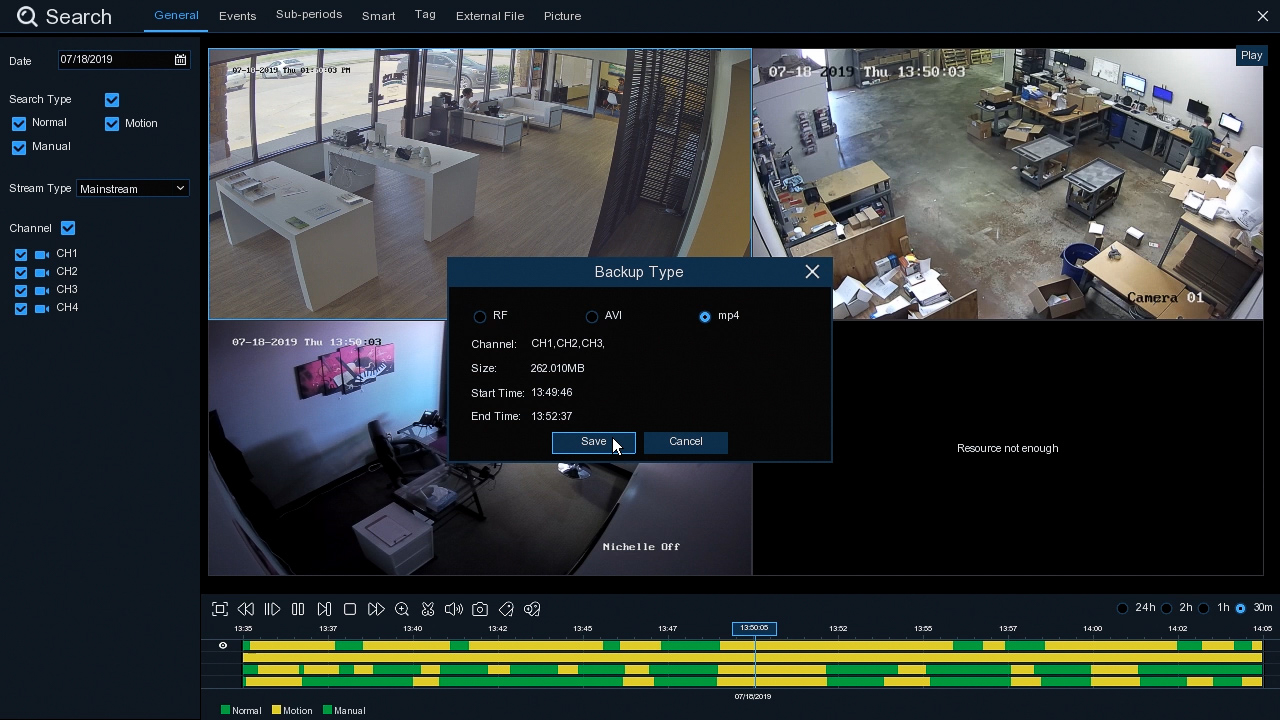
Step 5: Choose your file type
Your options are .RF, .AVI, or .mp4. This popup will also tell you the size of the file you’re about to download. Here you can confirm that you have the right channel and the right time range selected before moving forward.
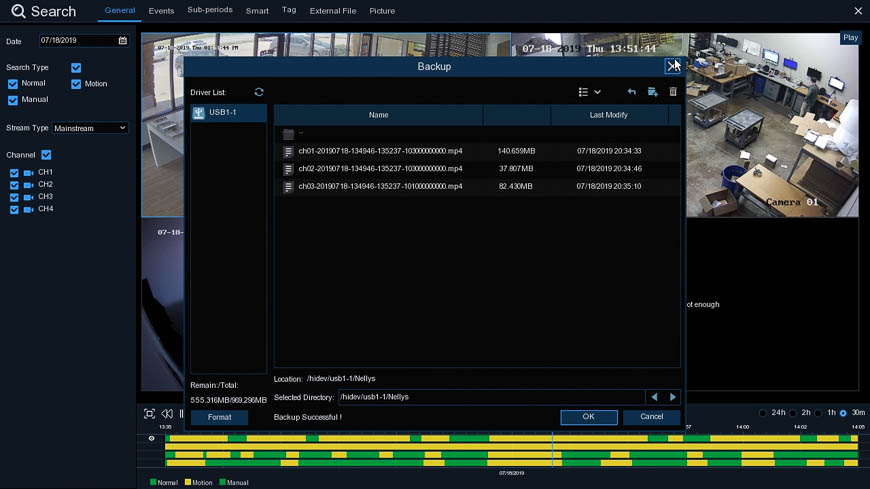
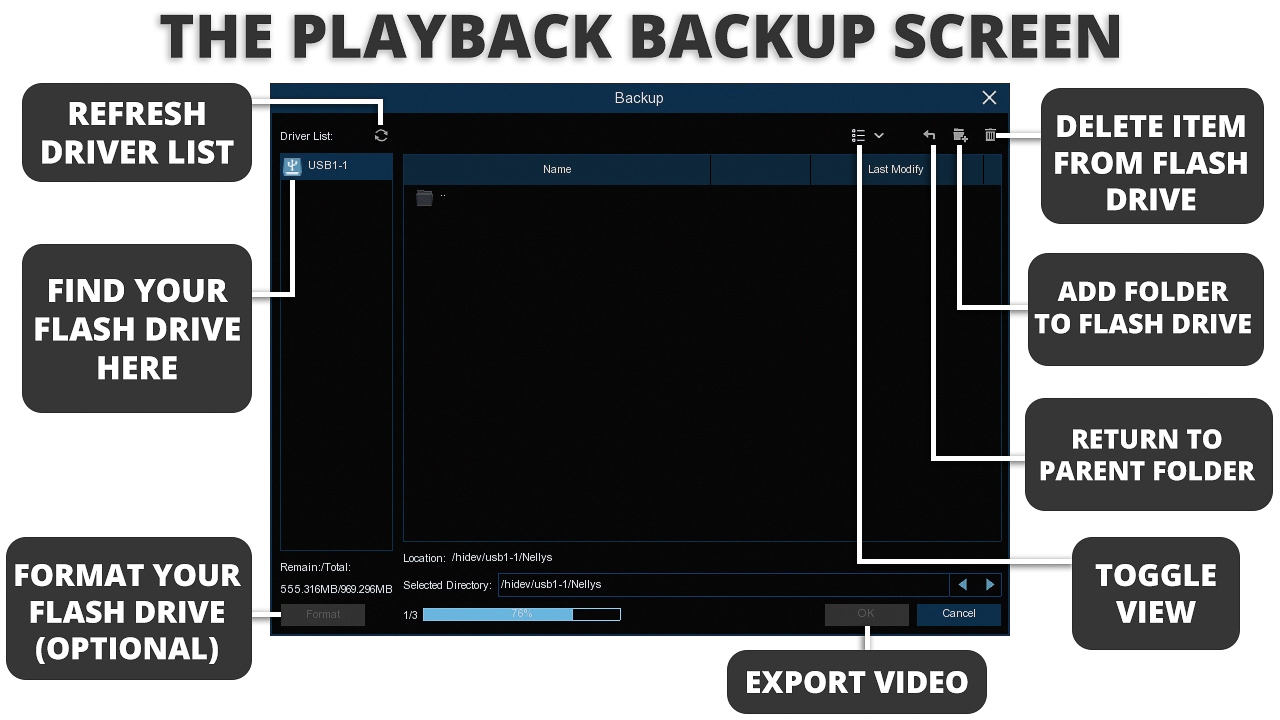
Step 6: Select your hard drive and click “Save”
There are a few other things you can do from this screen, such as formatting your drive or adding a new folder.
Congrats! You've successfully exported your clip from your NVR's hard drive to your flash drive.
Exporting an Event (From the Live View)
An event typically occurs when motion is detected on the screen. To export a motion detection event from the live view, follow these steps.
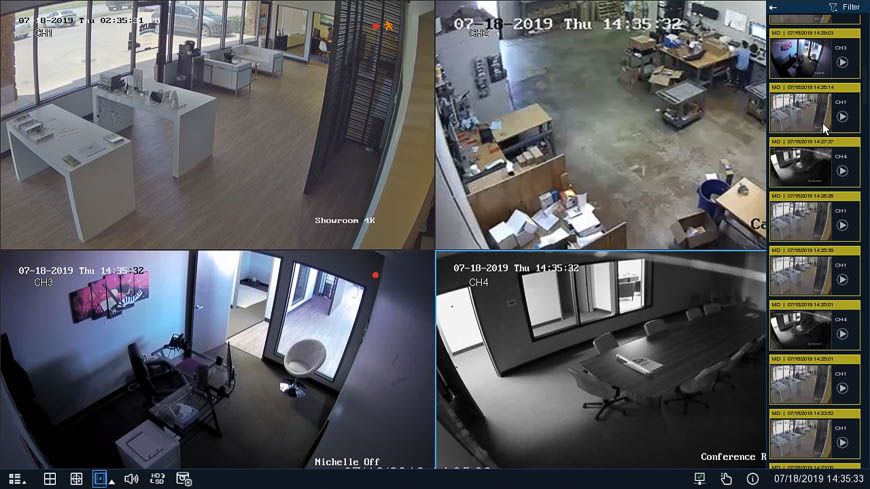
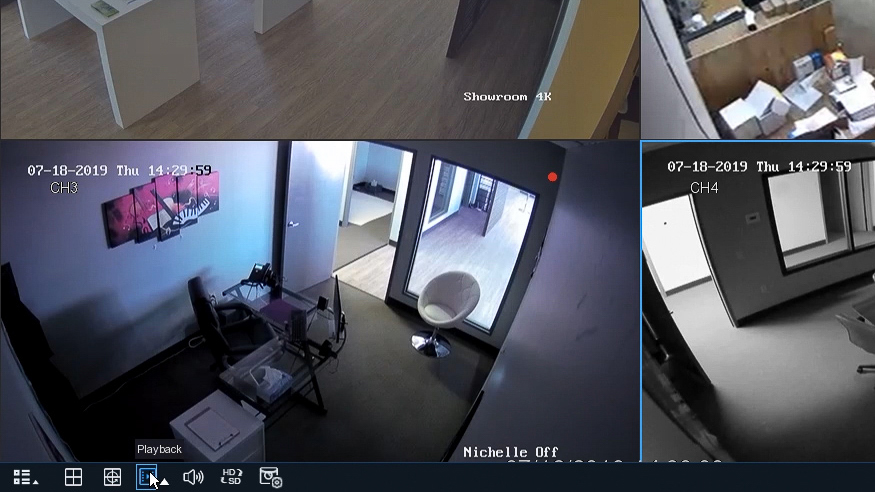
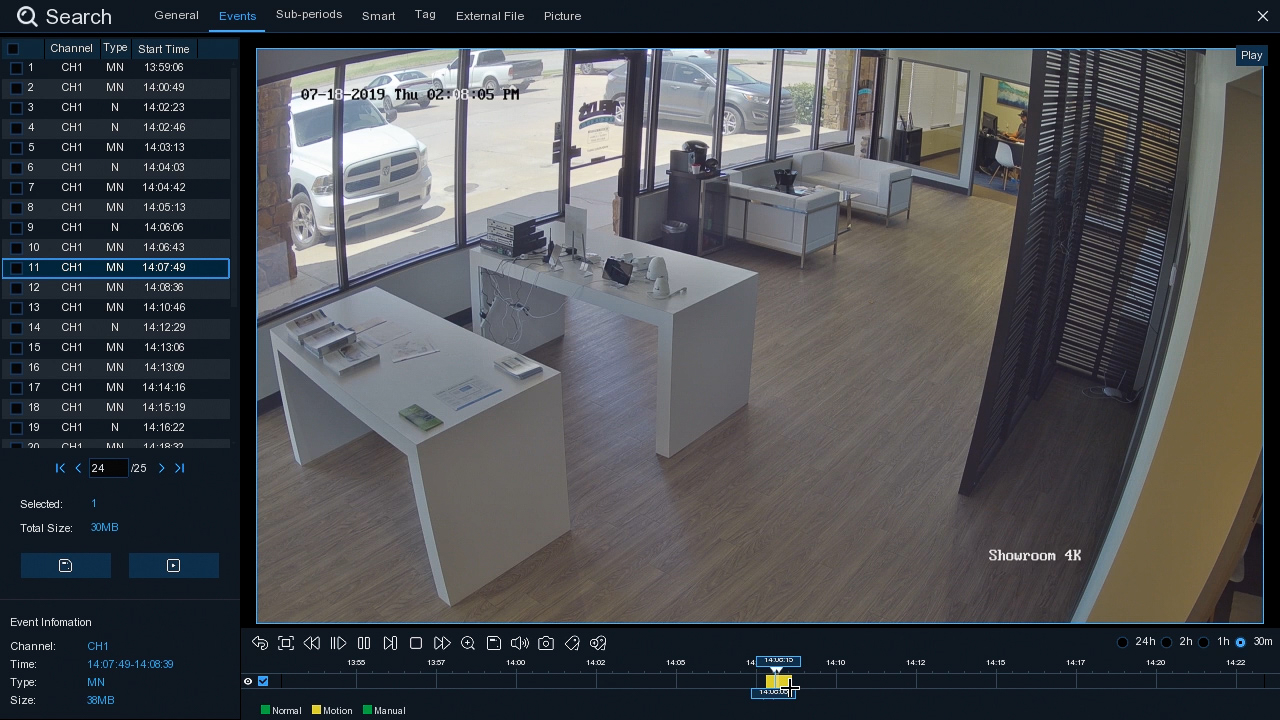
Step 1: Double-click on an event from the live view
On the right side of the screen, you will find a list of motion detection events. Double click one of these events to go directly to that event in the general playback menu.

Step 2: Select the clip you’d like to export
Follow the steps in the previous section (Exporting a Selected Clip) to select and export your clip.
Exporting an Event (From the Event Menu)
Alternatively, you can select and export events from the Event Menu by following these steps.
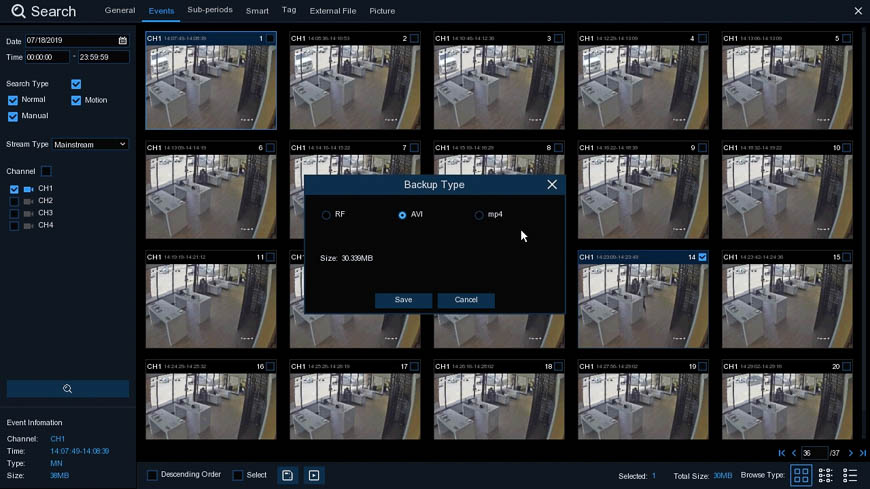
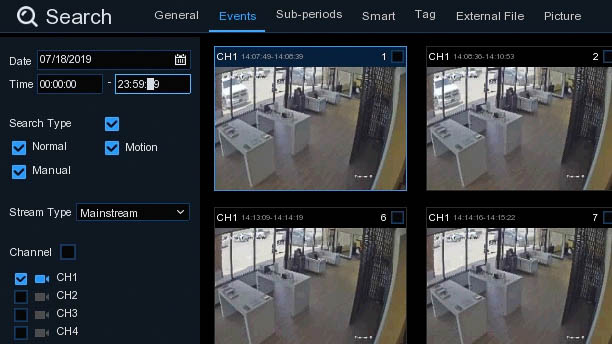
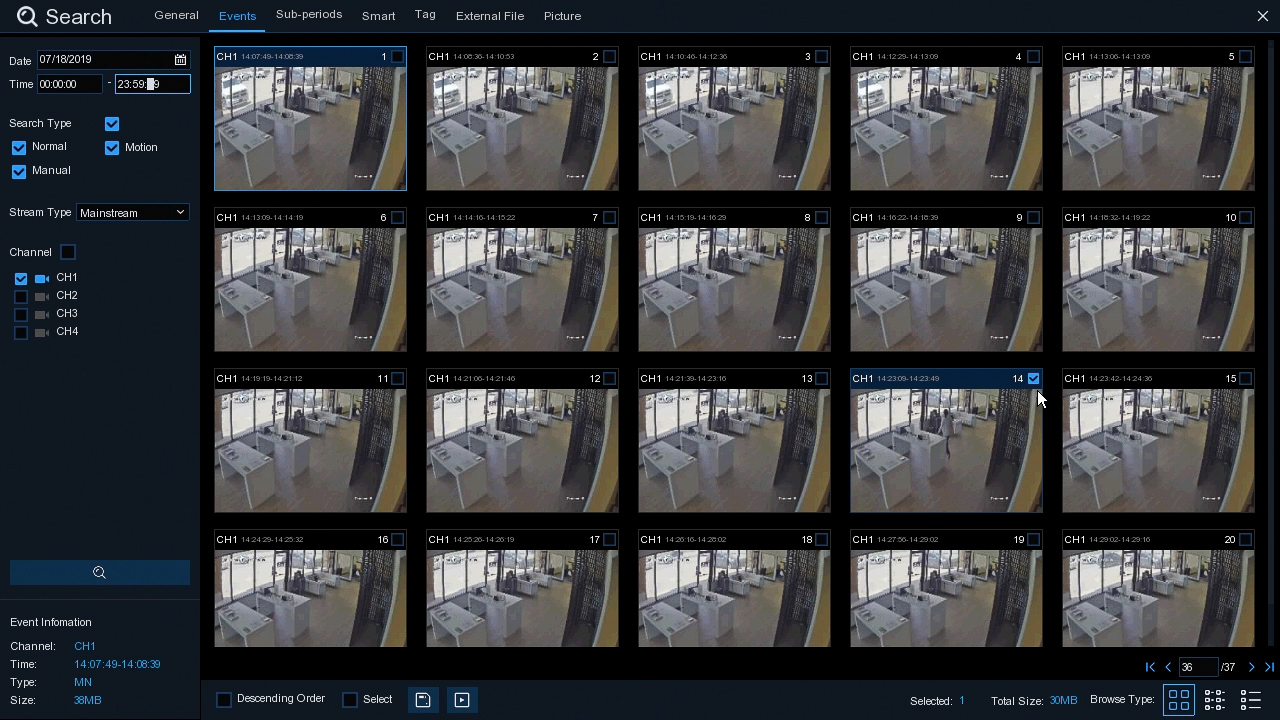
Step 1: Navigate to the Events Playback Menu
To find this screen, navigate to the general playback menu and click the “Events” tab at the top of the screen.

Step 2: Select the event or events that you’d like to export
You can use the filtering tools on the left side of the screen to find a specific event based on time, channel, and event type.
Step 3: Click the “Backup” or "Playback" icon at the bottom of the screen
The "Backup" icon looks like a floppy disk. This will allow you to export the entire event.
If you'd like to export only a portion of the event, click the "Playback" button. This will take you a playback menu where you can select your clip using the "Video Clip" scissors icon. Once you've selected your clip, click the "Backup" floppy disk.
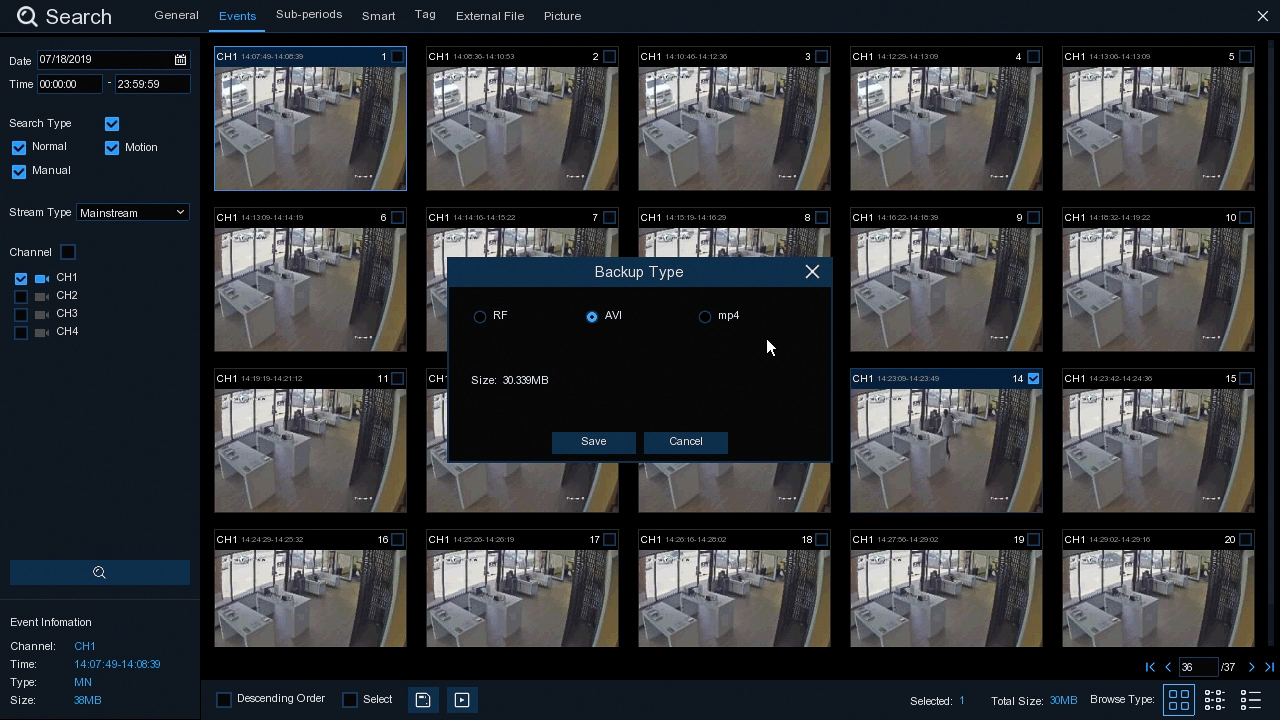
Step 4: Choose your file type
Your options are .RF, .AVI, or .mp4. This popup will also tell you the size of the file you’re about to download. Here you can confirm that you have the right channel and the right time range selected before moving forward.
Step 5: Select your hard drive and click “Save”
There are a few other things you can do from this screen, such as formatting your drive or adding a new folder.
Congrats! You’ve now exported an event clip from your NVR hard drive to your flash drive!
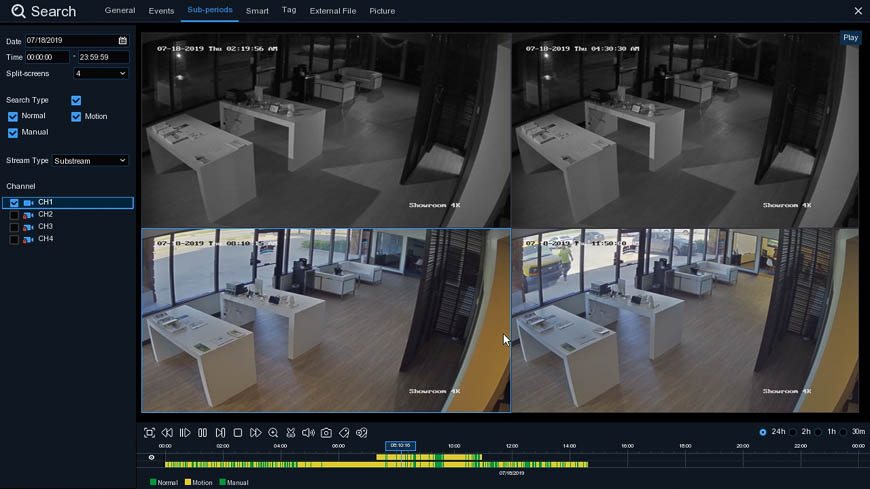
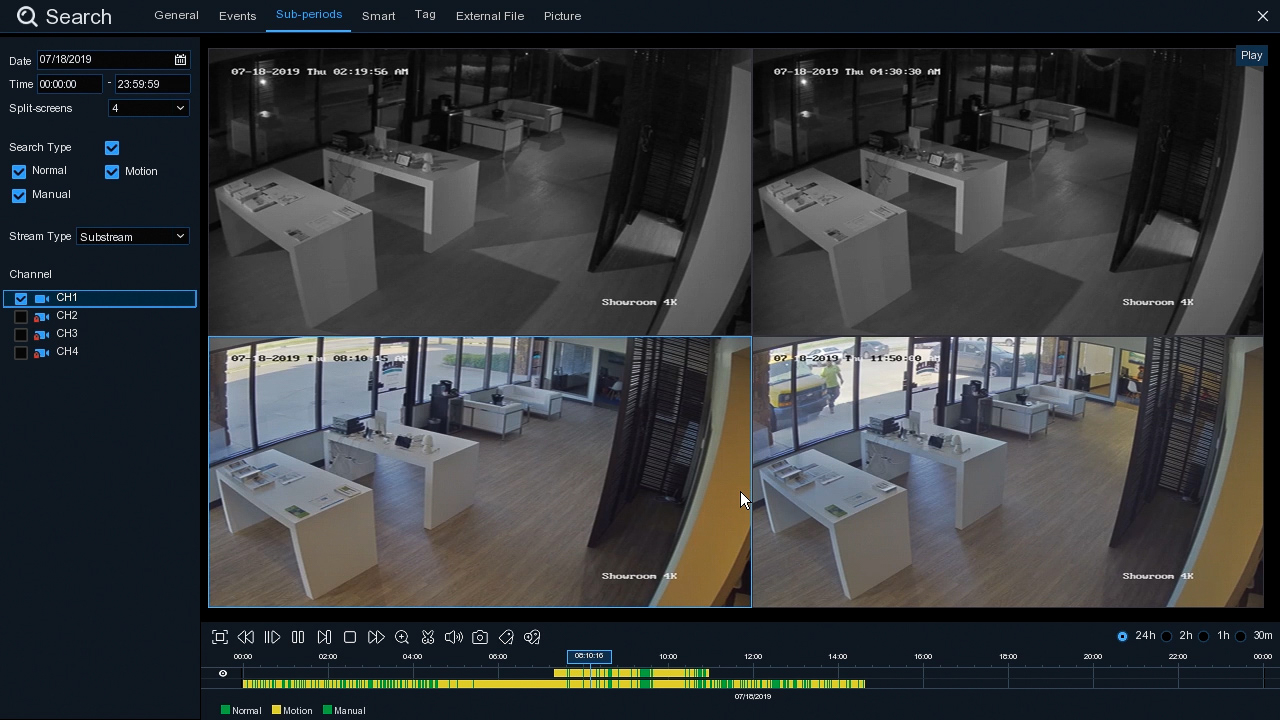
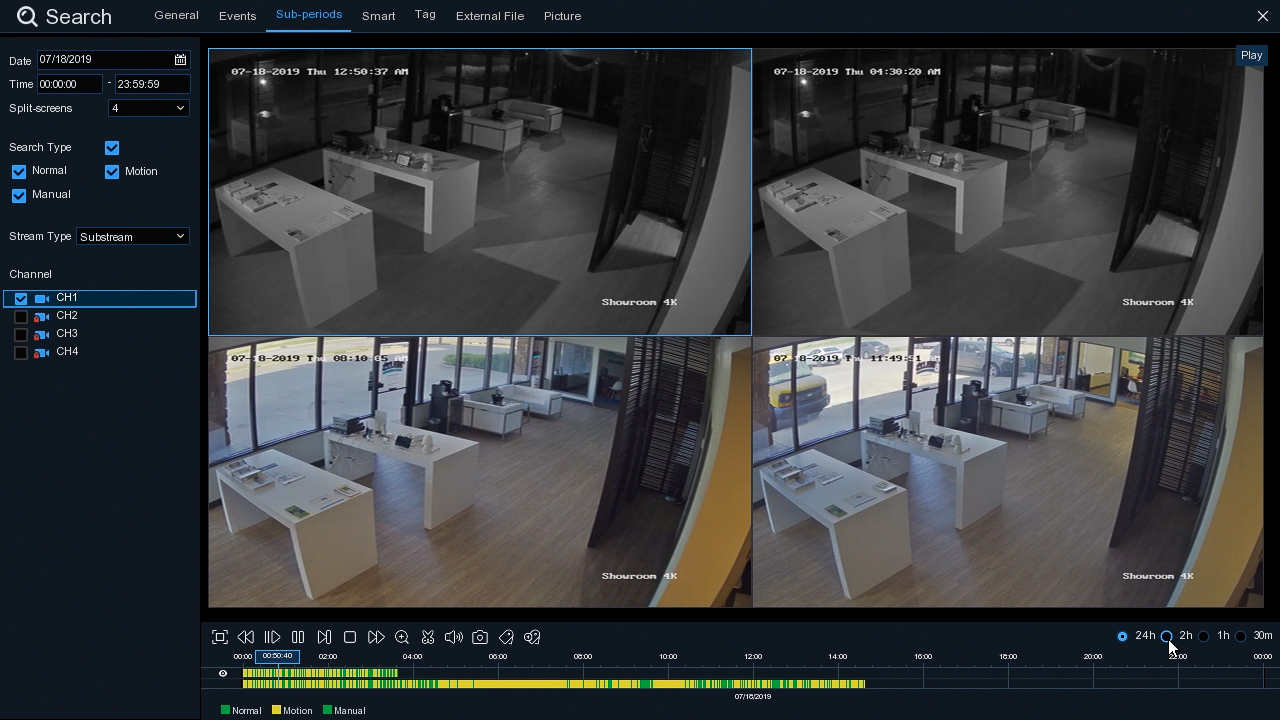
Exporting from the Sub-Periods Menu
The sub-periods menu allows you to view multiple parts of a clip across four different screens. For instance, you can review an entire hour of footage from one camera in fifteen minutes. If you find what you’re looking for, you can export from this menu as well.
Step 1: Select the channel you wish to export
You can tell which channel is selected based on the blue outline around the channel window.
Step 2: Click “Video Clip”
The icon looks like a pair of scissors. Once you click it, it will change to the “Backup” icon, which looks like a floppy disk.
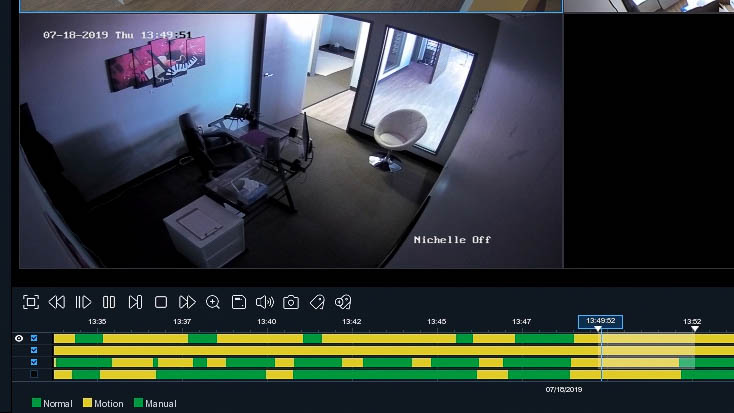
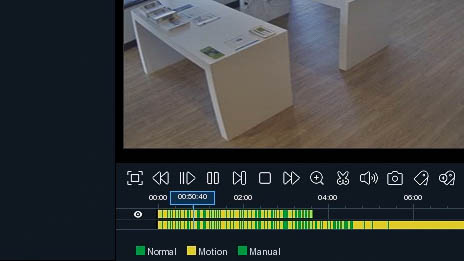
Step 3: Highlight the clip and click “Backup”
At the bottom of the screen you will see two timelines. The bottom timeline represents the entirety of the clip that you’re currently reviewing. The timeline on top represents the channel that you have selected. You can only select a clip from the top timeline.

Click and drag over the top timeline on the clip you’d like to export. Then click the “Backup” icon (the floppy disk) to export the selected video clip or clips.
Step 4: Choose your file type
Your options are .RF, .AVI, or .mp4. This popup will also tell you the size of the file you’re about to download. Here you can confirm that you have the right channel and the right time range selected before moving forward.
Step 5: Select your hard drive and click “Save”
There are a few other things you can do from this screen, such as formatting your drive or adding a new folder.
Congrats! You’ve now exported your clip from your NVR hard drive to your flash drive!
Exporting a Tagged Clip
From the live view or general playback menu, you have the ability to tag certain moments for later review. You can also export these tagged events.
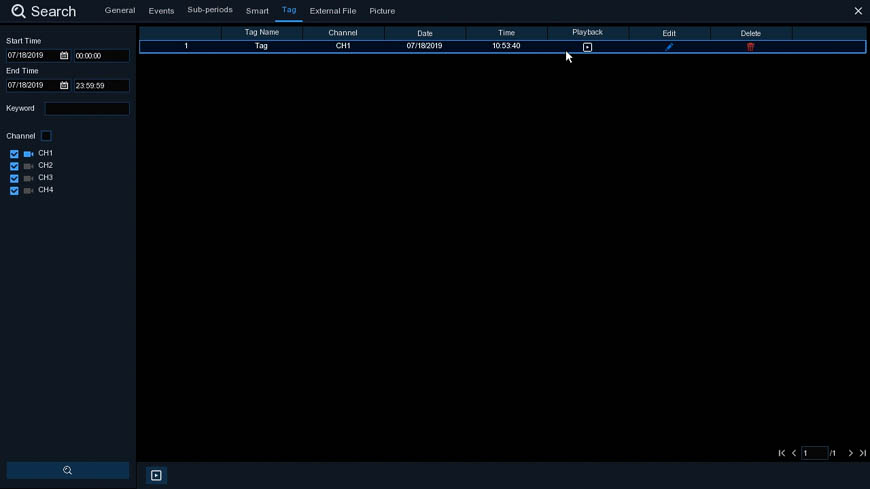
Step 1: Navigate to the “Tag” playback menu
To find this screen, navigate to the general playback menu and click the “Tag” tab at the top of the screen.
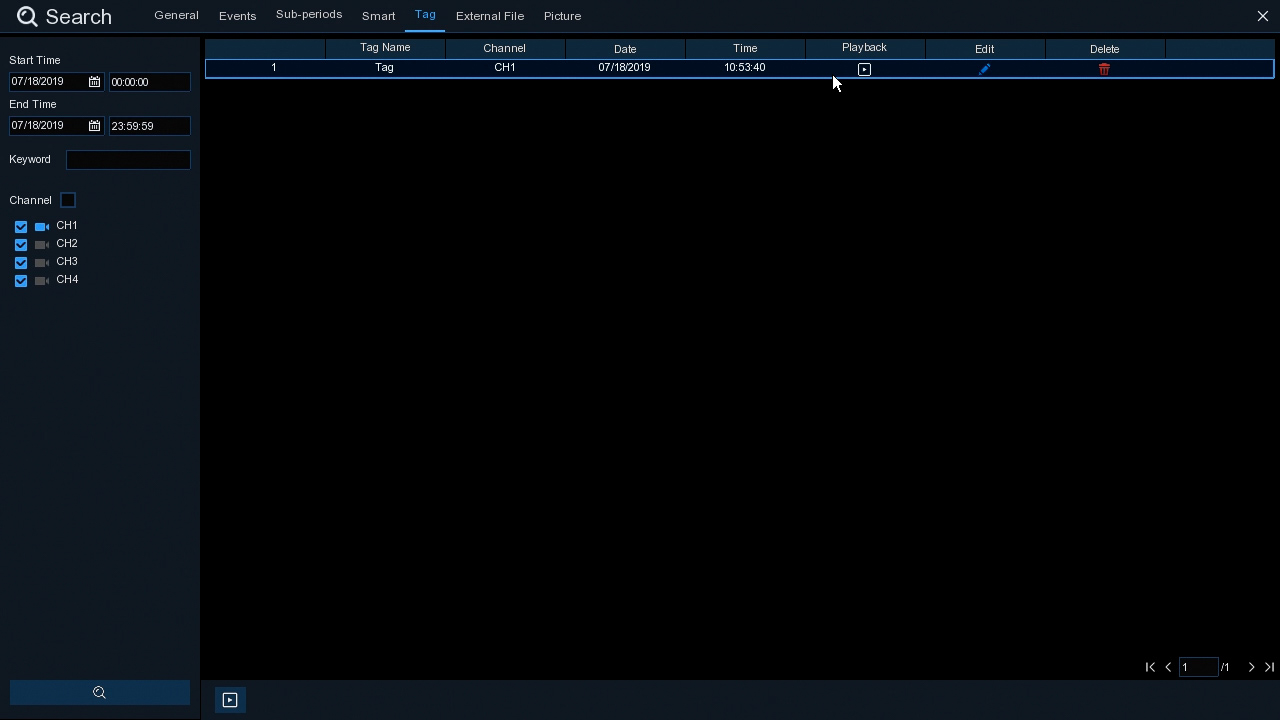
Step 2: Find the tag you’re looking for
If you have several tags, you can use the filtering tools to the right to narrow down your search based on time, channel, and/or keyword.
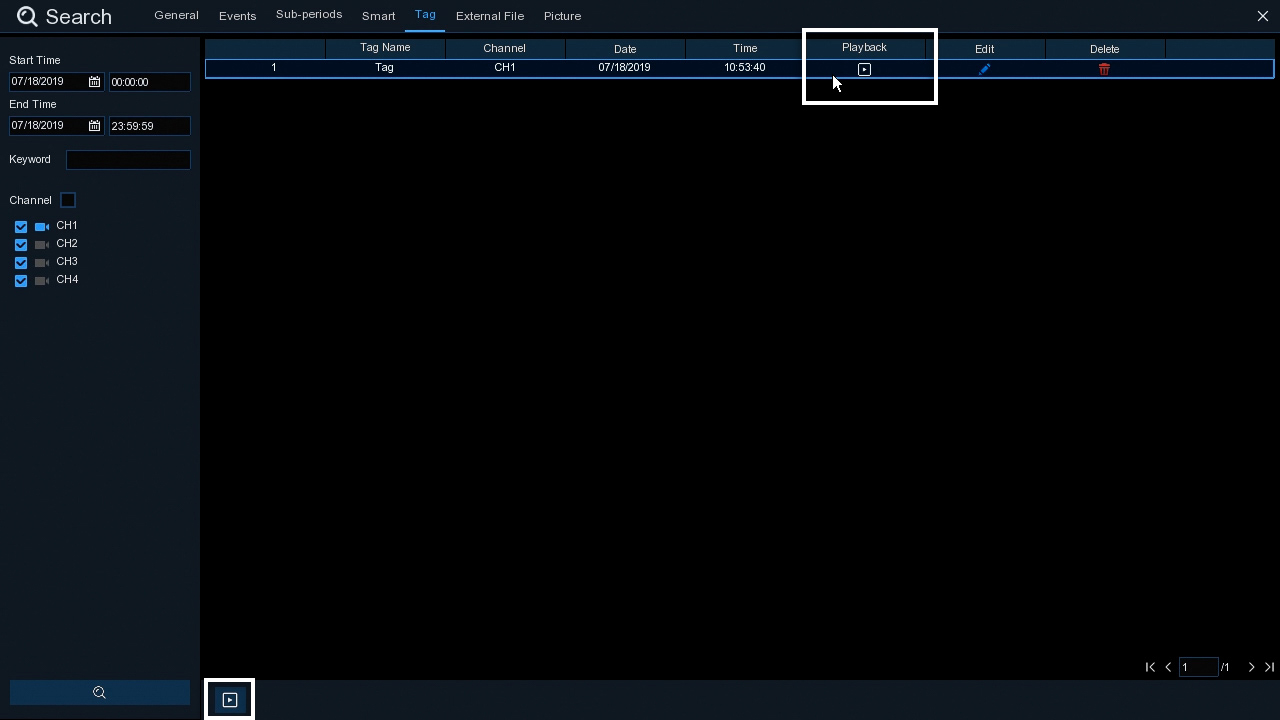
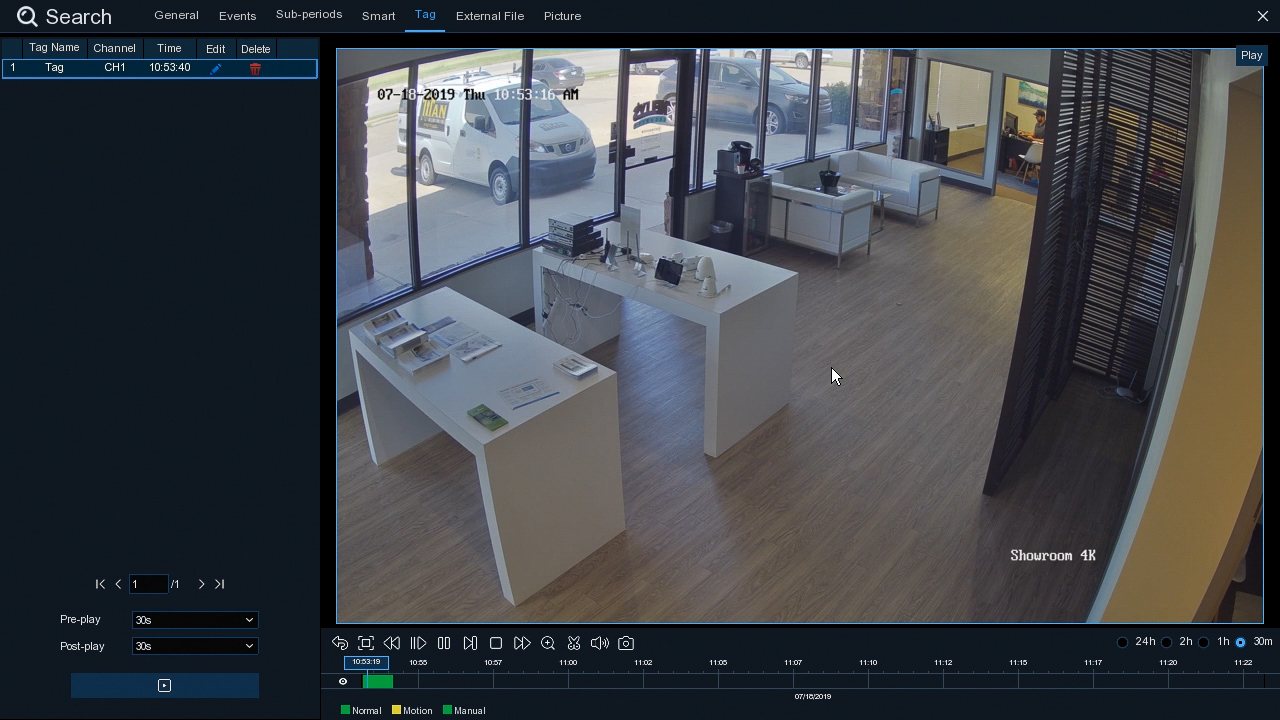
Step 3: Review the playback for the tagged clip
To do this, either click the “Playback” icon next to the clip, select the clip and click the “Playback” icon at the bottom of the screen, or simply double-click the clip.
Step 4: Click “Video Clip”
The icon looks like a pair of scissors. Once you click it, it will change to the “Backup” icon, which looks like a floppy disk.
Step 5: Step Five: Highlight the clip and click “Backup”
Click and drag over the playback timeline to select the range you'd like to export. Then click the Backup icon (the floppy disk) to export the selected video clip or clips
Step 6: Step Six: Choose your file type
Your options are .RF, .AVI, or .mp4. This popup will also tell you the size of the file you’re about to download. Here you can confirm that you have the right channel and the right time range selected before moving forward.
Step 7: Step Seven: Select your hard drive and click “Save”
There are a few other things you can do from this screen, such as formatting your drive or adding a new folder.
Congrats! You’ve successfully exported your tagged clip from your NVR hard drive to your flash drive.
Exporting Video from the CamViewer Desktop App
One of the quickest and easiest ways to export video from your NVR hard drive is to use the free computer application, CamViewer (available for Windows and Mac). You won’t have as many options when it comes to exporting as you would with the HDMI interface, but you can have immediate access to these files wherever you wish to store them on your computer.
Subsections
Configuring Your Computer's Settings (Optional but Recommended)
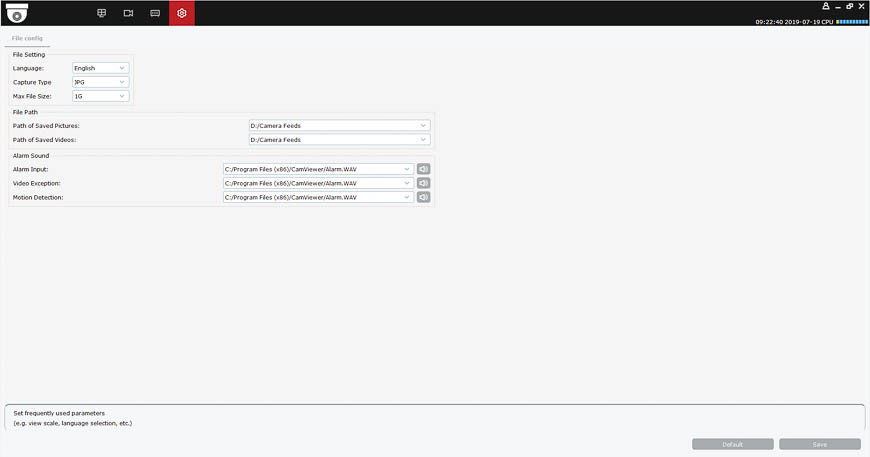
Step 1: Navigate to the “System Configuration” menu
To do this, click on the gear icon at the top of the screen.
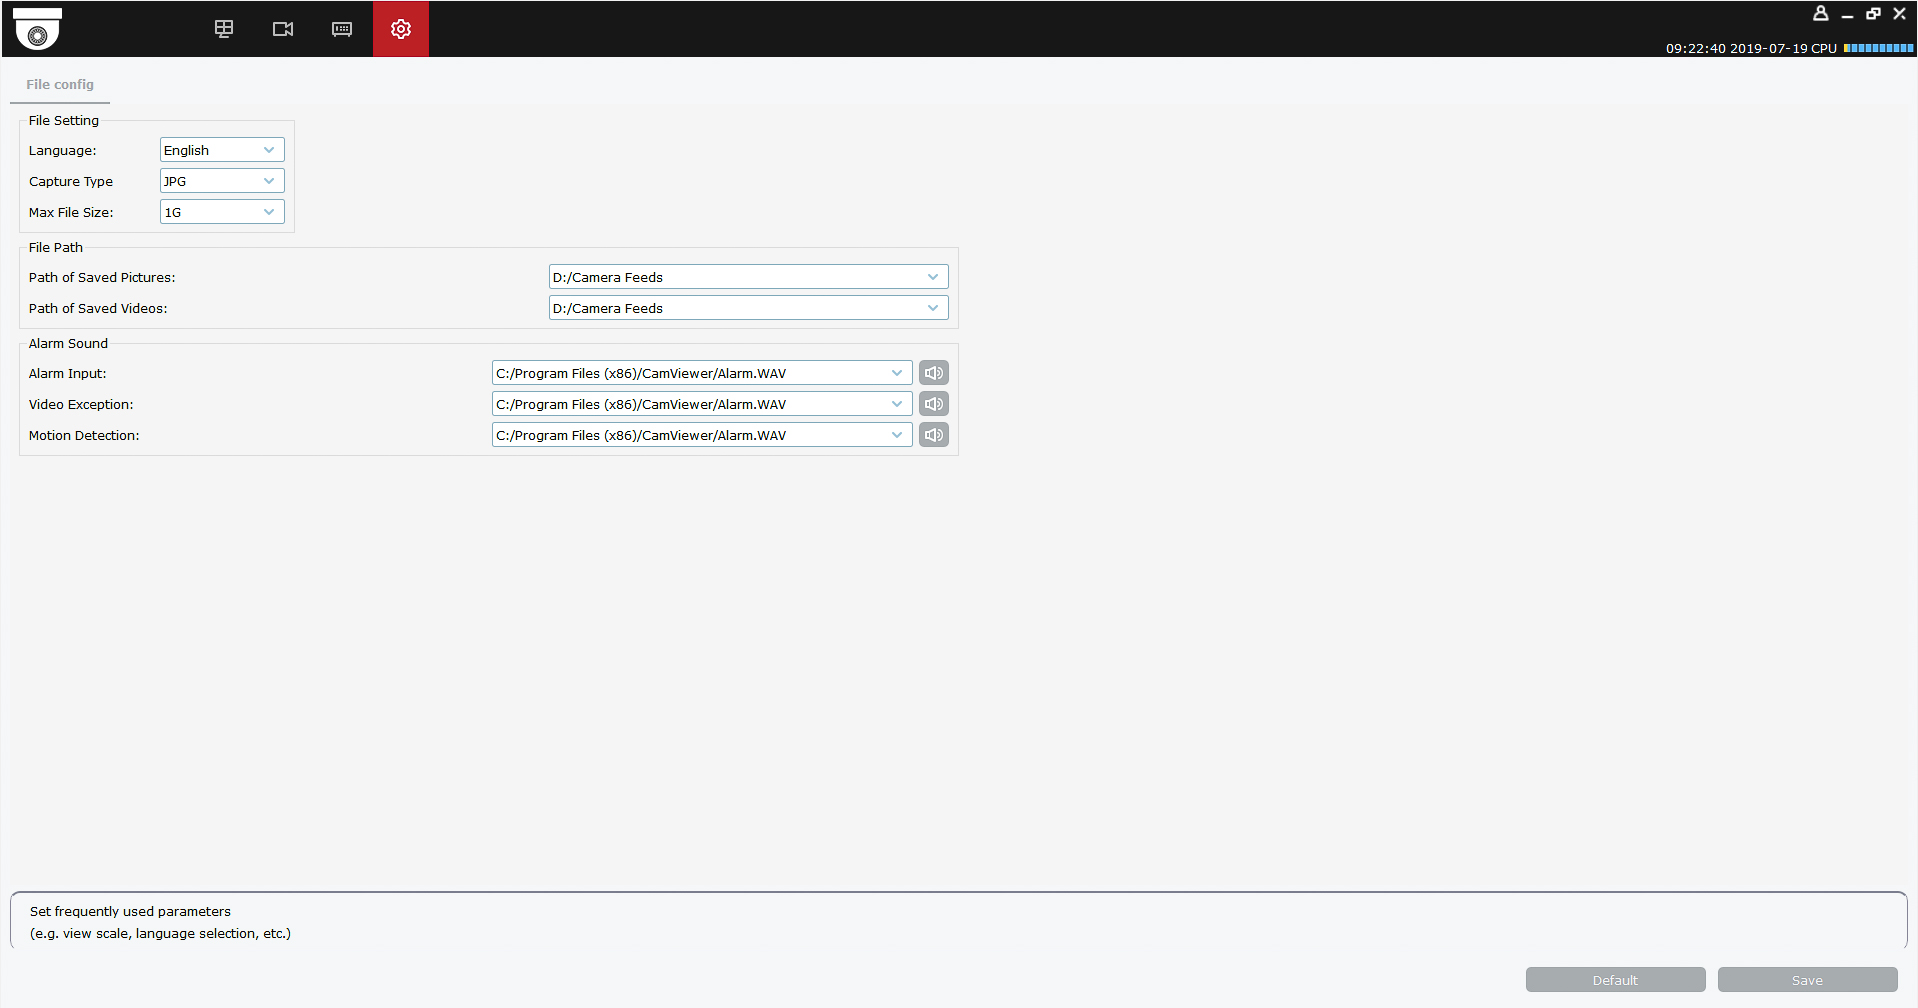
Step 2: Under “File Path,” determine where you’d like to save your exported video and photos
Step 3: Click “Save” at the bottom of the screen
You are now ready to export video from your NVR hard drive straight to your computer.
Exporting a Recorded Clip from your NVR's Hard Drive to your Computer's Hard Drive
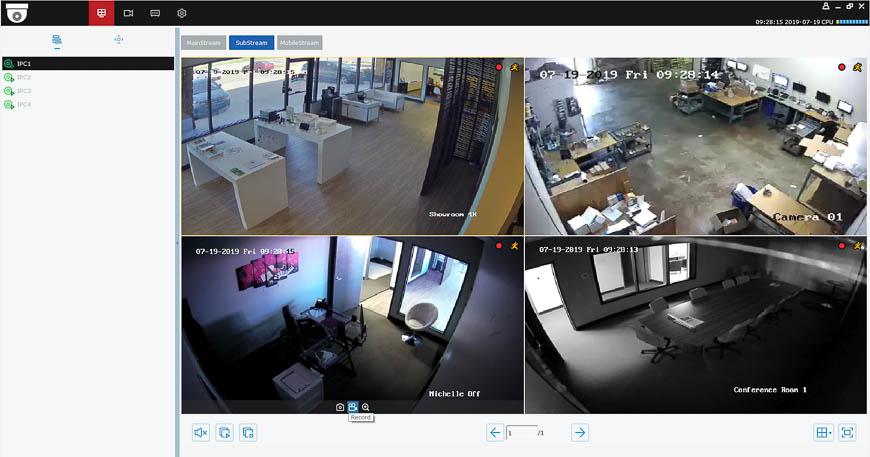
Step 1: Navigate to the “Remote Playback” menu
To get to this screen, click on the video camera icon at the top of the screen.

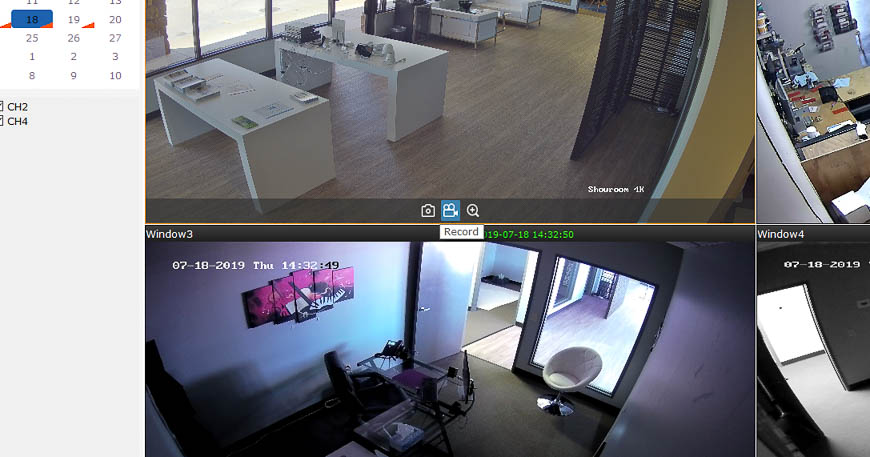
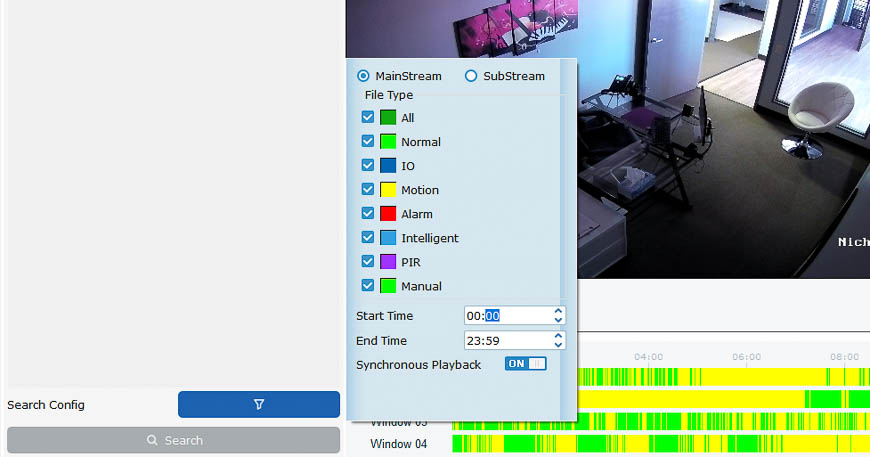
Step 2: Search for the clip you’d like to export using the calendar on the left side of the screen
You can also select which channel(s) you’d like to search for. Using the filter menu at the bottom-left, you can narrow down your search to a specific event or time range. Here you can also toggle synchronous playback, which allows you to select one playback time for every channel (if enabled) or select playback times individually for each channel (if disabled).

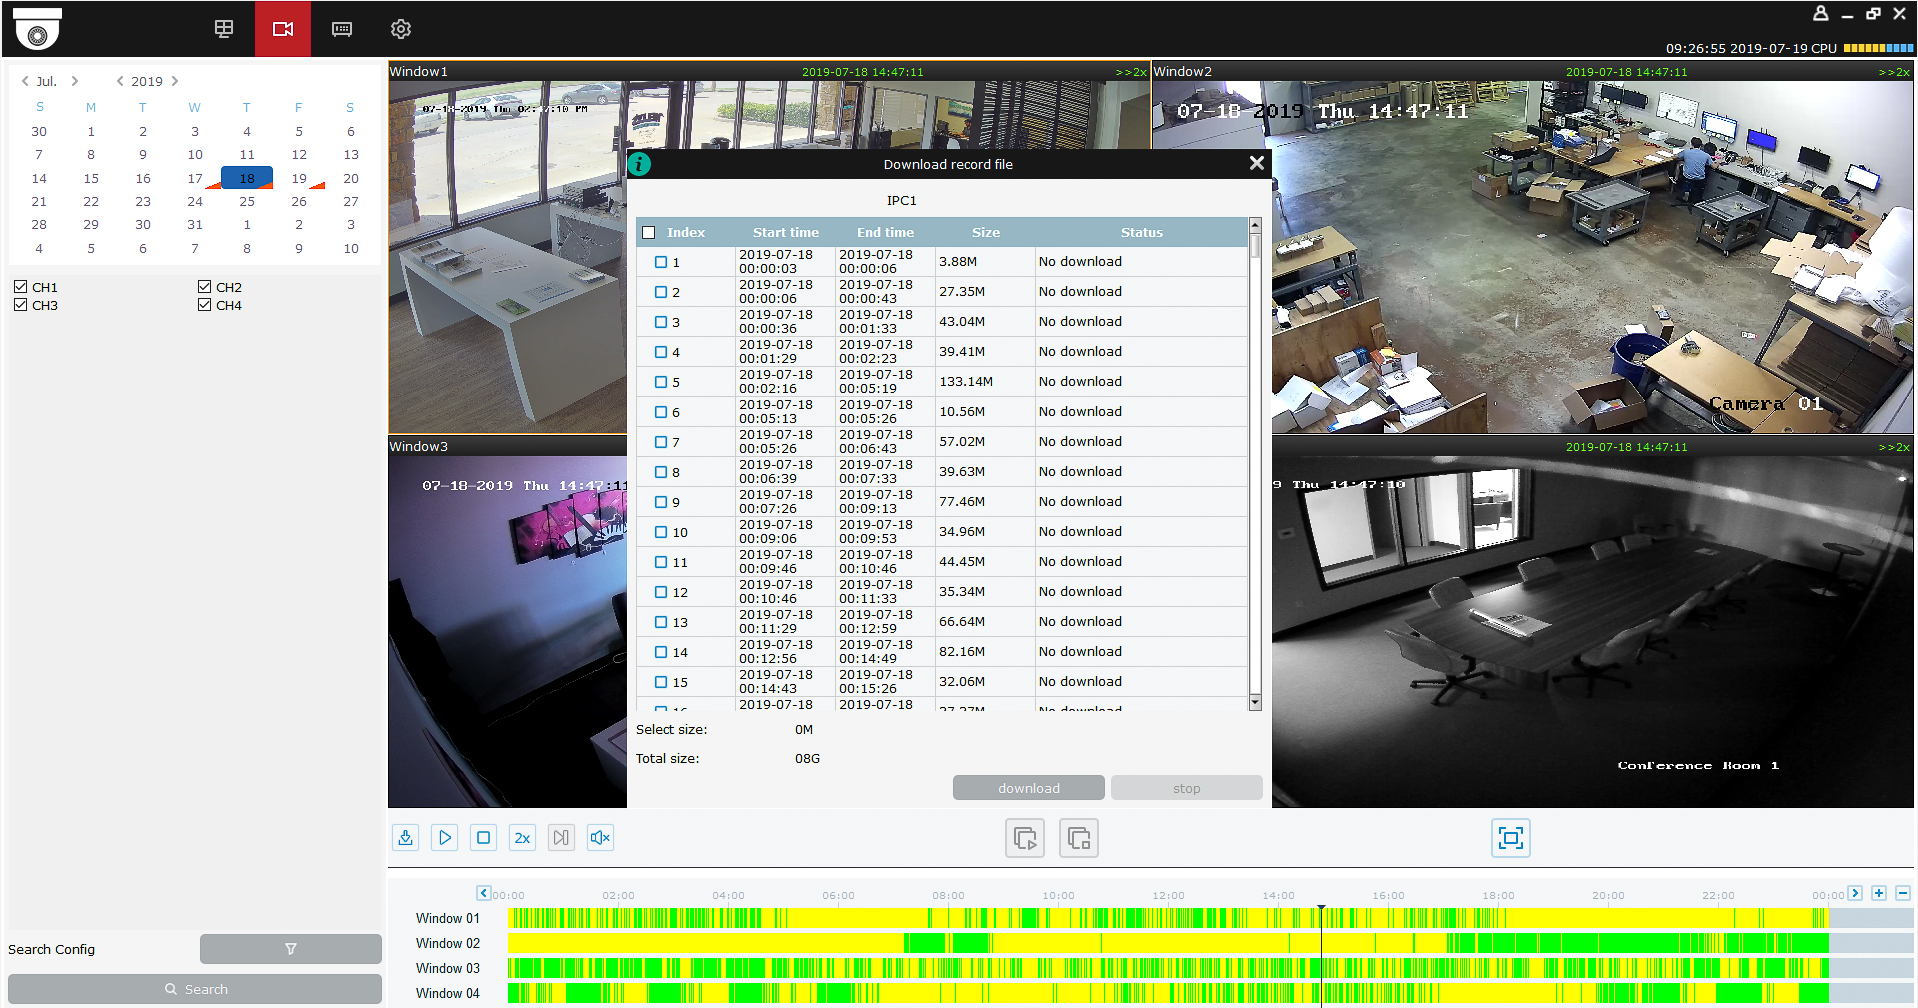
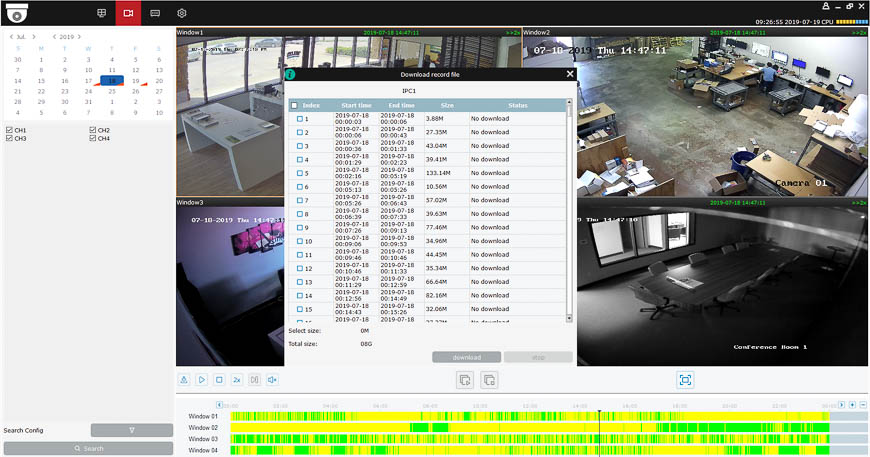
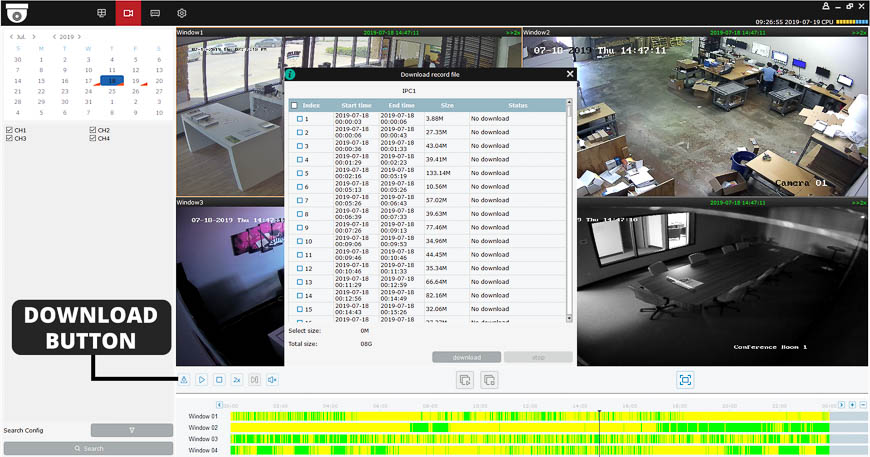
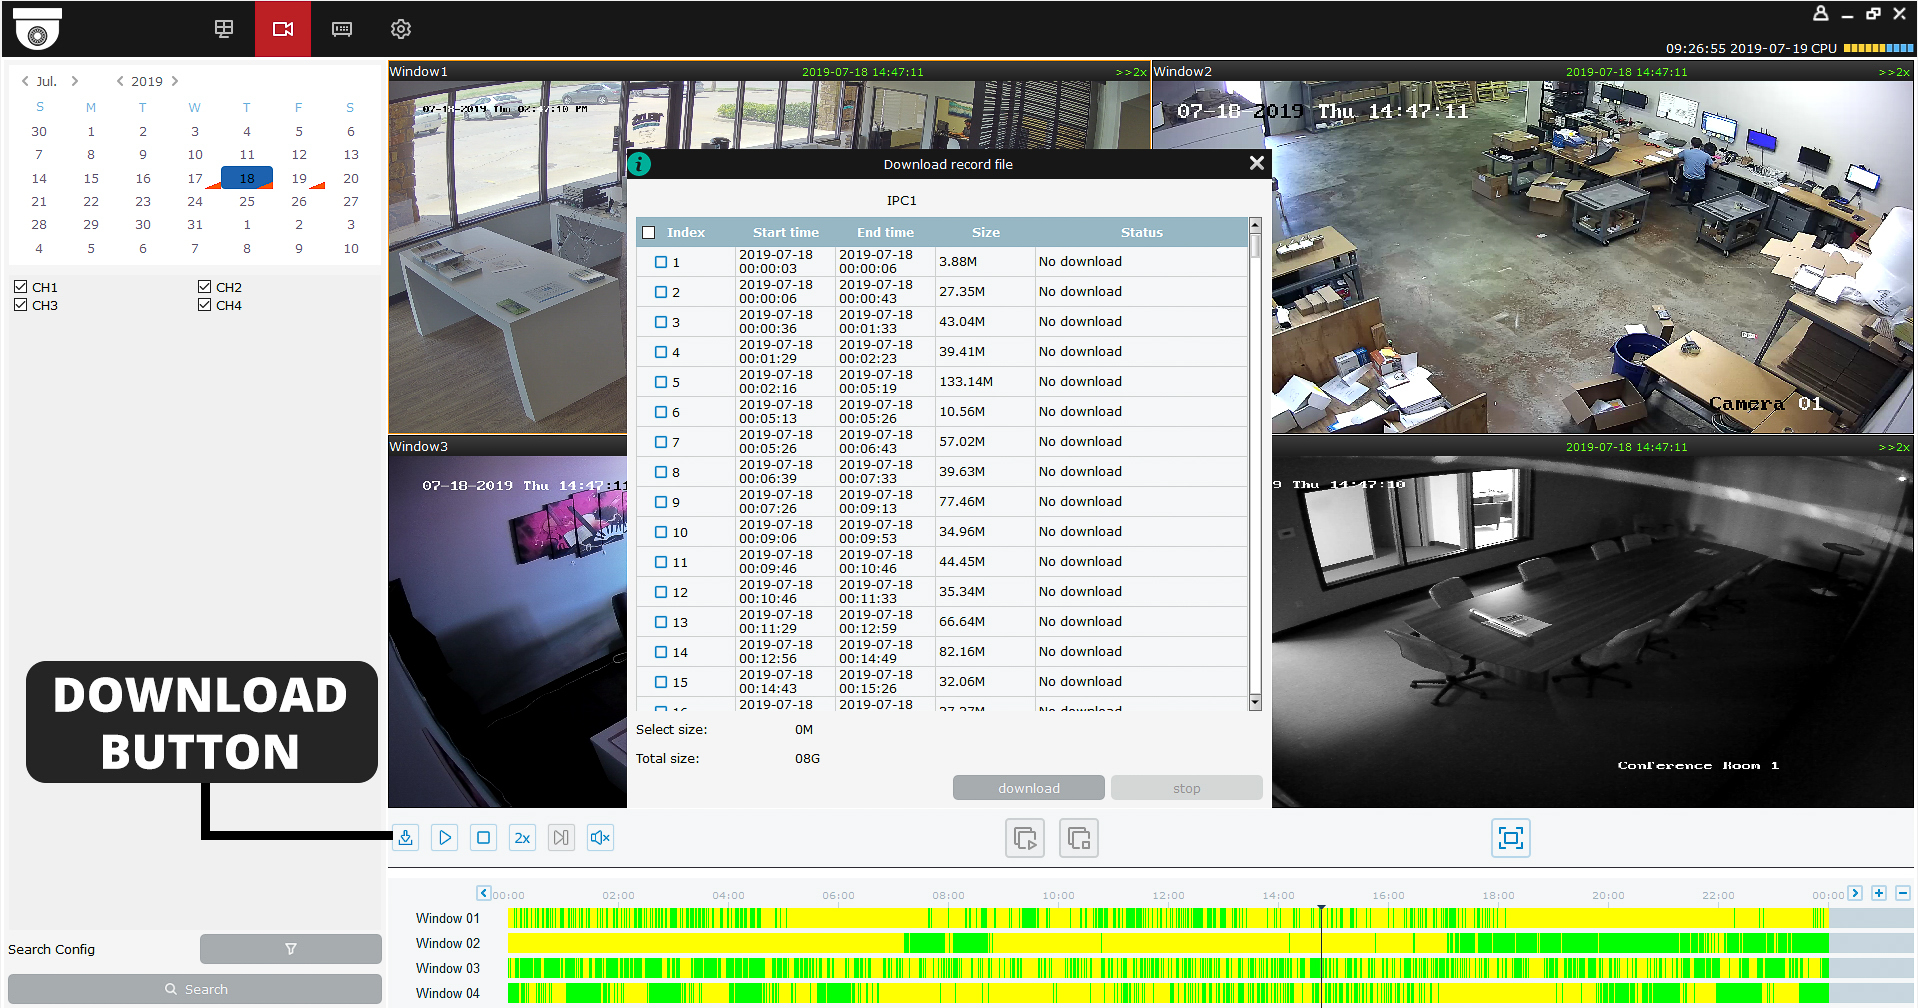
Step 3: Click the “Download” icon under the playback monitor
Step 4: Select the clip or clips you wish to export and click “Download”
Alternatively, you can export a clip during playback by using the "Record" button from the playback channel interface. Click the button once to begin recording, then click it again to stop the recording.

Congrats! You have successfully exported video from your NVR hard drive to your computer. You’ll find your file in the location you set up in the previous subsection, “Configuring your computer’s settings.”
Exporting a Manually Recorded Clip to your Computer's Hard Drive
From the live screen in the “Mainview” tab, you can export video to your computer by manually recording a clip. Since you’re recording the clip directly from the CamViewer application, an NVR hard drive is not required for this method.
Hover your mouse over the channel you wish to record and click the “Record” icon, which looks like a video camera. Click the icon once again to end the recording.
And that’s it! You have successfully saved a manually-recorded video to your computer. You’ll find your file in the location you set up in the previous subsection, “Configuring your computer’s settings.”

Exporting Video from the EyeCam Mobile App
You can effortlessly export video from your NVR’s hard drive anytime and anywhere using the free EyeCam Mobile Application for android and iOS devices. Save recorded video to your phone’s camera roll by following the steps below.
Subsections
Exporting a Recorded Clip from your NVR's Hard Drive to your Phone
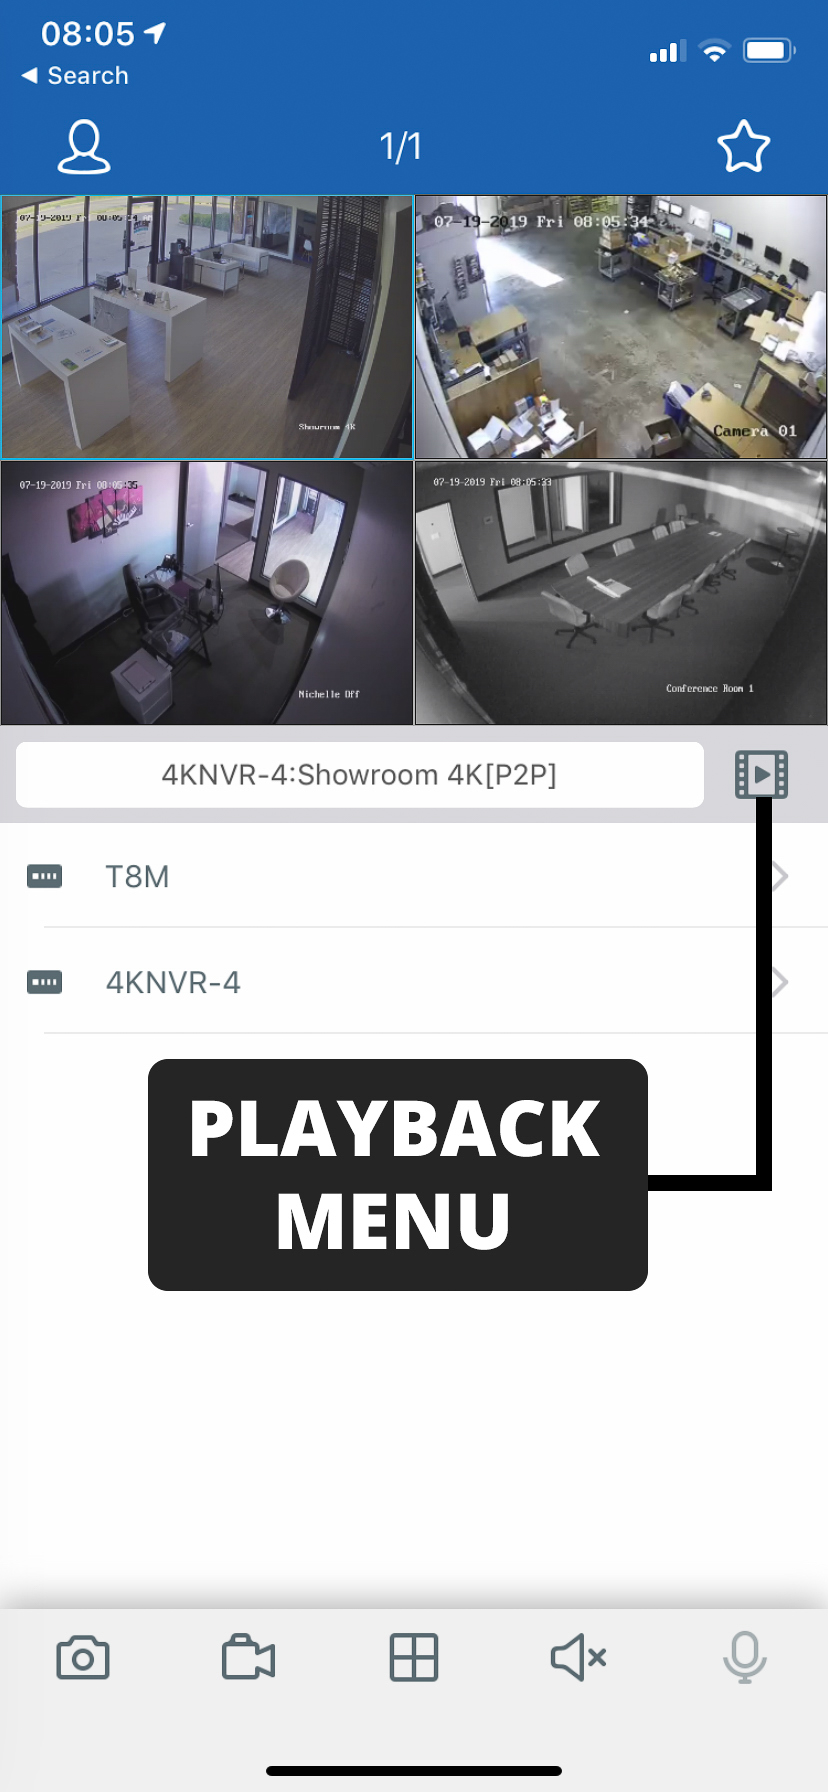
Step 1: Select your NVR from the device list and navigate to the playback menu.
To do this, click on the play button icon next to your device’s name.
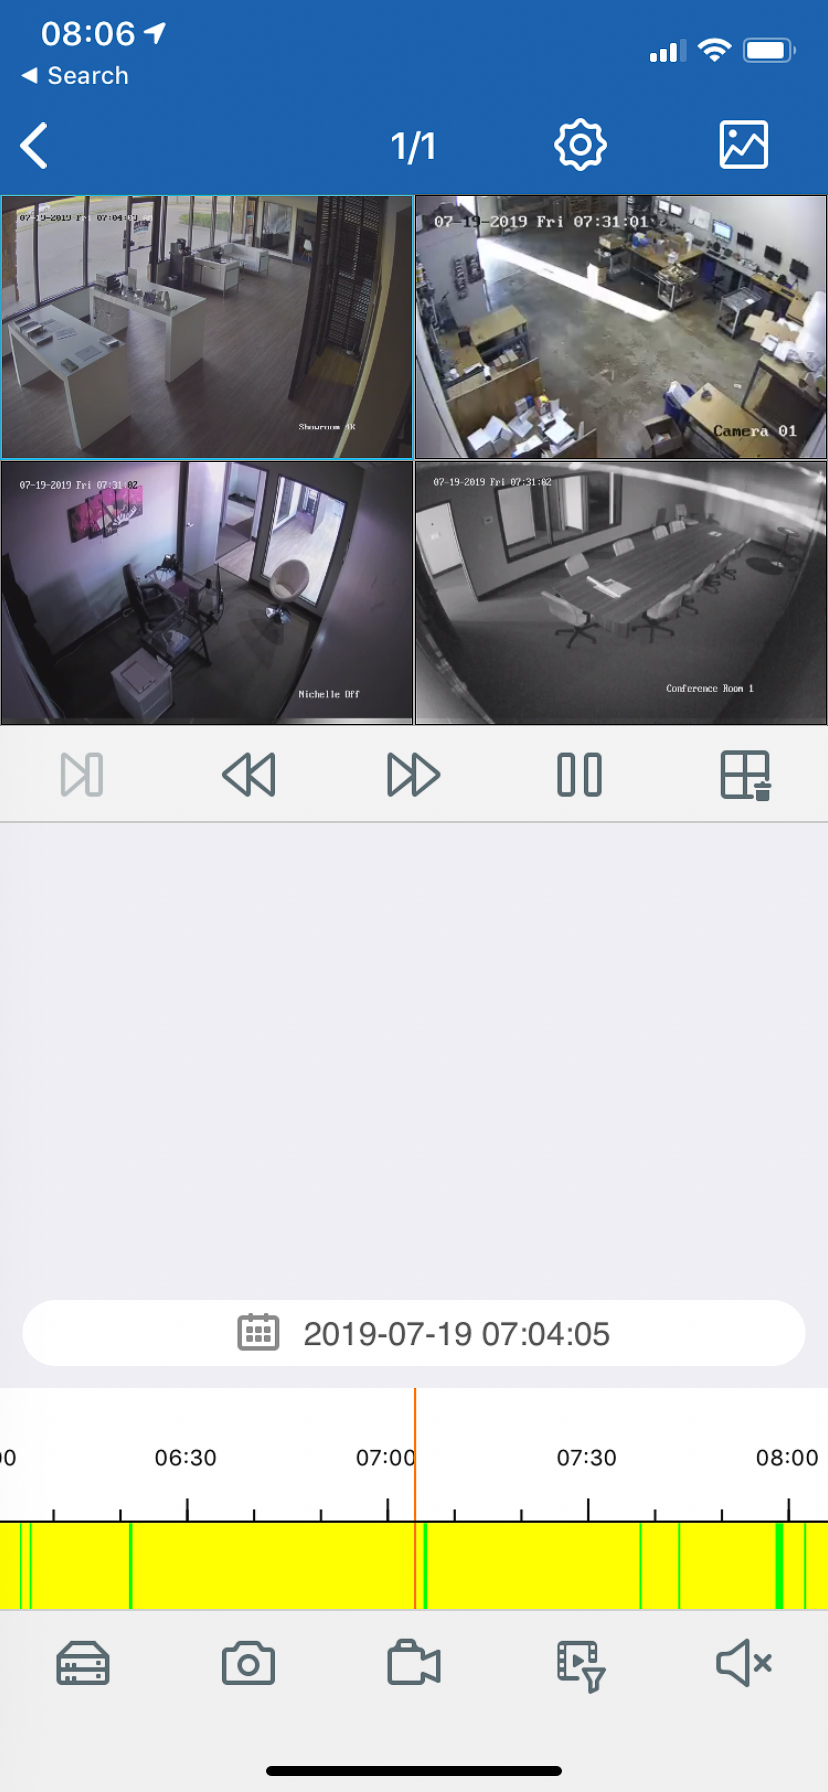
Step 2: Using the date and channel filters, find the clip you’d like to export
Simply tap the calendar icon above the playback timeline to select the date you’d like to search. Using finger gestures, scroll and zoom in and around the timeline to find the desired time.
Click the gear icon at the top to toggle synchronous playback, which allows you to select one playback time for all channels (if enabled) or to select playback times individually for each channel (if disabled).
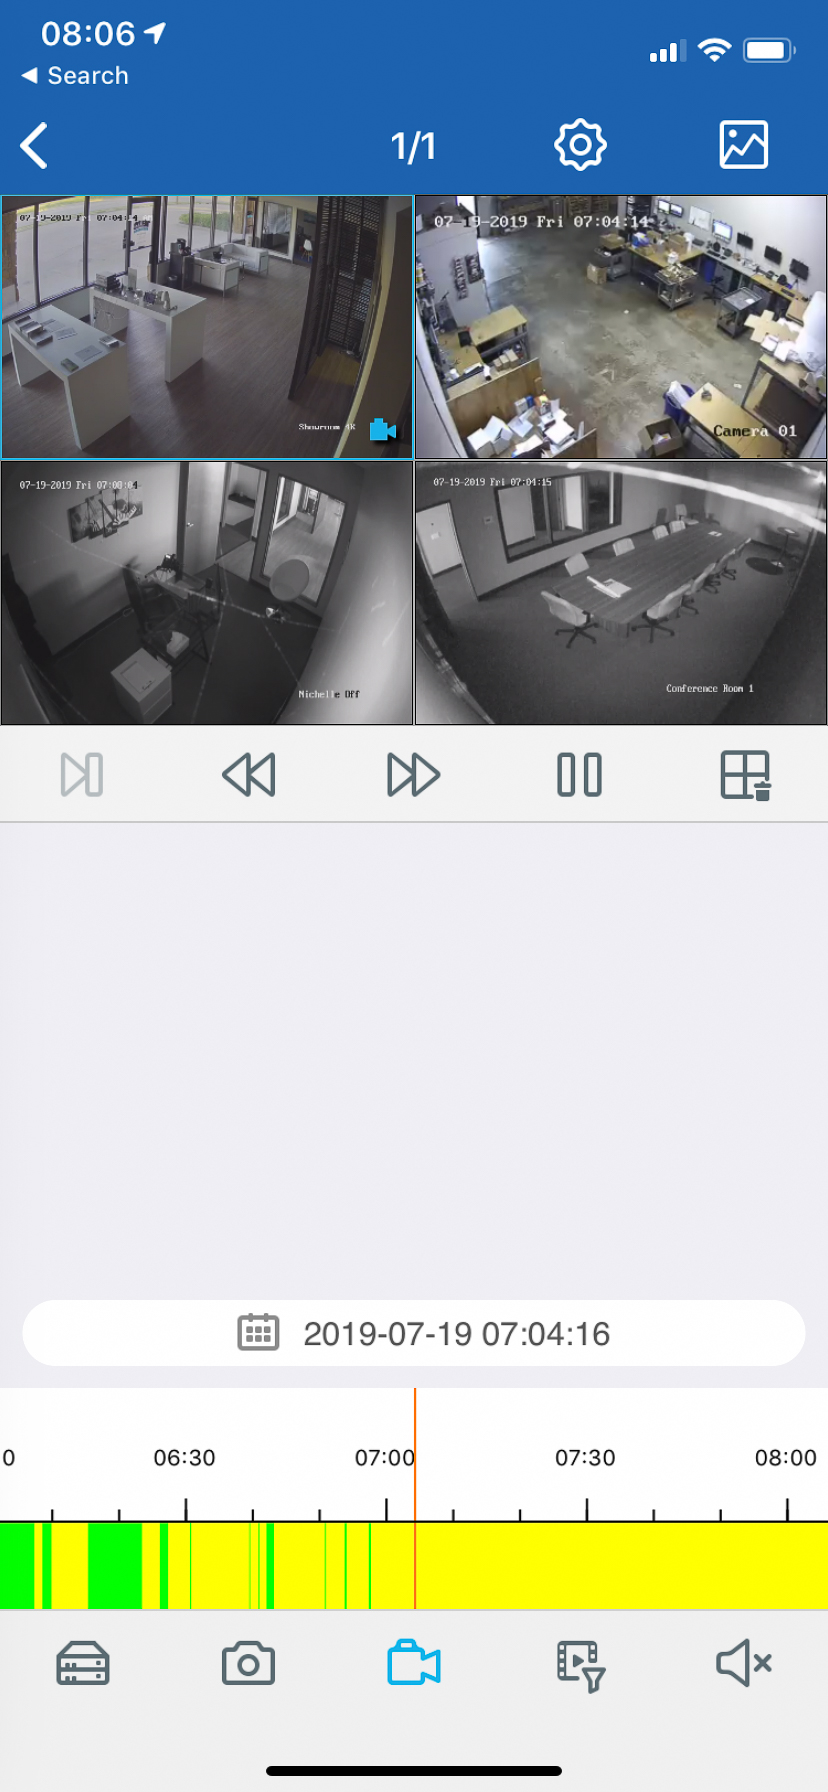
Step 3: Select the channel you’d like to record
You can tell which channel is selected based on the blue outline around the channel. You can only export one channel at a time. Repeat this step for each channel you’d like to export.
Step 4: Click the “Record” button at the bottom of the screen to begin your clip. Click the button a second time to end it.
Step 5: Navigate to the “File List” menu
From the main screen, click on the profile icon in the top left-hand corner, then click “File List.”
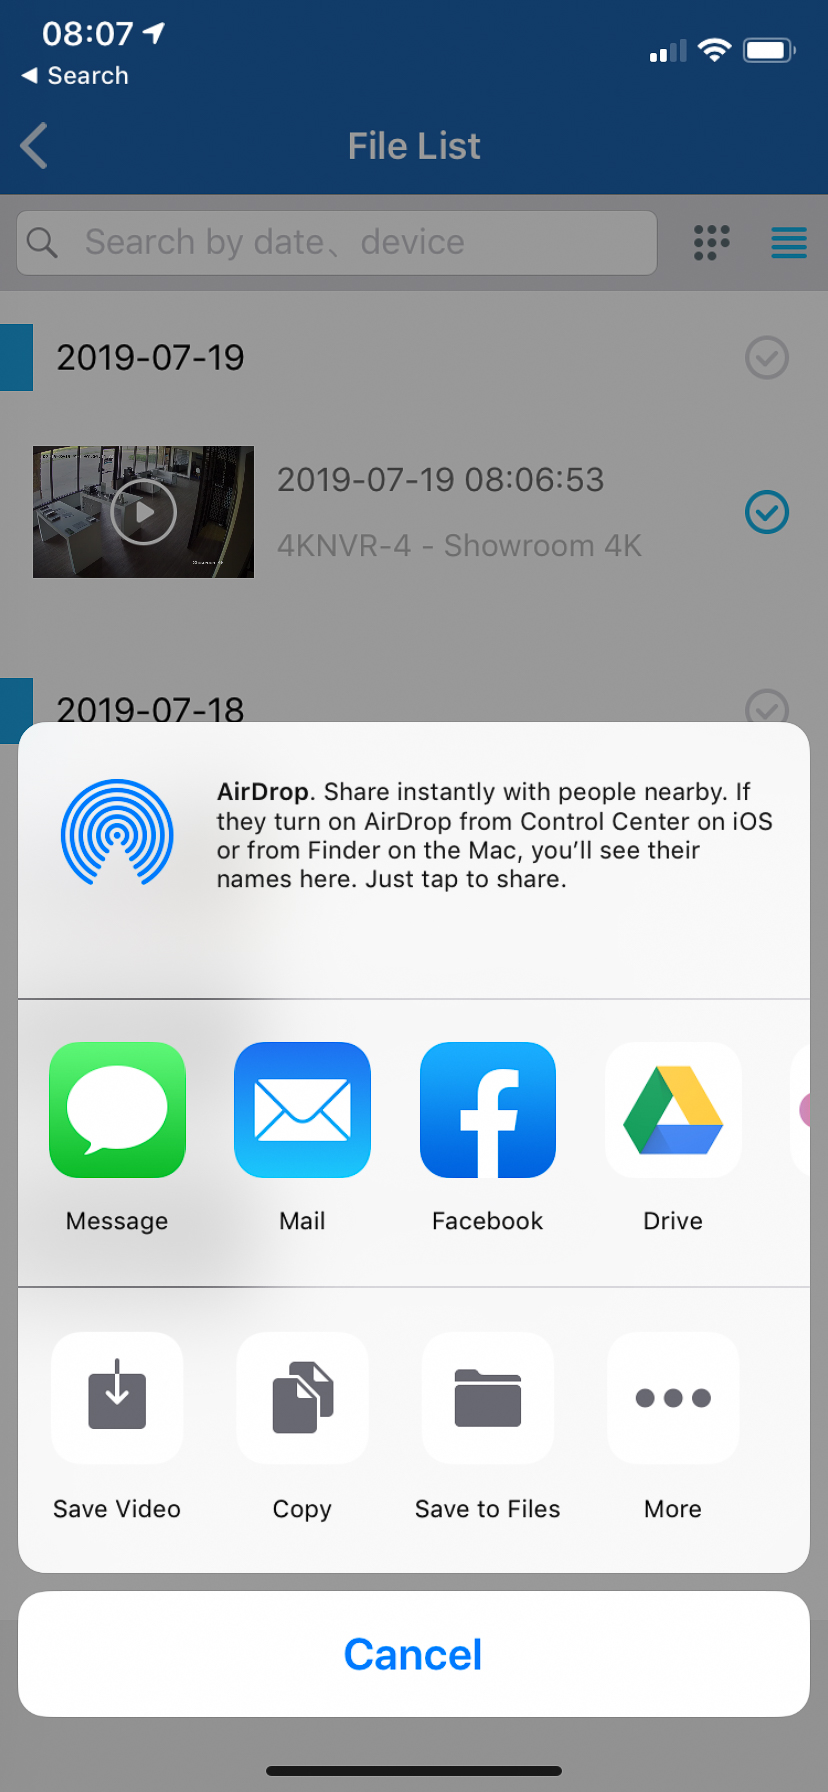
Step 6: Select the clip or clips you’d like to export, then click the “Share” icon at the bottom of the screen

Using your phone’s sharing menu, choose what you’d like to do with the clip. Save it to your camera roll, email it, open it with your favorite app, etc.
Congrats! You’ve successfully exported a video clip from your NVR hard drive to your phone.
Exporting a Manually Recorded Clip from your Phone
For this method, since you’re recording a clip directly from the EyeCam application, an NVR hard drive is not required.
Step 1: Select your NVR from the device list and select which channel you’d like to record
You can tell which channel is selected based on the blue outline around the channel. You can only export one channel at a time. Repeat this step for each channel you’d like to record.
Step 2: Click the “Record” button at the bottom of the screen to begin your clip. Click the button a second time to end it.

Step 3: Navigate to the “File List” menu
From the main screen, click on the profile icon in the top left-hand corner, then click “File List.”
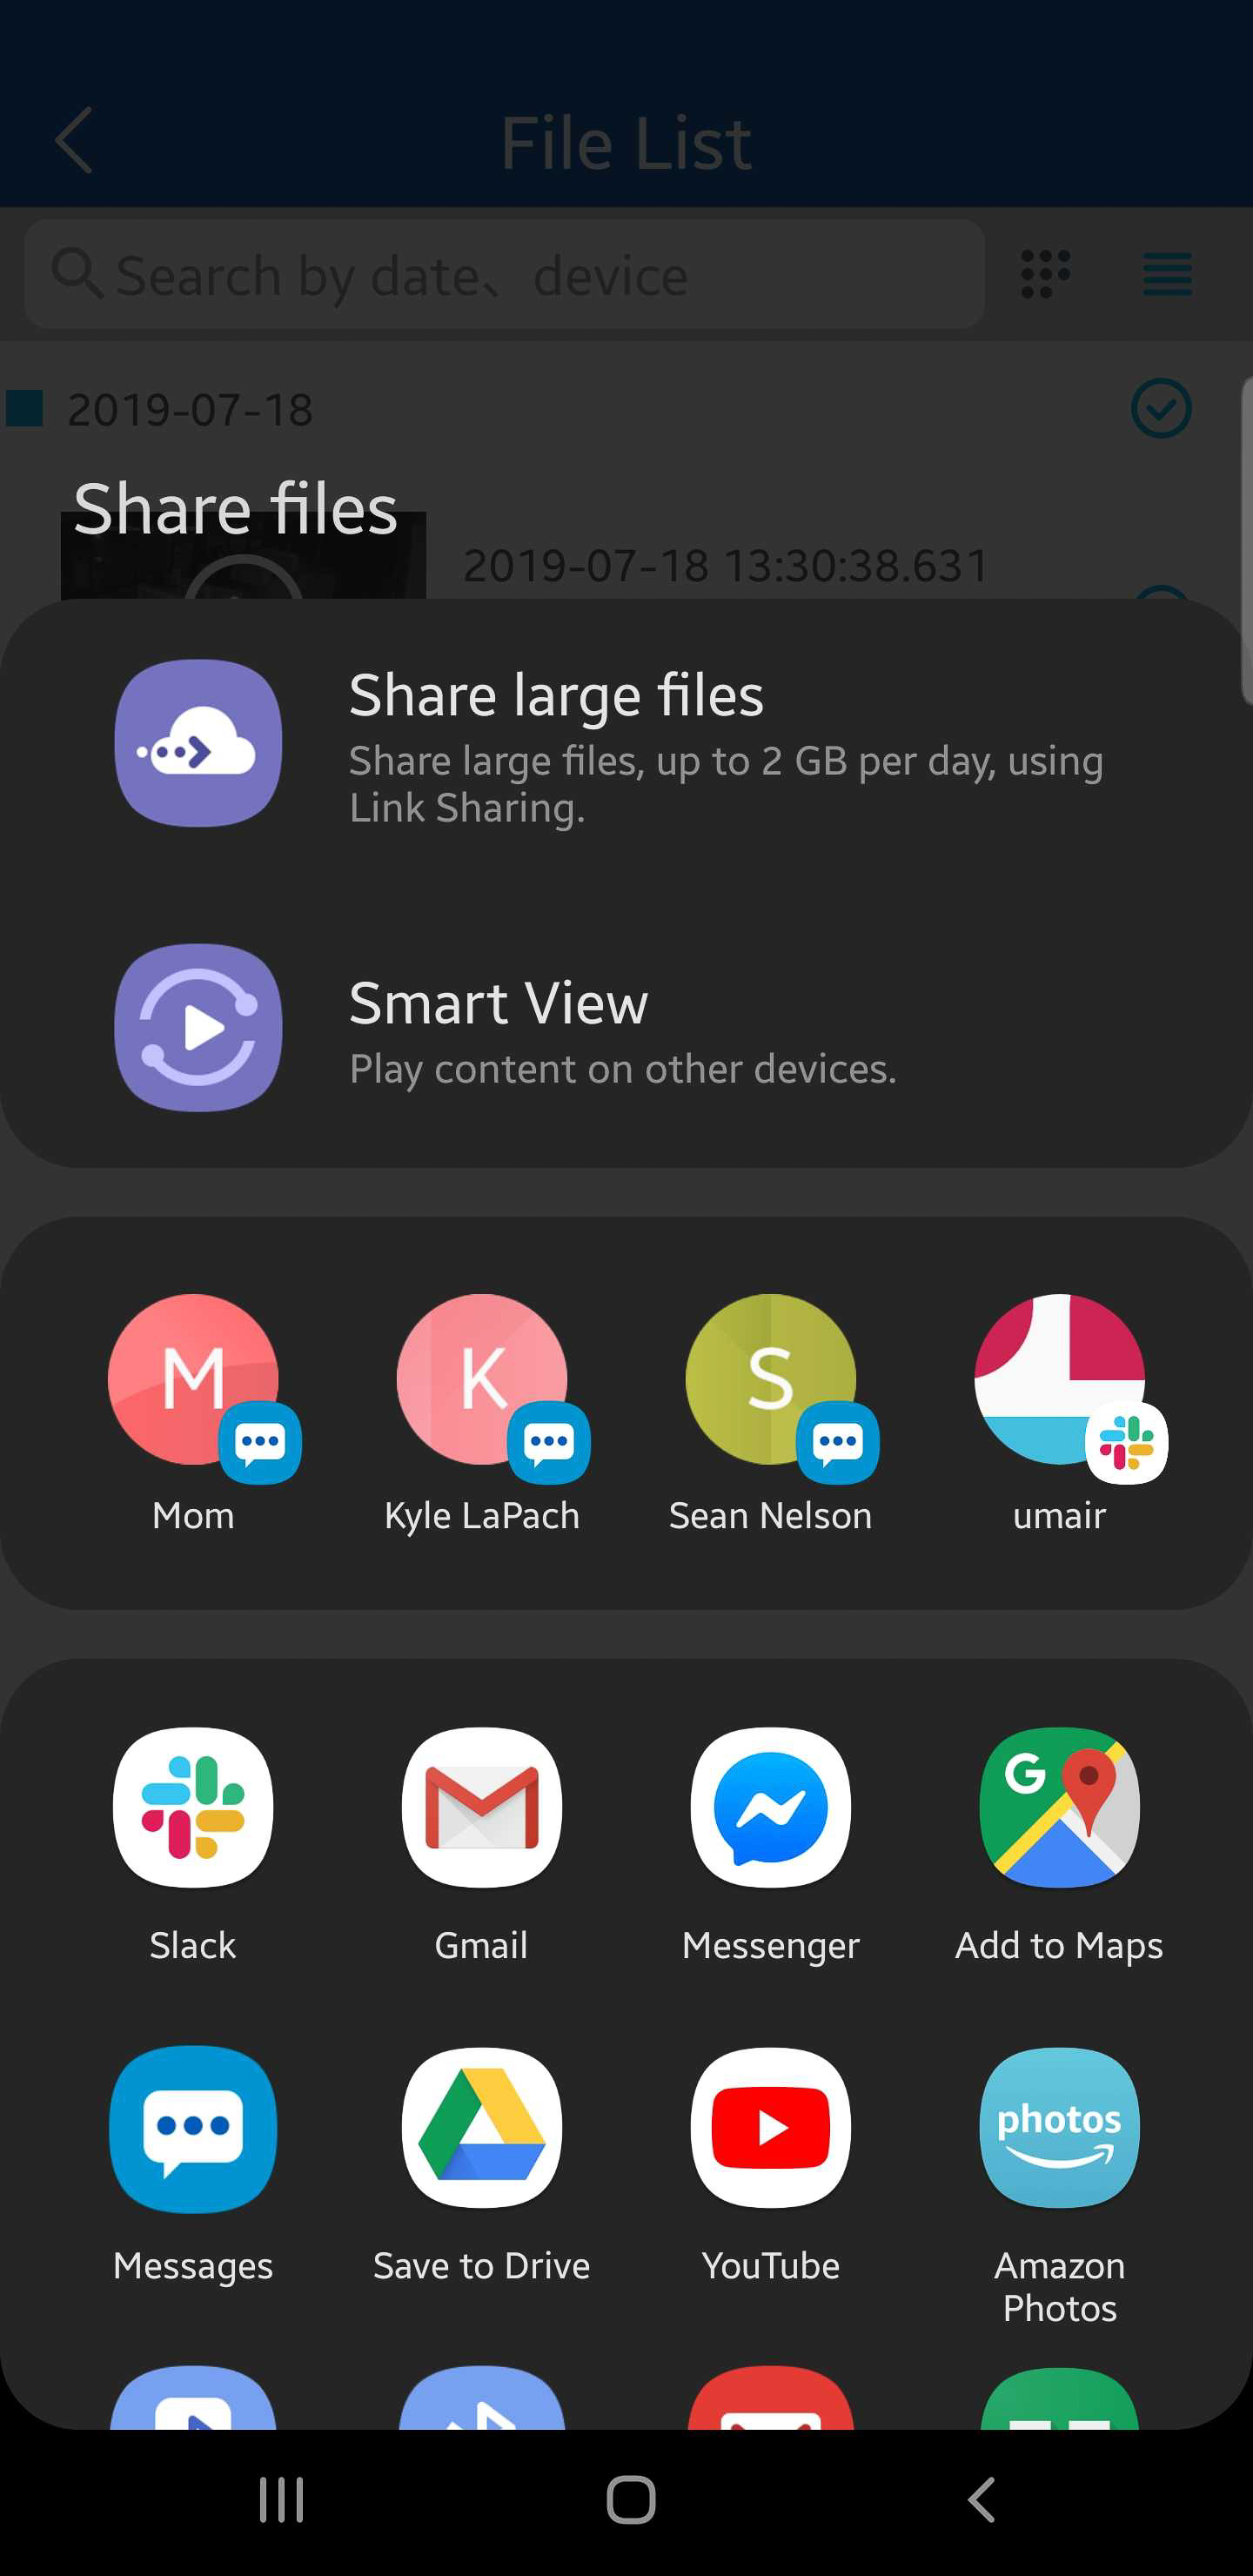
Step 4: Select the clip or clips you’d like to export, then click the “Share” icon at the bottom of the screen
Using your phone’s sharing menu, choose what you’d like to do with the clip. Save it to your camera roll, email it, open it with your favorite app, etc.
Congrats! You’ve successfully exported a video clip from your EyeCam app to your phone.