


Shipping
Free Ground Shipping

Support
Lifetime Tech Support

Guarantee
60 Day Guarantee

Returns
Hassle Free Returns
Popular Products
-
UNV 8MP HD IR 2.8mm Fixed Eye NDAA Compliant Network Turret Camera (IPC3618SR-ADF28KM-H)

Translation missing: en.products.product.sku: SKU# 3435
Vendor:UniviewUNV 8MP HD IR 2.8mm Fixed Eye NDAA Compliant Network Turret Camera (IPC3618SR-ADF28KM-H)
- Regular price
- $429.00
- Sale price
- $429.00
- Regular price
-
$529.00
-
UNV 4MP IP Weatherproof IR Turret Camera with Built-in Mic and 2.8mm Fixed Lens (IPC3614SR-ADF28KM-H)

Translation missing: en.products.product.sku: SKU# 3434
Vendor:UniviewUNV 4MP IP Weatherproof IR Turret Camera with Built-in Mic and 2.8mm Fixed Lens (IPC3614SR-ADF28KM-H)
- Regular price
- $369.00
-
OwlView 4MP Wise-ISP Turret IP Security Camera with a 2.8mm Fixed Lens (IPC3624SR-ADF28KM-WP)

Translation missing: en.products.product.sku: SKU# 3830
Vendor:UniviewOwlView 4MP Wise-ISP Turret IP Security Camera with a 2.8mm Fixed Lens (IPC3624SR-ADF28KM-WP)
- Regular price
- $419.00
- Sale price
- $419.00
- Regular price
-
$519.00
-
UNV 4MP Dual Lens Weatherproof PTZ IP Security Camera with a 25X Motorized Zoom Lens on Bottom and a Fixed 4mm Camera on Top (IPC94144SR-X25-F40C)

Translation missing: en.products.product.sku: SKU# 3571
Vendor:UniviewUNV 4MP Dual Lens Weatherproof PTZ IP Security Camera with a 25X Motorized Zoom Lens on Bottom and a Fixed 4mm Camera on Top (IPC94144SR-X25-F40C)
- Regular price
- $1,709.00
-
HD 3MP + 2MP Dual Lens Weatherproof Video Doorbell Wi-Fi Security Camera w/ 2-Way Audio, Human Body & Package Detection (ED-525B-WB)

Translation missing: en.products.product.sku: SKU# 3904
Vendor:UniviewHD 3MP + 2MP Dual Lens Weatherproof Video Doorbell Wi-Fi Security Camera w/ 2-Way Audio, Human Body & Package Detection (ED-525B-WB)
- Regular price
- $469.00
-
Uniarch by Uniview 1440p 4MP NDAA-Compliant Weatherproof Turret IP Security Camera with a 2.8mm Fixed Lens and a Built-In Microphone (IPC-T124-APF28)

Translation missing: en.products.product.sku: SKU# 3508
Vendor:UniarchUniarch by Uniview 1440p 4MP NDAA-Compliant Weatherproof Turret IP Security Camera with a 2.8mm Fixed Lens and a Built-In Microphone (IPC-T124-APF28)
- Regular price
- $162.00
- Sale price
- $162.00
- Regular price
-
-
UNV 4MP Easystar NDAA-Compliant Weatherproof Vandal-Resistant Dome IP Security Camera with a 2.8mm Fixed Lens (IPC324SR-ADF28KM-H)

Translation missing: en.products.product.sku: SKU# 3479
Vendor:UniviewUNV 4MP Easystar NDAA-Compliant Weatherproof Vandal-Resistant Dome IP Security Camera with a 2.8mm Fixed Lens (IPC324SR-ADF28KM-H)
- Regular price
- $299.00
- Sale price
- $299.00
- Regular price
-
$369.00
-
4K Wide Angle 180° FOV NDAA Compliant Weatherproof ColorHunter Tri-Guard 2.0 OmniView Series Fixed Turret IP Security Camera with Active Deterrence, 24/7 Color, Deep Learning AI Smart Events, Dual Mics (IPC3K28SE-ADF28KMC-DL-I0)

Translation missing: en.products.product.sku: SKU# 3885
Vendor:Uniview4K Wide Angle 180° FOV NDAA Compliant Weatherproof ColorHunter Tri-Guard 2.0 OmniView Series Fixed Turret IP Security Camera with Active Deterrence, 24/7 Color, Deep Learning AI Smart Events, Dual Mics (IPC3K28SE-ADF28KMC-DL-I0)
- Regular price
- $779.00
- Sale price
- $779.00
- Regular price
-
$969.00
-
UNV 4MP Deep Learning IP67 Weatherproof PTZ IP Security Camera with a 25x Motorized Zoom Lens, AI Autotracking, and LightHunter Illumination Technology, and Included Wall Mount (IPC6424SR-X25-VFB)

Translation missing: en.products.product.sku: SKU# 3373
Vendor:UniviewUNV 4MP Deep Learning IP67 Weatherproof PTZ IP Security Camera with a 25x Motorized Zoom Lens, AI Autotracking, and LightHunter Illumination Technology, and Included Wall Mount (IPC6424SR-X25-VFB)
- Regular price
- $1,359.00
- Sale price
- $1,359.00
- Regular price
-
$1,689.00
-
UNV 8MP 4K UltraHD Weatherproof Vandal Dome IP Security Camera with a 2.8mm Fixed Lens and a Built-In Microphone (IPC328SR-ADF28KM-H)

Translation missing: en.products.product.sku: SKU# 3494
Vendor:UniviewUNV 8MP 4K UltraHD Weatherproof Vandal Dome IP Security Camera with a 2.8mm Fixed Lens and a Built-In Microphone (IPC328SR-ADF28KM-H)
- Regular price
- $529.00
-
4MP IP Weatherproof IR Turret Camera with Built-in Mic and 2.8mm Fixed Lens (U1-4MP-T1G)

Translation missing: en.products.product.sku: SKU# 3434NB
Vendor:Uniview NB4MP IP Weatherproof IR Turret Camera with Built-in Mic and 2.8mm Fixed Lens (U1-4MP-T1G)
- Regular price
- $369.00
-
L-Series 5MP Ultra HD Weatherproof 24/7 Color Turret IP Security Camera with AI-Powered Intelligent Events, White Lights, IR Lights for Night Vision and a Built-in Mic (L5TW)

Translation missing: en.products.product.sku: SKU# 3920
Vendor:L-SeriesL-Series 5MP Ultra HD Weatherproof 24/7 Color Turret IP Security Camera with AI-Powered Intelligent Events, White Lights, IR Lights for Night Vision and a Built-in Mic (L5TW)
- Regular price
- $119.99
- Sale price
- $119.99
- Regular price
-
$129.99
-
UNV 4K Tri-Guard NDAA-Compliant Weatherproof Turret IP Security Camera 2.8mm Fixed Lens with Deep Learning AI, Active Deterrence, and 24/7 Color Illumination (IPC3618SB-ADF28KMC-I0)

Translation missing: en.products.product.sku: SKU# 3603
Vendor:UniviewUNV 4K Tri-Guard NDAA-Compliant Weatherproof Turret IP Security Camera 2.8mm Fixed Lens with Deep Learning AI, Active Deterrence, and 24/7 Color Illumination (IPC3618SB-ADF28KMC-I0)
- Regular price
- $659.00
-
OwlView 4K Wise-ISP Turret IP Security Camera with a 2.8mm Fixed Lens (IPC3628SR-ADF28KM-WP)

Translation missing: en.products.product.sku: SKU# 3865
Vendor:UniviewOwlView 4K Wise-ISP Turret IP Security Camera with a 2.8mm Fixed Lens (IPC3628SR-ADF28KM-WP)
- Regular price
- $539.00
- Sale price
- $539.00
- Regular price
-
$669.00
-
UNV 8MP 4K UltraHD Wide Angle 180° Field of View NDAA Compliant Weatherproof IR Fixed Turret IP Security Camera with Deep Learning AI (IPC3608SB-ADF16KM-I0)

Translation missing: en.products.product.sku: SKU# 3790
Vendor:UniviewUNV 8MP 4K UltraHD Wide Angle 180° Field of View NDAA Compliant Weatherproof IR Fixed Turret IP Security Camera with Deep Learning AI (IPC3608SB-ADF16KM-I0)
- Regular price
- $689.00
- Sale price
- $689.00
- Regular price
-
$859.00
-
UNV 8MP 4K UltraHD NDAA-Compliant Weatherproof Bullet IP Security Camera with 2.8mm Fixed Lens and a Built-In Microphone (IPC2128SR-ADF28KM-H)

Translation missing: en.products.product.sku: SKU# 3480
Vendor:UniviewUNV 8MP 4K UltraHD NDAA-Compliant Weatherproof Bullet IP Security Camera with 2.8mm Fixed Lens and a Built-In Microphone (IPC2128SR-ADF28KM-H)
- Regular price
- $529.00
-
UNV 5MP LightHunter Turret Prime I NDAA Compliant IP Security Camera with a 2.8mm Fixed Lens (IPC3615SB-ADF28KM-I0)

Translation missing: en.products.product.sku: SKU# 3222
Vendor:UniviewUNV 5MP LightHunter Turret Prime I NDAA Compliant IP Security Camera with a 2.8mm Fixed Lens (IPC3615SB-ADF28KM-I0)
- Regular price
- $519.00
-
UNV 5MP HD Wide Angle 180° Field of View NDAA Compliant Weatherproof IR Fixed Turret IP Security Camera with Deep Learning AI (IPC3605SB-ADF16KM-I0)

Translation missing: en.products.product.sku: SKU# 3600
Vendor:UniviewUNV 5MP HD Wide Angle 180° Field of View NDAA Compliant Weatherproof IR Fixed Turret IP Security Camera with Deep Learning AI (IPC3605SB-ADF16KM-I0)
- Regular price
- $659.00
-
UNV 4K UltraHD Prime I NDAA-Compliant Weatherproof Turret IP Security Camera with a 2.8mm Fixed Lens and Deep Learning Artificial Intelligence (IPC3618SB-ADF28KM-I0)

Translation missing: en.products.product.sku: SKU# 3300
Vendor:UniviewUNV 4K UltraHD Prime I NDAA-Compliant Weatherproof Turret IP Security Camera with a 2.8mm Fixed Lens and Deep Learning Artificial Intelligence (IPC3618SB-ADF28KM-I0)
- Regular price
- $609.00
-
UNV 5MP NDAA-Compliant IP Fisheye Security Camera with 360° Field of View and a 1.4mm Fixed Lens (IPC815SB-ADF14K-I0)

Translation missing: en.products.product.sku: SKU# 3399
Vendor:UniviewUNV 5MP NDAA-Compliant IP Fisheye Security Camera with 360° Field of View and a 1.4mm Fixed Lens (IPC815SB-ADF14K-I0)
- Regular price
- $809.00
-
UNV 12MP 4K Ultra HD Panoramic IR Fisheye Security Camera (IPC86CEB-AF18KC-I0)

Translation missing: en.products.product.sku: SKU# 3604
Vendor:UniviewUNV 12MP 4K Ultra HD Panoramic IR Fisheye Security Camera (IPC86CEB-AF18KC-I0)
- Regular price
- $2,079.00
-
8MP HD IR 2.8mm Fixed Eye NDAA Compliant Network Turret Camera (U1-8MP-T1G)

Translation missing: en.products.product.sku: SKU# 3435NB
Vendor:Uniview NB8MP HD IR 2.8mm Fixed Eye NDAA Compliant Network Turret Camera (U1-8MP-T1G)
- Regular price
- $529.00
-
Uniarch by Uniview FullHD 1080p 2MP Weatherproof Turret IP Security Camera with a 2.8mm Fixed Lens (IPC-T122-APF28)

Translation missing: en.products.product.sku: SKU# 3497
Vendor:UniarchUniarch by Uniview FullHD 1080p 2MP Weatherproof Turret IP Security Camera with a 2.8mm Fixed Lens (IPC-T122-APF28)
- Regular price
- $125.00
- Sale price
- $125.00
- Regular price
-
-
UNV 5MP LightHunter Weatherproof HD Turret TVI/AHD/CVI/CVBS Analog Security Camera with a 2.8mm Fixed Lens (UAC-T125-AF28M)

Translation missing: en.products.product.sku: SKU# 3709
Vendor:UniviewUNV 5MP LightHunter Weatherproof HD Turret TVI/AHD/CVI/CVBS Analog Security Camera with a 2.8mm Fixed Lens (UAC-T125-AF28M)
- Regular price
- $149.00
-
UNV 5MP Tri-Guard NDAA-Compliant Mini PTZ Dome IP Security Camera Dual-light with Active Deterrence, Deep Learning AI, 24/7 Color Illumination, 5X Zoom Lens, and Autotracking (IPC6325LFW-AX5C-VG)

Translation missing: en.products.product.sku: SKU# 3843
Vendor:UniviewUNV 5MP Tri-Guard NDAA-Compliant Mini PTZ Dome IP Security Camera Dual-light with Active Deterrence, Deep Learning AI, 24/7 Color Illumination, 5X Zoom Lens, and Autotracking (IPC6325LFW-AX5C-VG)
- Regular price
- $918.00
-
8MP 4K UltraHD Weatherproof Vandal Dome IP Security Camera with a 2.8mm Fixed Lens and a Built-In Microphone (U1-8MP-DG1)

Translation missing: en.products.product.sku: SKU# 3494NB
Vendor:Uniview NB8MP 4K UltraHD Weatherproof Vandal Dome IP Security Camera with a 2.8mm Fixed Lens and a Built-In Microphone (U1-8MP-DG1)
- Regular price
- $529.00
-
4MP NDAA-Compliant Weatherproof Turret IP Security Camera 2.8mm Fixed Lens (U1-4MPR-T)

Translation missing: en.products.product.sku: SKU# 3870NB
Vendor:Uniview NB4MP NDAA-Compliant Weatherproof Turret IP Security Camera 2.8mm Fixed Lens (U1-4MPR-T)
- Regular price
- $299.00
-
L-Series 4K Ultra HD Weatherproof 24/7 Color Turret IP Security Camera with AI-Powered Intelligent Events, White Lights, IR Lights for Night Vision and a Built-in Mic (L8TW)
Translation missing: en.products.product.sku: SKU# 3921
Vendor:L-SeriesL-Series 4K Ultra HD Weatherproof 24/7 Color Turret IP Security Camera with AI-Powered Intelligent Events, White Lights, IR Lights for Night Vision and a Built-in Mic (L8TW)
- Regular price
- $159.99
- Sale price
- $159.99
- Regular price
-
$169.99
-
UNV 4MP Tri-Guard NDAA-Compliant Weatherproof Turret IP Security Camera 2.8mm Fixed Lens with Deep Learning AI, Active Deterrence, and 24/7 Color Illumination (IPC3614SB-ADF28KMC-I0)

Translation missing: en.products.product.sku: SKU# 3452
Vendor:UniviewUNV 4MP Tri-Guard NDAA-Compliant Weatherproof Turret IP Security Camera 2.8mm Fixed Lens with Deep Learning AI, Active Deterrence, and 24/7 Color Illumination (IPC3614SB-ADF28KMC-I0)
- Regular price
- $519.00
-
UNV 4MP NDAA Compliant Weatherproof IR Turret Security Camera with 2.8mm Fixed Lens and Built-In Mic (EC-T4F28M-V3)

Translation missing: en.products.product.sku: SKU# 3791
Vendor:UniviewUNV 4MP NDAA Compliant Weatherproof IR Turret Security Camera with 2.8mm Fixed Lens and Built-In Mic (EC-T4F28M-V3)
- Regular price
- $239.00
- Sale price
- $239.00
- Regular price
-
$299.00
-
UNV 4MP Easystar Weatherproof Bullet IP Security Camera with a 2.8mm Fixed Lens and a Built-In Mic (IPC2124SR-ADF28KM-H)

Translation missing: en.products.product.sku: SKU# 3459
Vendor:UniviewUNV 4MP Easystar Weatherproof Bullet IP Security Camera with a 2.8mm Fixed Lens and a Built-In Mic (IPC2124SR-ADF28KM-H)
- Regular price
- $369.00
-
4MP Wise-ISP 24/7 Color Turret IP Security Camera with a 2.8mm Fixed Lens (U1-4MP-OWLT)

Translation missing: en.products.product.sku: SKU# 3830NB
Vendor:Uniview NB4MP Wise-ISP 24/7 Color Turret IP Security Camera with a 2.8mm Fixed Lens (U1-4MP-OWLT)
- Regular price
- $419.00
- Sale price
- $419.00
- Regular price
-
$519.00
-
UNV 8MP 4K UltraHD Wide Angle Weatherproof 24/7 ColorHunter Bullet IP Security Camera with 2 x 4.0mm Fixed Lenses and 2-Way Audio (IPC2K28SE-ADF40KMC-WL-I0)

Translation missing: en.products.product.sku: SKU# 3772
Vendor:UniviewUNV 8MP 4K UltraHD Wide Angle Weatherproof 24/7 ColorHunter Bullet IP Security Camera with 2 x 4.0mm Fixed Lenses and 2-Way Audio (IPC2K28SE-ADF40KMC-WL-I0)
- Regular price
- $779.00
- Sale price
- $779.00
- Regular price
-
$969.00
-
OwlView 4MP Wise-ISP Bullet IP Security Camera with a 2.8mm Fixed Lens (IPC2314SR-ADF28KM-WP)

Translation missing: en.products.product.sku: SKU# 3828
Vendor:UniviewOwlView 4MP Wise-ISP Bullet IP Security Camera with a 2.8mm Fixed Lens (IPC2314SR-ADF28KM-WP)
- Regular price
- $419.00
- Sale price
- $419.00
- Regular price
-
$519.00
-
Alarm.com FullHD 2MP Intelligent Video Doorbell IP Security Camera (ADC-VDB750)

Translation missing: en.products.product.sku: SKU# 3706
Vendor:Alarm.comAlarm.com FullHD 2MP Intelligent Video Doorbell IP Security Camera (ADC-VDB750)
-
UNV FullHD 1080p @ 60fps ANPR License Plate Recognition LPR Weatherproof NDAA-Compliant Bullet IP Security Camera with a 4.7-47mm Motorized Lens (HC121@TS8CR-Z)

Translation missing: en.products.product.sku: SKU# 3458
Vendor:UniviewUNV FullHD 1080p @ 60fps ANPR License Plate Recognition LPR Weatherproof NDAA-Compliant Bullet IP Security Camera with a 4.7-47mm Motorized Lens (HC121@TS8CR-Z)
- Regular price
- $1,839.00
-
UNV 4K UltraHD (8MP) Prime I NDAA Compliant Weatherproof Bullet IP Security Camera with a 2.8-12mm Motorized Varifocal Lens and LightHunter Illumination Technology (IPC2328SB-DZK-I0)

Translation missing: en.products.product.sku: SKU# 3257
Vendor:UniviewUNV 4K UltraHD (8MP) Prime I NDAA Compliant Weatherproof Bullet IP Security Camera with a 2.8-12mm Motorized Varifocal Lens and LightHunter Illumination Technology (IPC2328SB-DZK-I0)
- Regular price
- $1,159.00
-
UNV 4MP Dual Lens, Dual Channel Non-Splicing IP Vandal Dome, 2 Lenses, NDAA, Deep Learning, Lighthunter (IPC3224SS-ADF28K-I1)

Translation missing: en.products.product.sku: SKU# 3722
Vendor:UniviewUNV 4MP Dual Lens, Dual Channel Non-Splicing IP Vandal Dome, 2 Lenses, NDAA, Deep Learning, Lighthunter (IPC3224SS-ADF28K-I1)
- Regular price
- $1,139.00
-
UNV Tri-Guard 2.0 8MP 4K UltraHD Red/Blue Active Deterrence Lights, White Light, and IR LED Turret IP Security Camera with a 2.8mm Lens and Two-Way Audio (IPC3638SS-ADF28KMC-I1)

Translation missing: en.products.product.sku: SKU# 3778
Vendor:UniviewUNV Tri-Guard 2.0 8MP 4K UltraHD Red/Blue Active Deterrence Lights, White Light, and IR LED Turret IP Security Camera with a 2.8mm Lens and Two-Way Audio (IPC3638SS-ADF28KMC-I1)
- Regular price
- $669.00
- Sale price
- $669.00
- Regular price
-
$829.00
-
L-Series 4K Ultra HD Weatherproof Active Deterrence 24/7 Color Turret IP Security Camera with a 2.8mm Fixed Lens and Built-in Mic and Speaker (L8T-DT)

Translation missing: en.products.product.sku: SKU# 3926
Vendor:L-SeriesL-Series 4K Ultra HD Weatherproof Active Deterrence 24/7 Color Turret IP Security Camera with a 2.8mm Fixed Lens and Built-in Mic and Speaker (L8T-DT)
- Regular price
- $179.99
- Sale price
- $179.99
- Regular price
-
$189.99
-
UNV 4MP LightHunter NDAA-Compliant Weatherproof Mini Dome IP Security Camera with a 2.8mm Fixed Lens and a Built-in Microphone (IPC314SB-ADF28K-I0)

Translation missing: en.products.product.sku: SKU# 3304
Vendor:UniviewUNV 4MP LightHunter NDAA-Compliant Weatherproof Mini Dome IP Security Camera with a 2.8mm Fixed Lens and a Built-in Microphone (IPC314SB-ADF28K-I0)
- Regular price
- $489.00
-
Alarm.com FullHD 2MP Intelligent Video Doorbell IP Security Camera (ADC-VDB770)

Translation missing: en.products.product.sku: SKU# 3309
Vendor:Alarm.comAlarm.com FullHD 2MP Intelligent Video Doorbell IP Security Camera (ADC-VDB770)
-
UNV 5MP ColorHunter HD-TVI Turret Camera with a 2.8mm Fixed Lens (UAC-T125-AF28M-W)

Translation missing: en.products.product.sku: SKU# 3710
Vendor:UniviewUNV 5MP ColorHunter HD-TVI Turret Camera with a 2.8mm Fixed Lens (UAC-T125-AF28M-W)
- Regular price
- $169.00
-
Uniarch by Uniview 4MP Mini Fixed Lens NDAA-Compliant Network Camera (IPC-B124-APF28)

Translation missing: en.products.product.sku: SKU# 3503
Vendor:UniarchUniarch by Uniview 4MP Mini Fixed Lens NDAA-Compliant Network Camera (IPC-B124-APF28)
- Regular price
- $162.00
- Sale price
- $162.00
- Regular price
-
-
OwlView 4MP Wise-ISP Vandal Dome IP Security Camera with a 2.8mm Fixed Lens (IPC3514SR-ADF28KM-WP)

Translation missing: en.products.product.sku: SKU# 3829
Vendor:UniviewOwlView 4MP Wise-ISP Vandal Dome IP Security Camera with a 2.8mm Fixed Lens (IPC3514SR-ADF28KM-WP)
- Regular price
- $419.00
- Sale price
- $419.00
- Regular price
-
$519.00
-
UNV FullHD 1080p 2MP Wi-Fi Indoor Cube IP Security Camera with a 2.8mm Fixed Lens (C1L-2WN-G)

Translation missing: en.products.product.sku: SKU# 3350
Vendor:UniviewUNV FullHD 1080p 2MP Wi-Fi Indoor Cube IP Security Camera with a 2.8mm Fixed Lens (C1L-2WN-G)
- Regular price
- $189.00
- Sale price
- $189.00
- Regular price
-
$159.00
-
4MP NDAA-Compliant Weatherproof Bullet IP Security Camera 2.8mm Fixed Lens (U1-4MPR-B)

Translation missing: en.products.product.sku: SKU# 3871NB
Vendor:Uniview NB4MP NDAA-Compliant Weatherproof Bullet IP Security Camera 2.8mm Fixed Lens (U1-4MPR-B)
- Regular price
- $299.00
-
UNV 5MP LightHunter Vandal-Resistant Dome Prime I NDAA Compliant IP Security Camera with a 2.8mm Fixed Lens (IPC325SB-DF28K-I0)

Translation missing: en.products.product.sku: SKU# 3223
Vendor:UniviewUNV 5MP LightHunter Vandal-Resistant Dome Prime I NDAA Compliant IP Security Camera with a 2.8mm Fixed Lens (IPC325SB-DF28K-I0)
- Regular price
- $519.00
-
8MP 4K UltraHD Wide Angle Dual Lens Weatherproof 24/7 Color Bullet IP Security Camera with 2 x 4.0mm Fixed Lenses and 2-Way Audio (U1-8MP-CWL)

Translation missing: en.products.product.sku: SKU# 3772NB
Vendor:Uniview NB8MP 4K UltraHD Wide Angle Dual Lens Weatherproof 24/7 Color Bullet IP Security Camera with 2 x 4.0mm Fixed Lenses and 2-Way Audio (U1-8MP-CWL)
- Regular price
- $779.00
- Sale price
- $779.00
- Regular price
-
$969.00
-
UNV 4MP Dark Grey IP Weatherproof IR Turret Camera with Built-in Mic and 2.8mm Fixed Lens (IPC3614SR-ADF28KM-H-BK)

Translation missing: en.products.product.sku: SKU# 3500
Vendor:UniviewUNV 4MP Dark Grey IP Weatherproof IR Turret Camera with Built-in Mic and 2.8mm Fixed Lens (IPC3614SR-ADF28KM-H-BK)
- Regular price
- $369.00
-
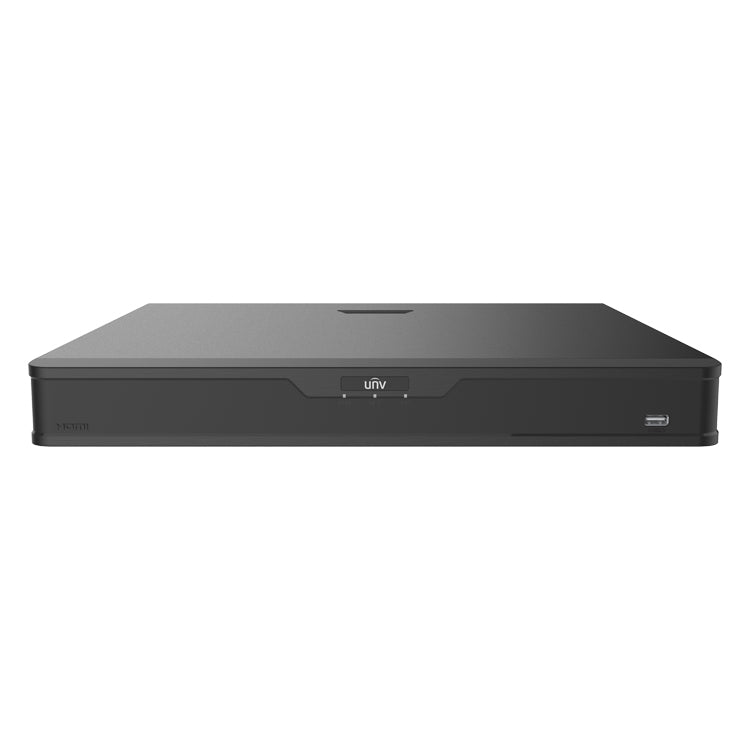
UNV 8-Channel 12MP NDAA Compliant PoE NVR with 2 SATA HDD Bays (NVR302-08B-P8-IQ)

Translation missing: en.products.product.sku: SKU# 3868
Vendor:UniviewUNV 8-Channel 12MP NDAA Compliant PoE NVR with 2 SATA HDD Bays (NVR302-08B-P8-IQ)
- Regular price
- $859.00
-
UNV 16MP UltraHD 16-Channel Network Video Recorder with 2 Hard Drive Bays and Intelligent Video Analytics (NVR502-16B-P16-IQ)

Translation missing: en.products.product.sku: SKU# 3803
Vendor:UniviewUNV 16MP UltraHD 16-Channel Network Video Recorder with 2 Hard Drive Bays and Intelligent Video Analytics (NVR502-16B-P16-IQ)
- Regular price
- $1,639.00
-
UNV 16-Channel 12MP NDAA Compliant PoE NVR with 2 SATA HDD Bays (NVR302-16B-P16-IQ)
Translation missing: en.products.product.sku: SKU# 3869
Vendor:UniviewUNV 16-Channel 12MP NDAA Compliant PoE NVR with 2 SATA HDD Bays (NVR302-16B-P16-IQ)
- Regular price
- $1,119.00
-
UNV 4K Ultra HD PoE 4-Channel NVR with 1 SATA HDD Bay, NDAA Compliant IP Network Video Recorder (NVR501-04B-P4)

Translation missing: en.products.product.sku: SKU# 3625
Vendor:UniviewUNV 4K Ultra HD PoE 4-Channel NVR with 1 SATA HDD Bay, NDAA Compliant IP Network Video Recorder (NVR501-04B-P4)
- Regular price
- $529.00
-
UNV 4K 16-Channel Hybrid XVR With 16 BNC, 8 IP, with 2 SATA HDD Bays, NDAA Compliant (XVR302-16Q3)

Translation missing: en.products.product.sku: SKU# 3663
Vendor:UniviewUNV 4K 16-Channel Hybrid XVR With 16 BNC, 8 IP, with 2 SATA HDD Bays, NDAA Compliant (XVR302-16Q3)
- Regular price
- $709.00
-
UNV 4K UltraHD Hybrid 8-Channel Digital Video Recorder with 4 Additional IP Inputs and 1 SATA Hard Drive Bay (XVR301-08Q3)

Translation missing: en.products.product.sku: SKU# 3677
Vendor:UniviewUNV 4K UltraHD Hybrid 8-Channel Digital Video Recorder with 4 Additional IP Inputs and 1 SATA Hard Drive Bay (XVR301-08Q3)
- Regular price
- $339.00
-
UNV 16MP UltraHD 32-Channel Network Video Recorder with 4 Hard Drive Bays, 16 PoE Ports, and Intelligent Video Analytics (NVR504-32B-P16-IQ)

Translation missing: en.products.product.sku: SKU# 3804
Vendor:UniviewUNV 16MP UltraHD 32-Channel Network Video Recorder with 4 Hard Drive Bays, 16 PoE Ports, and Intelligent Video Analytics (NVR504-32B-P16-IQ)
- Regular price
- $2,279.00
-
L-Series 4K Ultra HD 8-Channel NDAA-Compliant IP Network Video Recorder with 1 SATA Hard Drive Bay (NVR-1B8L)

Translation missing: en.products.product.sku: SKU# 3932
Vendor:L-SeriesL-Series 4K Ultra HD 8-Channel NDAA-Compliant IP Network Video Recorder with 1 SATA Hard Drive Bay (NVR-1B8L)
- Regular price
- $239.99
- Sale price
- $239.99
- Regular price
-
$249.99
-
UNV 16MP UltraHD 8-Channel Network Video Recorder with 2 Hard Drive Bays and Intelligent Video Analytics (NVR502-08B-P8-IQ)
Translation missing: en.products.product.sku: SKU# 3802
Vendor:UniviewUNV 16MP UltraHD 8-Channel Network Video Recorder with 2 Hard Drive Bays and Intelligent Video Analytics (NVR502-08B-P8-IQ)
- Regular price
- $1,399.00
-
UNV 16-Channel 16MP UltraHD NDAA Compliant PoE NVR with 2 SATA HDD Bays (NVR502-16B-P16)

Translation missing: en.products.product.sku: SKU# 3785
Vendor:UniviewUNV 16-Channel 16MP UltraHD NDAA Compliant PoE NVR with 2 SATA HDD Bays (NVR502-16B-P16)
- Regular price
- $1,049.00
- Sale price
- $1,049.00
- Regular price
-
$1,309.00
-
UNV 12MP 4 Channel Network Video Recorder with AI Facial Recognition, 4 PoE, 1 HDD (NVR301-04B-P4-IQ)

Translation missing: en.products.product.sku: SKU# 3867
Vendor:UniviewUNV 12MP 4 Channel Network Video Recorder with AI Facial Recognition, 4 PoE, 1 HDD (NVR301-04B-P4-IQ)
- Regular price
- $509.00
-
UNV 32-Channel 16MP UltraHD NDAA Compliant PoE NVR with 16 PoE Ports and 4 SATA HDD Bays (NVR504-32B-P16)

Translation missing: en.products.product.sku: SKU# 3784
Vendor:UniviewUNV 32-Channel 16MP UltraHD NDAA Compliant PoE NVR with 16 PoE Ports and 4 SATA HDD Bays (NVR504-32B-P16)
- Regular price
- $1,579.00
- Sale price
- $1,579.00
- Regular price
-
$1,969.00
-
Uniarch by Uniview 8MP NDAA-Compliant 8-Channel NVR with a SATA HDD Bay (NVR-108E2-P8)

Translation missing: en.products.product.sku: SKU# 3501
Vendor:UniarchUniarch by Uniview 8MP NDAA-Compliant 8-Channel NVR with a SATA HDD Bay (NVR-108E2-P8)
- Regular price
- $355.00
- Sale price
- $355.00
- Regular price
-
-
Uniarch by Uniview 4K UltraHD 8MP NDAA-Compliant 16-Channel IP Network Video Recorder with 1 SATA Bay (NVR-116E2)

Translation missing: en.products.product.sku: SKU# 3403
Vendor:UniarchUniarch by Uniview 4K UltraHD 8MP NDAA-Compliant 16-Channel IP Network Video Recorder with 1 SATA Bay (NVR-116E2)
- Regular price
- $188.00
- Sale price
- $188.00
- Regular price
-
-
UNV 8-Channel 16MP UltraHD NDAA Compliant PoE NVR with 2 SATA HDD Bays (NVR502-08B-P8)
Translation missing: en.products.product.sku: SKU# 3783
Vendor:UniviewUNV 8-Channel 16MP UltraHD NDAA Compliant PoE NVR with 2 SATA HDD Bays (NVR502-08B-P8)
- Regular price
- $889.00
- Sale price
- $889.00
- Regular price
-
$1,109.00
-
Uniarch by Uniview 4K UltraHD 8MP NDAA-Compliant 4-Channel IP Network Video Recorder with 4 PoE Ports and 1 SATA Hard Drive Bay (NVR-104E2-P4)

Translation missing: en.products.product.sku: SKU# 3541
Vendor:UniarchUniarch by Uniview 4K UltraHD 8MP NDAA-Compliant 4-Channel IP Network Video Recorder with 4 PoE Ports and 1 SATA Hard Drive Bay (NVR-104E2-P4)
- Regular price
- $237.00
- Sale price
- $237.00
- Regular price
-
-
L-Series 4K Ultra HD 16-Channel NDAA-Compliant IP Network Video Recorder with 2 SATA Hard Drive Bays (NVR-2B16L)

Translation missing: en.products.product.sku: SKU# 3933
Vendor:L-SeriesL-Series 4K Ultra HD 16-Channel NDAA-Compliant IP Network Video Recorder with 2 SATA Hard Drive Bays (NVR-2B16L)
- Regular price
- $339.99
- Sale price
- $339.99
- Regular price
-
$349.99
-
16-Channel 12MP NDAA Compliant PoE NVR with 2 SATA HDD Bays (U2-NVR302-16IQ)
Translation missing: en.products.product.sku: SKU# 3869NB
Vendor:Uniview NB16-Channel 12MP NDAA Compliant PoE NVR with 2 SATA HDD Bays (U2-NVR302-16IQ)
- Regular price
- $1,119.00
-
8-Channel 12MP NDAA Compliant PoE NVR with 2 SATA HDD Bays (U2-NVR302-08IQ)

Translation missing: en.products.product.sku: SKU# 3868NB
Vendor:Uniview NB8-Channel 12MP NDAA Compliant PoE NVR with 2 SATA HDD Bays (U2-NVR302-08IQ)
- Regular price
- $859.00
-
UNV 4K UltraHD NDAA-Compliant 16-Channel Hybrid Digital Video Recorder with support for TVI, AHD, CVI, CVBS, and 16 Additional IP Inputs (XVR302-16U3)

Translation missing: en.products.product.sku: SKU# 3787
Vendor:UniviewUNV 4K UltraHD NDAA-Compliant 16-Channel Hybrid Digital Video Recorder with support for TVI, AHD, CVI, CVBS, and 16 Additional IP Inputs (XVR302-16U3)
- Regular price
- $909.00
- Sale price
- $909.00
- Regular price
-
$1,129.00
-
32MP UltraHD 64-Channel Intelligent IQ Network Video Recorder with 8 Hard Drive Bays and RAID Support (NVR508-64-E-IQ)

Translation missing: en.products.product.sku: SKU# 3842
Vendor:Uniview32MP UltraHD 64-Channel Intelligent IQ Network Video Recorder with 8 Hard Drive Bays and RAID Support (NVR508-64-E-IQ)
- Regular price
- $5,689.00
-
UNV 4K UltraHD 32-Channel Hybrid XVR Supporting 32 TVI/AHD/CVI/CVBS Inputs & 4 Additional IP Inputs (XVR302-32Q3)

Translation missing: en.products.product.sku: SKU# 3708
Vendor:UniviewUNV 4K UltraHD 32-Channel Hybrid XVR Supporting 32 TVI/AHD/CVI/CVBS Inputs & 4 Additional IP Inputs (XVR302-32Q3)
- Regular price
- $1,289.00
-
L-Series 4K Ultra HD 4-Channel NDAA-Compliant IP Network Video Recorder with 1 SATA Hard Drive Bay (NVR-1B4L)

Translation missing: en.products.product.sku: SKU# 3935
Vendor:L-SeriesL-Series 4K Ultra HD 4-Channel NDAA-Compliant IP Network Video Recorder with 1 SATA Hard Drive Bay (NVR-1B4L)
- Regular price
- $199.99
- Sale price
- $199.99
- Regular price
-
$209.99
-
32-Channel 16MP UltraHD NDAA Compliant PoE NVR with 16 PoE Ports and 4 SATA HDD Bays (U2-NVRB-32)

Translation missing: en.products.product.sku: SKU# 3784NB
Vendor:Uniview NB32-Channel 16MP UltraHD NDAA Compliant PoE NVR with 16 PoE Ports and 4 SATA HDD Bays (U2-NVRB-32)
- Regular price
- $1,969.00
-
12MP 4 Channel Network Video Recorder with AI Facial Recognition, 4 PoE, 1 HDD (U-NVRIQ-4P)

Translation missing: en.products.product.sku: SKU# 3867NB
Vendor:Uniview NB12MP 4 Channel Network Video Recorder with AI Facial Recognition, 4 PoE, 1 HDD (U-NVRIQ-4P)
- Regular price
- $509.00
-
L-Series 4K Ultra HD 32-Channel NDAA-Compliant IP Network Video Recorder with 4 SATA Hard Drive Bays (NVR-4B32L)

Translation missing: en.products.product.sku: SKU# 3934
Vendor:L-SeriesL-Series 4K Ultra HD 32-Channel NDAA-Compliant IP Network Video Recorder with 4 SATA Hard Drive Bays (NVR-4B32L)
- Regular price
- $499.99
- Sale price
- $499.99
- Regular price
-
$509.99
-
UNV 32-Channel 16MP UltraHD NDAA Compliant NVR with 4 SATA HDD Bays (NVR504-32B)

Translation missing: en.products.product.sku: SKU# 3952
Vendor:UniviewUNV 32-Channel 16MP UltraHD NDAA Compliant NVR with 4 SATA HDD Bays (NVR504-32B)
- Regular price
- $1,119.00
- Sale price
- $1,119.00
- Regular price
-
$1,399.00
-
16MP UltraHD 16-Channel Network Video Recorder with 2 Hard Drive Bays and Intelligent Video Analytics (U2-NVRIQ-16)

Translation missing: en.products.product.sku: SKU# 3803NB
Vendor:Uniview NB16MP UltraHD 16-Channel Network Video Recorder with 2 Hard Drive Bays and Intelligent Video Analytics (U2-NVRIQ-16)
- Regular price
- $1,639.00
-
UNV 32MP UltraHD 64-Channel Network Video Recorder with 8 Hard Drive Bays and RAID Support (NVR508-64E-R)

Translation missing: en.products.product.sku: SKU# 3782
Vendor:UniviewUNV 32MP UltraHD 64-Channel Network Video Recorder with 8 Hard Drive Bays and RAID Support (NVR508-64E-R)
- Regular price
- $4,559.00
- Sale price
- $4,559.00
- Regular price
-
$5,689.00
-
UNV 4K UltraHD NDAA-Compliant 8-Channel Hybrid Digital Video Recorder with support for TVI, AHD, CVI, CVBS, and 8 Additional IP Inputs (XVR302-08U3)

Translation missing: en.products.product.sku: SKU# 3771
Vendor:UniviewUNV 4K UltraHD NDAA-Compliant 8-Channel Hybrid Digital Video Recorder with support for TVI, AHD, CVI, CVBS, and 8 Additional IP Inputs (XVR302-08U3)
- Regular price
- $569.00
- Sale price
- $569.00
- Regular price
-
$709.00
-
8-Channel 16MP UltraHD NDAA Compliant PoE NVR with 2 SATA HDD Bays (U2-NVRB-8)

Translation missing: en.products.product.sku: SKU# 3783NB
Vendor:Uniview NB8-Channel 16MP UltraHD NDAA Compliant PoE NVR with 2 SATA HDD Bays (U2-NVRB-8)
- Regular price
- $1,109.00
-
UNV 32MP UltraHD 32-Channel Intelligent IQ Network Video Recorder with 8 Hard Drive Bays and RAID Support (NVR508-32-E-IQ)
Translation missing: en.products.product.sku: SKU# 3841
Vendor:UniviewUNV 32MP UltraHD 32-Channel Intelligent IQ Network Video Recorder with 8 Hard Drive Bays and RAID Support (NVR508-32-E-IQ)
- Regular price
- $4,639.00
-
UNV 32 Channel 16MP Intelligent IQ NVR with 4 SATA HDD Bays (NVR504-32B-IQ)
Translation missing: en.products.product.sku: SKU# 3951
Vendor:UniviewUNV 32 Channel 16MP Intelligent IQ NVR with 4 SATA HDD Bays (NVR504-32B-IQ)
- Regular price
- $1,689.00
-
16-Channel 16MP UltraHD NDAA Compliant PoE NVR with 2 SATA HDD Bays (U2-NVRB-16)

Translation missing: en.products.product.sku: SKU# 3785NB
Vendor:Uniview NB16-Channel 16MP UltraHD NDAA Compliant PoE NVR with 2 SATA HDD Bays (U2-NVRB-16)
- Regular price
- $1,049.00
- Sale price
- $1,049.00
- Regular price
-
$1,309.00
-
16MP UltraHD 32-Channel Network Video Recorder with 4 Hard Drive Bays, 16 PoE Ports, and Intelligent Video Analytics (U2-NVRIQ-32)

Translation missing: en.products.product.sku: SKU# 3804NB
Vendor:Uniview NB16MP UltraHD 32-Channel Network Video Recorder with 4 Hard Drive Bays, 16 PoE Ports, and Intelligent Video Analytics (U2-NVRIQ-32)
- Regular price
- $1,809.00
-
16MP UltraHD 8-Channel Network Video Recorder with 2 Hard Drive Bays and Intelligent Video Analytics (U2-NVRIQ-8)

Translation missing: en.products.product.sku: SKU# 3802NB
Vendor:Uniview NB16MP UltraHD 8-Channel Network Video Recorder with 2 Hard Drive Bays and Intelligent Video Analytics (U2-NVRIQ-8)
- Regular price
- $1,399.00
-
32MP UltraHD 64-Channel Intelligent IQ Network Video Recorder with 8 Hard Drive Bays and RAID Support (U2-NVR-E-64IQ)

Translation missing: en.products.product.sku: SKU# 3842NB
Vendor:Uniview NB32MP UltraHD 64-Channel Intelligent IQ Network Video Recorder with 8 Hard Drive Bays and RAID Support (U2-NVR-E-64IQ)
- Regular price
- $5,689.00
-
32MP UltraHD 32-Channel Network Video Recorder with 8 Hard Drive Bays and RAID Support (NVR508-32E-R)

Translation missing: en.products.product.sku: SKU# 3781
Vendor:Uniview32MP UltraHD 32-Channel Network Video Recorder with 8 Hard Drive Bays and RAID Support (NVR508-32E-R)
- Regular price
- $4,639.00
-
Hanwha Wisenet A series 4K NDAA Compliant 4-Channel IP Network Video Recorder with 1 SATA Hard Drive Bay (ARN-410S)

Translation missing: en.products.product.sku: SKU# 3631
Vendor:HanwhaHanwha Wisenet A series 4K NDAA Compliant 4-Channel IP Network Video Recorder with 1 SATA Hard Drive Bay (ARN-410S)
- Regular price
- $218.00
- Sale price
- $218.00
- Regular price
-
-
UNV 12MP 32-Channel NDAA-Compliant IP Network Video Recorder with 8 SATA Hard Drive Bays and RAID Data Protection (NVR308-32X)

Translation missing: en.products.product.sku: SKU# 3328
Vendor:UniviewUNV 12MP 32-Channel NDAA-Compliant IP Network Video Recorder with 8 SATA Hard Drive Bays and RAID Data Protection (NVR308-32X)
- Regular price
- $4,309.00
-
Alarm.com 16-Channel 4MP Commercial Stream Video Recorder (ADC-CSVR2016P-0X0TB)

Translation missing: en.products.product.sku: SKU# 3903
Vendor:Alarm.comAlarm.com 16-Channel 4MP Commercial Stream Video Recorder (ADC-CSVR2016P-0X0TB)
-
12MP 32-Channel NDAA-Compliant IP Network Video Recorder with 8 SATA Hard Drive Bays and RAID Data Protection (U-NVR-32X)

Translation missing: en.products.product.sku: SKU# 3328NB
Vendor:Uniview NB12MP 32-Channel NDAA-Compliant IP Network Video Recorder with 8 SATA Hard Drive Bays and RAID Data Protection (U-NVR-32X)
- Regular price
- $4,309.00
-
12MP 16-Channel NDAA-Compliant IP Network Video Recorder with 4 SATA Hard Drive Bays and RAID Data Protection (U-NVR-16X)

Translation missing: en.products.product.sku: SKU# 3329NB
Vendor:Uniview NB12MP 16-Channel NDAA-Compliant IP Network Video Recorder with 4 SATA Hard Drive Bays and RAID Data Protection (U-NVR-16X)
- Regular price
- $1,879.00
- Sale price
- $1,879.00
- Regular price
-
-
Hanwha Wisenet A series 4K NDAA Compliant 16-Channel IP Network Video Recorder with 2 SATA Hard Drive Bays (ARN-1610S)

Translation missing: en.products.product.sku: SKU# 3633
Vendor:HanwhaHanwha Wisenet A series 4K NDAA Compliant 16-Channel IP Network Video Recorder with 2 SATA Hard Drive Bays (ARN-1610S)
- Regular price
- $600.00
- Sale price
- $600.00
- Regular price
-
-
UNV 32MP 128-Channel Network Video Recorder with 16 Hard Drive Bays (NVR516-128E-R)

Translation missing: en.products.product.sku: SKU# 3962
Vendor:UniviewUNV 32MP 128-Channel Network Video Recorder with 16 Hard Drive Bays (NVR516-128E-R)
- Regular price
- $8,139.00
-
Hanwha Wisenet A series 4K NDAA 8-Channel IP Network Video Recorder with 1 SATA Hard Drive Bay (ARN-810S)

Translation missing: en.products.product.sku: SKU# 3632
Vendor:HanwhaHanwha Wisenet A series 4K NDAA 8-Channel IP Network Video Recorder with 1 SATA Hard Drive Bay (ARN-810S)
- Regular price
- $430.00
- Sale price
- $430.00
- Regular price
-
-
32MP UltraHD 32-Channel Intelligent IQ Network Video Recorder with 8 Hard Drive Bays and RAID Support (U2-NVR-E-32IQ)

Translation missing: en.products.product.sku: SKU# 3841NB
Vendor:Uniview NB32MP UltraHD 32-Channel Intelligent IQ Network Video Recorder with 8 Hard Drive Bays and RAID Support (U2-NVR-E-32IQ)
- Regular price
- $4,639.00
-
Alarm.com 8-Channel 4MP Commercial Stream Video Recorder (ADC-CSVR2008P-0X0TB)

Translation missing: en.products.product.sku: SKU# 3902
Vendor:Alarm.comAlarm.com 8-Channel 4MP Commercial Stream Video Recorder (ADC-CSVR2008P-0X0TB)
-
32 Channel 16MP Intelligent IQ NVR with 4 SATA HDD Bays (NVR504-32B-IQ-NB)

Translation missing: en.products.product.sku: SKU# 3951NB
Vendor:Uniview NB32 Channel 16MP Intelligent IQ NVR with 4 SATA HDD Bays (NVR504-32B-IQ-NB)
- Regular price
- $1,689.00
-
UNV 12MP UltraHD 8-Channel Network Video Recorder with 1 Hard Drive Bay and Intelligent Video Analytics (NVR301-08B-P8-IQ)

Translation missing: en.products.product.sku: SKU# 3941
Vendor:UniviewUNV 12MP UltraHD 8-Channel Network Video Recorder with 1 Hard Drive Bay and Intelligent Video Analytics (NVR301-08B-P8-IQ)
- Regular price
- $619.00
-
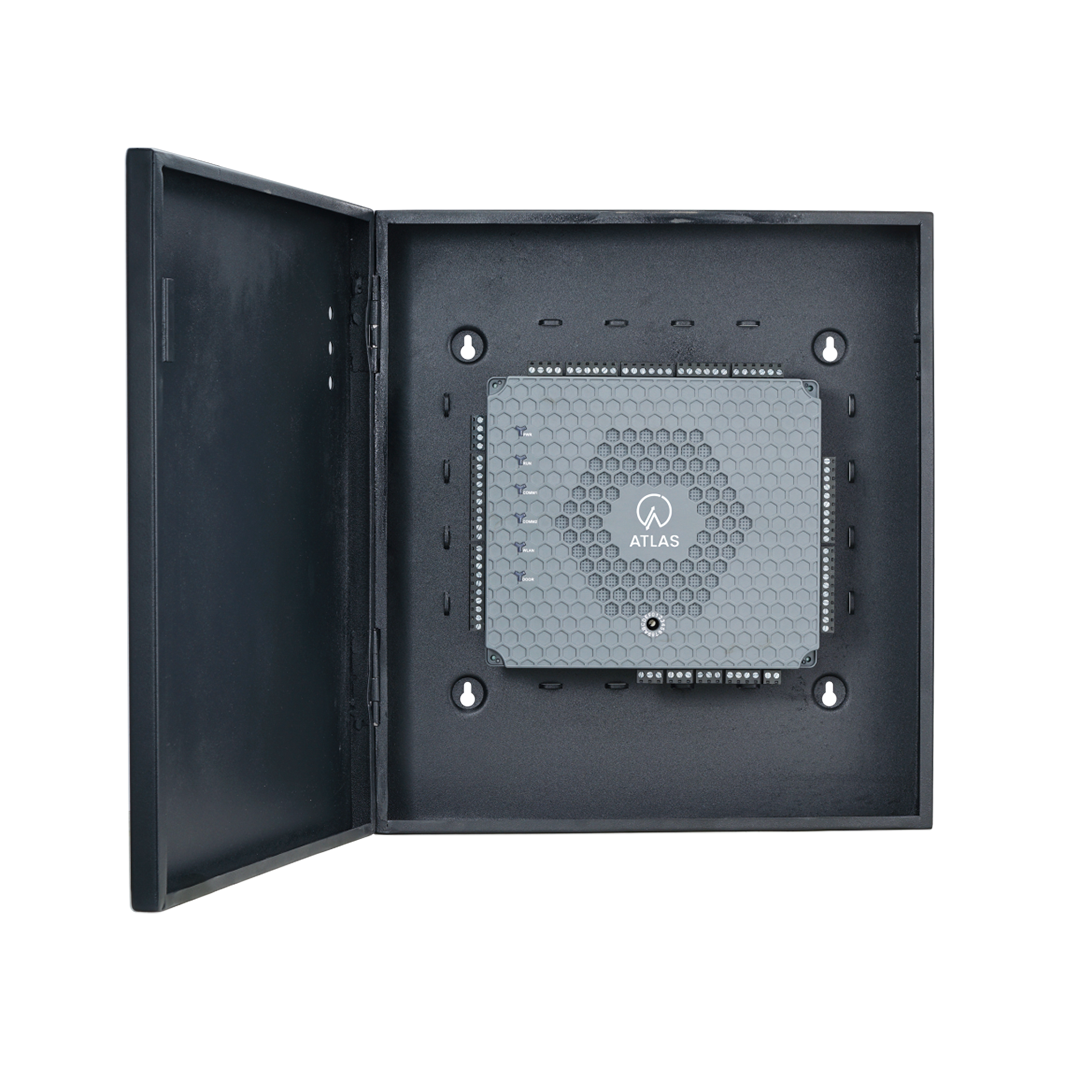
ZKTeco USA Atlas Bio 460 Bundle - 4 Door Access Control Panel with Built-in Web Application (No Software Required) - Includes Cabinet & Power Supply (Atlas460-bun)

Translation missing: en.products.product.sku: SKU# 3808
Vendor:ZKTeco USAZKTeco USA Atlas Bio 460 Bundle - 4 Door Access Control Panel with Built-in Web Application (No Software Required) - Includes Cabinet & Power Supply (Atlas460-bun)
- Regular price
- $1,563.00
- Sale price
- $1,563.00
- Regular price
-
-
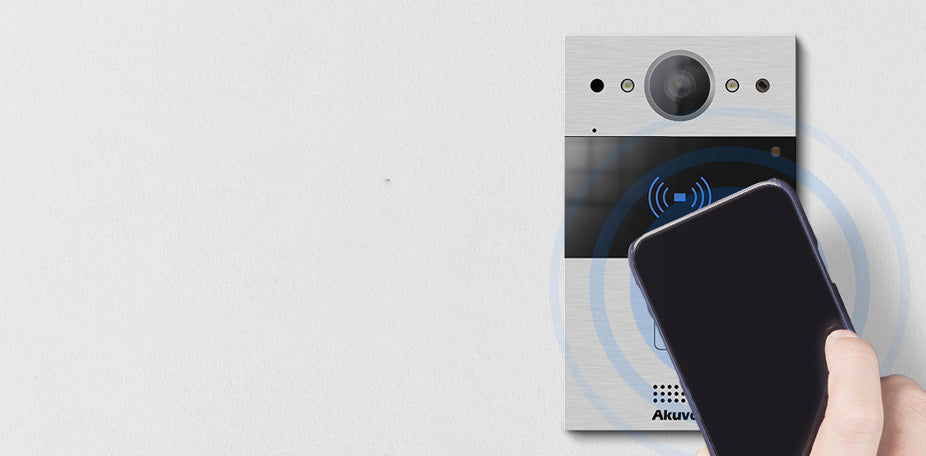
Akuvox Palm-Sized Doorphone Intercom and Proximity Card Reader With a Built-In 2MP Camera (R20A)

Translation missing: en.products.product.sku: SKU# 3354
Vendor:AkuvoxAkuvox Palm-Sized Doorphone Intercom and Proximity Card Reader With a Built-In 2MP Camera (R20A)
-
PDK Red CloudNode with Built-in Red Single Door Controller with Ethernet Connectivity (PDK-RCNE)

Translation missing: en.products.product.sku: SKU# 3587
Vendor:PDKPDK Red CloudNode with Built-in Red Single Door Controller with Ethernet Connectivity (PDK-RCNE)
-
Akuvox Slim Doorphone Intercom and Proximity Card Reader with Bluetooth, Wi-Fi, and a Built-In 2MP Camera (E12W)

Translation missing: en.products.product.sku: SKU# 3367
Vendor:AkuvoxAkuvox Slim Doorphone Intercom and Proximity Card Reader with Bluetooth, Wi-Fi, and a Built-In 2MP Camera (E12W)
-
PDK Red 4 Four-Door Access Control Panel with Ethernet Connectivity (PDK-R4)

Translation missing: en.products.product.sku: SKU# 3590
Vendor:PDKPDK Red 4 Four-Door Access Control Panel with Ethernet Connectivity (PDK-R4)
-
PDK Red High-Security One-Door Access Control Panel with Ethernet Connectivity (PDK-R1)

Translation missing: en.products.product.sku: SKU# 3608
Vendor:PDKPDK Red High-Security One-Door Access Control Panel with Ethernet Connectivity (PDK-R1)
-
ZKTeco USA Atlas Bio 260 Bundle - 2 Door Access Control Panel with Built-in Web Application (No Software Required) - Includes Cabinet & Power Supply (Atlas260-bun)
Translation missing: en.products.product.sku: SKU# 3819
Vendor:ZKTeco USAZKTeco USA Atlas Bio 260 Bundle - 2 Door Access Control Panel with Built-in Web Application (No Software Required) - Includes Cabinet & Power Supply (Atlas260-bun)
- Regular price
- $1,288.00
- Sale price
- $1,288.00
- Regular price
-
-
ZKTeco USA Atlas160 Bio Series Single Door Access Control Panel Bundle with Metal Enclosure and Power Supply (Atlas160-BUN)

Translation missing: en.products.product.sku: SKU# 3713
Vendor:ZKTeco USAZKTeco USA Atlas160 Bio Series Single Door Access Control Panel Bundle with Metal Enclosure and Power Supply (Atlas160-BUN)
- Regular price
- $1,088.00
- Sale price
- $1,088.00
- Regular price
-
-
ZKTeco USA Atlas 200 Bundle - Two Door Access Control panel with Built-in Web Application (No Software Required) - Includes Cabinet & Power Supply (Atlas200 BUN)

Translation missing: en.products.product.sku: SKU# 2061
Vendor:ZKTeco USAZKTeco USA Atlas 200 Bundle - Two Door Access Control panel with Built-in Web Application (No Software Required) - Includes Cabinet & Power Supply (Atlas200 BUN)
- Regular price
- $1,050.00
- Sale price
- $1,050.00
- Regular price
-
$1,360.00
-
PDK Red CloudNode with Built-in Red Single Door Controller with Ethernet + Wireless Connectivity (PDK-RCNEW)

Translation missing: en.products.product.sku: SKU# 3588
Vendor:PDKPDK Red CloudNode with Built-in Red Single Door Controller with Ethernet + Wireless Connectivity (PDK-RCNEW)
-
Akuvox Indoor Android Monitor With Built-In Wi-fi, Bluetooth, and a 10" LCD Touch Screen and a 1MP Built-In Camera (C319A)

Translation missing: en.products.product.sku: SKU# 3357
Vendor:AkuvoxAkuvox Indoor Android Monitor With Built-In Wi-fi, Bluetooth, and a 10" LCD Touch Screen and a 1MP Built-In Camera (C319A)
-
Akuvox Palm-Size Doorphone Certified for Outdoor Usage (R20K)

Translation missing: en.products.product.sku: SKU# 3700
Vendor:AkuvoxAkuvox Palm-Size Doorphone Certified for Outdoor Usage (R20K)
-
ZKTeco USA Atlas460 4 Door Biometric Access Control Panel with Built-in Web Application - No software required

Translation missing: en.products.product.sku: SKU# 2042
Vendor:ZKTeco USAZKTeco USA Atlas460 4 Door Biometric Access Control Panel with Built-in Web Application - No software required
- Regular price
- $1,288.00
- Sale price
- $1,288.00
- Regular price
-
-
PDK Red 2 Two-Door Access Control Panel with Ethernet Connectivity (PDK-R2)

Translation missing: en.products.product.sku: SKU# 3589
Vendor:PDKPDK Red 2 Two-Door Access Control Panel with Ethernet Connectivity (PDK-R2)
-
ZKTeco USA Atlas160 Access Control Panel for 1 Door with Biometric Compatibility & Built-In Interface

Translation missing: en.products.product.sku: SKU# 2040
Vendor:ZKTeco USAZKTeco USA Atlas160 Access Control Panel for 1 Door with Biometric Compatibility & Built-In Interface
- Regular price
- $813.00
- Sale price
- $813.00
- Regular price
-
-
Akuvox Luxury Indoor Android Monitor With Built-in Wi-Fi, Bluetooth, and a 8" LCD Touch Screen (S563W)

Translation missing: en.products.product.sku: SKU# 3358
Vendor:AkuvoxAkuvox Luxury Indoor Android Monitor With Built-in Wi-Fi, Bluetooth, and a 8" LCD Touch Screen (S563W)
-
PDK Red Eight-Door Access Control Panel with Ethernet Connectivity (PDK-R8)

Translation missing: en.products.product.sku: SKU# 3611
Vendor:PDKPDK Red Eight-Door Access Control Panel with Ethernet Connectivity (PDK-R8)
-
ZKTeco USA Atlas260 2 Door Biometric Access Control Panel with Built-in Web Application - No software required
Translation missing: en.products.product.sku: SKU# 2041
Vendor:ZKTeco USAZKTeco USA Atlas260 2 Door Biometric Access Control Panel with Built-in Web Application - No software required
- Regular price
- $1,013.00
- Sale price
- $1,013.00
- Regular price
-
-
PDK Red Pedestal Outdoor Wi-Fi Access Control Panel (PDK-RPW)

Translation missing: en.products.product.sku: SKU# 3610
Vendor:PDKPDK Red Pedestal Outdoor Wi-Fi Access Control Panel (PDK-RPW)
-
Akuvox Smart Doorphone Intercom and Proximity Card Reader With a Built-In 3MP Camera for Facial Recognition and 7" LCD Display (R29S)

Translation missing: en.products.product.sku: SKU# 3355
Vendor:AkuvoxAkuvox Smart Doorphone Intercom and Proximity Card Reader With a Built-In 3MP Camera for Facial Recognition and 7" LCD Display (R29S)
-
Akuvox Vandal-Resistant Door Phone Smart Intercom with a Built-In 2MP Camera for High-End Residential and Buildings (X912)

Translation missing: en.products.product.sku: SKU# 3485
Vendor:AkuvoxAkuvox Vandal-Resistant Door Phone Smart Intercom with a Built-In 2MP Camera for High-End Residential and Buildings (X912)
-
Akuvox Square Access Control Terminal with Keypad, Brackets Included (A02S)

Translation missing: en.products.product.sku: SKU# 3484
Vendor:AkuvoxAkuvox Square Access Control Terminal with Keypad, Brackets Included (A02S)
-
Alarm.com Aero X1100 Four Door Controller & Power Kit (ADC-AC-X1100-4PSE)

Translation missing: en.products.product.sku: SKU# 3253
Vendor:Alarm.comAlarm.com Aero X1100 Four Door Controller & Power Kit (ADC-AC-X1100-4PSE)
-
4 Door C3-Pro Advanced Access Control Bundle (US-C3-400-PRO-BUN)

Translation missing: en.products.product.sku: SKU# 3123
Vendor:ZKTeco USA4 Door C3-Pro Advanced Access Control Bundle (US-C3-400-PRO-BUN)
-
Akuvox Bluetooth + RFID Access Control Terminal, Bracket Included (A03S)

Translation missing: en.products.product.sku: SKU# 3483
Vendor:AkuvoxAkuvox Bluetooth + RFID Access Control Terminal, Bracket Included (A03S)
-
PDK Red Gate Controller Outdoor Access Control Panel with Ethernet Connectivity (PDK-RGE)

Translation missing: en.products.product.sku: SKU# 3614
Vendor:PDKPDK Red Gate Controller Outdoor Access Control Panel with Ethernet Connectivity (PDK-RGE)
-
Alarm.com Aero X1100 Two Door Controller & Power Kit (ADC-AC-X1100-2PSE)

Translation missing: en.products.product.sku: SKU# 3252
Vendor:Alarm.comAlarm.com Aero X1100 Two Door Controller & Power Kit (ADC-AC-X1100-2PSE)
-
Akuvox Premium SIP Indoor Monitor with 8-inch Display (S563)

Translation missing: en.products.product.sku: SKU# 3966
Vendor:AkuvoxAkuvox Premium SIP Indoor Monitor with 8-inch Display (S563)
-
Alarm.com Aero Door/Reader Two Door Access Control Expansion Module (ADC-AC-X100)

Translation missing: en.products.product.sku: SKU# 3255
Vendor:Alarm.comAlarm.com Aero Door/Reader Two Door Access Control Expansion Module (ADC-AC-X100)
-
Akuvox 10" Linux SIP Video Indoor Monitor (S565) (White)

Translation missing: en.products.product.sku: SKU# 3967
Vendor:AkuvoxAkuvox 10" Linux SIP Video Indoor Monitor (S565) (White)
-
Akuvox 10" Linux SIP Video Indoor Monitor (S565) (Black)

Translation missing: en.products.product.sku: SKU# 3968
Vendor:AkuvoxAkuvox 10" Linux SIP Video Indoor Monitor (S565) (Black)
-
Akuvox Palm-Size 2MP Video Intercom Door Phone (R20A-2)

Translation missing: en.products.product.sku: SKU# 3976
Vendor:AkuvoxAkuvox Palm-Size 2MP Video Intercom Door Phone (R20A-2)
-
Akuvox Smart Intercom 2MP Video Door Phone (E12S-2)

Translation missing: en.products.product.sku: SKU# 3977
Vendor:AkuvoxAkuvox Smart Intercom 2MP Video Door Phone (E12S-2)
-
1 Door C3-Pro Advanced Access Control Bundle (US-C3-100-PRO-BUN)

Translation missing: en.products.product.sku: SKU# 3121
Vendor:ZKTeco USA1 Door C3-Pro Advanced Access Control Bundle (US-C3-100-PRO-BUN)
-
Akuvox Android 5MP Video Door Phone with 10-inch Display (S539)

Translation missing: en.products.product.sku: SKU# 3975
Vendor:AkuvoxAkuvox Android 5MP Video Door Phone with 10-inch Display (S539)
-
Suprema CoreStation Intelligent Biometric Door Controller (CS-40)

Translation missing: en.products.product.sku: SKU# 3944
Vendor:SupremaSuprema CoreStation Intelligent Biometric Door Controller (CS-40)
-
Alarm.com Aero Intelligent Access Control Two Door Controller (ADC-AC-X1100)

Translation missing: en.products.product.sku: SKU# 3254
Vendor:Alarm.comAlarm.com Aero Intelligent Access Control Two Door Controller (ADC-AC-X1100)
-
Akuvox Weatherproof SIP 2MP PoE Powered Video Door Phone w/ Single Button Call Button & 2-Way Audio (E13S)

Translation missing: en.products.product.sku: SKU# 3972
Vendor:AkuvoxAkuvox Weatherproof SIP 2MP PoE Powered Video Door Phone w/ Single Button Call Button & 2-Way Audio (E13S)
-
Akuvox Weatherproof Single-Button SIP Dual Lens Video Door Phone Smart Intercom w/ 5MP Main Camera + 2MP Auxiliary Camera, Package Detection & 2-Way Audio (X910)

Translation missing: en.products.product.sku: SKU# 3971
Vendor:AkuvoxAkuvox Weatherproof Single-Button SIP Dual Lens Video Door Phone Smart Intercom w/ 5MP Main Camera + 2MP Auxiliary Camera, Package Detection & 2-Way Audio (X910)
-
Akuvox High-End Smart Door Phone with 5MP Main Camera With Built-In HDR Mode and Starlight and 2MP Auxiliary Camera and 8-inch Touchscreen Display for Luxury Buildings (X915S)

Translation missing: en.products.product.sku: SKU# 3973
Vendor:AkuvoxAkuvox High-End Smart Door Phone with 5MP Main Camera With Built-In HDR Mode and Starlight and 2MP Auxiliary Camera and 8-inch Touchscreen Display for Luxury Buildings (X915S)
-
Akuvox Android 13-inch Touchscreen Video Door Phone with 2MP Startlight Camera (X916)

Translation missing: en.products.product.sku: SKU# 3974
Vendor:AkuvoxAkuvox Android 13-inch Touchscreen Video Door Phone with 2MP Startlight Camera (X916)
-
PDK Red Pedestal Outdoor Access Control Panel with Ethernet Connectivity (PDK-RPE)

Translation missing: en.products.product.sku: SKU# 3615
Vendor:PDKPDK Red Pedestal Outdoor Access Control Panel with Ethernet Connectivity (PDK-RPE)
-
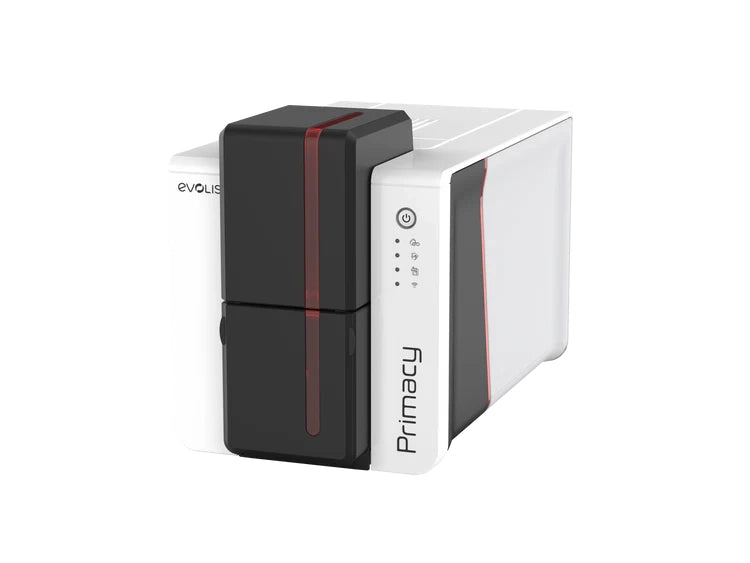
Evolis Primacy 2 ID Card Printer

Translation missing: en.products.product.sku: SKU# PE135-S
Vendor:EvolisEvolis Primacy 2 ID Card Printer
-
Dascom DC-2300 Card Printer

Translation missing: en.products.product.sku: SKU# DC-2300-YY
Vendor:DascomDascom DC-2300 Card Printer
-
Dascom DC-3300 Card Printer

Translation missing: en.products.product.sku: SKU# DC-3300-YY
Vendor:DascomDascom DC-3300 Card Printer
-
Evolis Avansia Card Printer

Translation missing: en.products.product.sku: SKU# EV-AV-YY
Vendor:EvolisEvolis Avansia Card Printer
-
Dascom DC-7600 and DC-5100 Card Printer

Translation missing: en.products.product.sku: SKU# DC-7600-5100-YY
Vendor:DascomDascom DC-7600 and DC-5100 Card Printer
-
Dascom DC-7600 Duplex Card Printer with Serial I/O Option for Laminator - 600 DPI

Translation missing: en.products.product.sku: SKU# 28.836.4342
Vendor:DascomDascom DC-7600 Duplex Card Printer with Serial I/O Option for Laminator - 600 DPI
-
Dascom DC-8600 Simplex Card Printer - 600 DPI

Translation missing: en.products.product.sku: SKU# 28.BFB.6516
Vendor:DascomDascom DC-8600 Simplex Card Printer - 600 DPI
-
Dascom DC-8600 Duplex Card Printer - 600 DPI
Translation missing: en.products.product.sku: SKU# 28.BFB.6519
Vendor:DascomDascom DC-8600 Duplex Card Printer - 600 DPI
-
Agilia Retransfer ID Card Printer

Translation missing: en.products.product.sku: SKU# AG1-0001
Vendor:EvolisAgilia Retransfer ID Card Printer
-
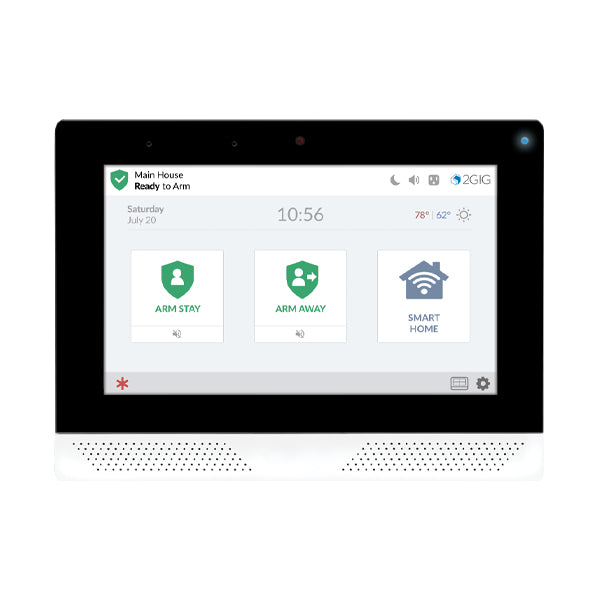
2GIG Edge Security & Smart Home System Control Panel with Built-in 4G LTE Verizon (2GIG-EDG-NA-VA)

Translation missing: en.products.product.sku: SKU# 3315
Vendor:2GIG2GIG Edge Security & Smart Home System Control Panel with Built-in 4G LTE Verizon (2GIG-EDG-NA-VA)
-
2GIG eSeries Wireless Thin Door / Window Sensor Contact (2GIG-DW10e)

Translation missing: en.products.product.sku: SKU# 2032
Vendor:2GIG2GIG eSeries Wireless Thin Door / Window Sensor Contact (2GIG-DW10e)
-
2GIG eSeries GC2e Security Alarm & Home Automation Control Panel (2GIG-GC2E-345)

Translation missing: en.products.product.sku: SKU# 2016
Vendor:2GIG2GIG eSeries GC2e Security Alarm & Home Automation Control Panel (2GIG-GC2E-345)
-
2GIG Wireless Thin Door / Window Sensor Contact (2GIG-DW10)

Translation missing: en.products.product.sku: SKU# 1299AL
Vendor:2GIG2GIG Wireless Thin Door / Window Sensor Contact (2GIG-DW10)
-
E+ Extended Range Indoor Door/Window Sensor (2GIG-DW10E-900)

Translation missing: en.products.product.sku: SKU# 3852
Vendor:2GIGE+ Extended Range Indoor Door/Window Sensor (2GIG-DW10E-900)
-
2GIG Edge Security & Smart Home System Control Panel with Built-in 4G LTE AT&T (2GIG-EDG-NA-AA)

Translation missing: en.products.product.sku: SKU# 3392
Vendor:2GIG2GIG Edge Security & Smart Home System Control Panel with Built-in 4G LTE AT&T (2GIG-EDG-NA-AA)
-
Wireless E+ Extended Range PIR Motion Detector (2GIG-PIR1E-900)

Translation missing: en.products.product.sku: SKU# 3849
Vendor:2GIGWireless E+ Extended Range PIR Motion Detector (2GIG-PIR1E-900)
-
2GIG Wireless Recessed Door & Window Sensor Contact (2GIG-DW20R)

Translation missing: en.products.product.sku: SKU# 1300AL
Vendor:2GIG2GIG Wireless Recessed Door & Window Sensor Contact (2GIG-DW20R)
-
2GIG eSeries Wireless Glass Break Detector (2GIG-GB1e)

Translation missing: en.products.product.sku: SKU# 2034
Vendor:2GIG2GIG eSeries Wireless Glass Break Detector (2GIG-GB1e)
-
2GIG eSeries Wireless Recessed Door & Window Sensor Contact (2GIG-DW20e)

Translation missing: en.products.product.sku: SKU# 2033
Vendor:2GIG2GIG eSeries Wireless Recessed Door & Window Sensor Contact (2GIG-DW20e)
-
2GIG Wireless Glass Break Detector (2GIG-GB1-345)

Translation missing: en.products.product.sku: SKU# 1302AL
Vendor:2GIG2GIG Wireless Glass Break Detector (2GIG-GB1-345)
-
2GIG Encrypted Fire Fighter Listener-Transmitter (2GIG-FF1E-345)

Translation missing: en.products.product.sku: SKU# 3109
Vendor:2GIG2GIG Encrypted Fire Fighter Listener-Transmitter (2GIG-FF1E-345)
-
2GIG Passive Infrared Wall-Mounted Motion Detector (2GIG-PIR100-345)

Translation missing: en.products.product.sku: SKU# 4009
Vendor:2GIG2GIG Passive Infrared Wall-Mounted Motion Detector (2GIG-PIR100-345)
-
E+ Extended Range Glass Break Detector (2GIG-GB1E-900)

Translation missing: en.products.product.sku: SKU# 3850
Vendor:2GIGE+ Extended Range Glass Break Detector (2GIG-GB1E-900)
-
E+ Extended Range Outdoor Wireless Contact Sensor (2GIG-DW30E-900)

Translation missing: en.products.product.sku: SKU# 3851
Vendor:2GIGE+ Extended Range Outdoor Wireless Contact Sensor (2GIG-DW30E-900)
-
2GIG eSeries Wireless Carbon Monoxide Alarm (2GIG-CO8e-345)

Translation missing: en.products.product.sku: SKU# 3780
Vendor:2GIG2GIG eSeries Wireless Carbon Monoxide Alarm (2GIG-CO8e-345)
-
2GIG Wireless Door/Window Contact Sensor (2GIG-DW100-345)

Translation missing: en.products.product.sku: SKU# 4001
Vendor:2GIG2GIG Wireless Door/Window Contact Sensor (2GIG-DW100-345)
-
Qolsys IQ Encrypted Mini Door and Window Sensor (QS1135-840)

Translation missing: en.products.product.sku: SKU# 3293
Vendor:QolsysQolsys IQ Encrypted Mini Door and Window Sensor (QS1135-840)
-
Qolsys IQ Remote IQR-PG Secondary Panel for IQ Panel 4, IQ Hub, IQ4 Hub, IQ Pro and IQ Panel 2 Plus

Translation missing: en.products.product.sku: SKU# 3292
Vendor:QolsysQolsys IQ Remote IQR-PG Secondary Panel for IQ Panel 4, IQ Hub, IQ4 Hub, IQ Pro and IQ Panel 2 Plus
-
2GIG Encrypted Water Leak Detector (2GIG-FT6E-345)

Translation missing: en.products.product.sku: SKU# 3106
Vendor:2GIG2GIG Encrypted Water Leak Detector (2GIG-FT6E-345)
-
2GIG Encrypted Tilt Sensor (2GIG-TILT1E-345)

Translation missing: en.products.product.sku: SKU# 2096
Vendor:2GIG2GIG Encrypted Tilt Sensor (2GIG-TILT1E-345)
-
Alarm.com Smart Thermostat (ADC-T2000)

Translation missing: en.products.product.sku: SKU# 1376AL
Vendor:Alarm.comAlarm.com Smart Thermostat (ADC-T2000)
-
HomeConnect 620 Keypad Z-Wave Plus Connected Smart Lock

Translation missing: en.products.product.sku: SKU# 3523
Vendor:KwiksetHomeConnect 620 Keypad Z-Wave Plus Connected Smart Lock
- Regular price
- $189.99
- Sale price
- $189.99
- Regular price
-
-
Alarm.com Smart Thermostat HD with Color Touchscreen (ADC-T40K-HD)

Translation missing: en.products.product.sku: SKU# 3572
Vendor:Alarm.comAlarm.com Smart Thermostat HD with Color Touchscreen (ADC-T40K-HD)
-
2GIG Wireless Carbon Monoxide Alarm (2GIG-C08-345)

Translation missing: en.products.product.sku: SKU# 3218
Vendor:2GIG2GIG Wireless Carbon Monoxide Alarm (2GIG-C08-345)
-
2GIG Outdoor Wireless Contact Sensor (2GIG-DW30-345)

Translation missing: en.products.product.sku: SKU# 1586AL
Vendor:2GIG2GIG Outdoor Wireless Contact Sensor (2GIG-DW30-345)
-
GoControl Z-Wave Smart Garage Door Remote Controller (GD00Z-8-GC)

Translation missing: en.products.product.sku: SKU# 1332AL
Vendor:GoControlGoControl Z-Wave Smart Garage Door Remote Controller (GD00Z-8-GC)
- Regular price
- $190.64
- Sale price
- $190.64
- Regular price
-
-
Kwikset Home Connect 620 Traditional Keypad Connected Smart Lock with Z-Wave Technology

Translation missing: en.products.product.sku: SKU# 3468
Vendor:KwiksetKwikset Home Connect 620 Traditional Keypad Connected Smart Lock with Z-Wave Technology
- Regular price
- $199.99
- Sale price
- $199.99
- Regular price
-
-
Qolsys IQ Motion-S Encrypted PIR True Motion Detection Sensor (QS1231-840)

Translation missing: en.products.product.sku: SKU# 3294
Vendor:QolsysQolsys IQ Motion-S Encrypted PIR True Motion Detection Sensor (QS1231-840)
-
2GIG Encrypted Flood and Temperature Sensor (2GIG-FT1E-345)

Translation missing: en.products.product.sku: SKU# 3105
Vendor:2GIG2GIG Encrypted Flood and Temperature Sensor (2GIG-FT1E-345)
-
Alarm.com Battery-Operated LTE Verizon Wireless Sensor (ADC-FLEX-100)

Translation missing: en.products.product.sku: SKU# 3360
Vendor:Alarm.comAlarm.com Battery-Operated LTE Verizon Wireless Sensor (ADC-FLEX-100)
-
Qolsys IQ Smoke Detector Sensor (QS5110-840)

Translation missing: en.products.product.sku: SKU# 3296
Vendor:QolsysQolsys IQ Smoke Detector Sensor (QS5110-840)
-
2GIG Wireless Tilt Sensor (2GIG-TILT1-345)

Translation missing: en.products.product.sku: SKU# 1308AL
Vendor:2GIG2GIG Wireless Tilt Sensor (2GIG-TILT1-345)
-
Kwikset Smartcode 912 Z-Wave 500 Door Lock with Keypad (SmartCode 912)

Translation missing: en.products.product.sku: SKU# 3520
Vendor:KwiksetKwikset Smartcode 912 Z-Wave 500 Door Lock with Keypad (SmartCode 912)
- Regular price
- $225.00
- Sale price
- $225.00
- Regular price
-
-
2GIG Z-Wave Thermostat (2GIG-STZ-1)

Translation missing: en.products.product.sku: SKU# 3216
Vendor:2GIG2GIG Z-Wave Thermostat (2GIG-STZ-1)
-
Qolsys IQ Panel 4 Security and Smart Home Platform with Improved Dual SRF PowerG & Legacy 319.5 MHz for Qolsys S-Line and Interlogix Sensors, with Built-In AT&T LTE 4G (IQP4004)

Translation missing: en.products.product.sku: SKU# 3661
Vendor:QolsysQolsys IQ Panel 4 Security and Smart Home Platform with Improved Dual SRF PowerG & Legacy 319.5 MHz for Qolsys S-Line and Interlogix Sensors, with Built-In AT&T LTE 4G (IQP4004)
-
2GIG Wireless Glass Break Detector (2GIG-GB100-345)

Translation missing: en.products.product.sku: SKU# 4006
Vendor:2GIG2GIG Wireless Glass Break Detector (2GIG-GB100-345)
-
Qolsys IQ Hub Wireless Touchscreen Alarm Control Panel for Legacy 319.5 MHz Sensors with a Built-In Verizon LTE Cell Card (IQPH051)

Translation missing: en.products.product.sku: SKU# 3685
Vendor:QolsysQolsys IQ Hub Wireless Touchscreen Alarm Control Panel for Legacy 319.5 MHz Sensors with a Built-In Verizon LTE Cell Card (IQPH051)
-
Linear Z-Wave Single Wall Outlet (WO15Z-1)

Translation missing: en.products.product.sku: SKU# 1346AL
Vendor:LinearLinear Z-Wave Single Wall Outlet (WO15Z-1)
- Regular price
- $44.99
- Sale price
- $44.99
- Regular price
-
-
Qolsys IQ Panel 4 Power G Kit with a Built-In Verizon Cell Card, a PowerG Motion Sensor, and a PowerG Door/Window Sensor (IQP4017-KIT-PG)

Translation missing: en.products.product.sku: SKU# 3659
Vendor:QolsysQolsys IQ Panel 4 Power G Kit with a Built-In Verizon Cell Card, a PowerG Motion Sensor, and a PowerG Door/Window Sensor (IQP4017-KIT-PG)
- Regular price
- $599.00
- Sale price
- $599.00
- Regular price
-
-
2GIG Wireless Flood/Temp Sensor (2GIG-FT100-345)

Translation missing: en.products.product.sku: SKU# 4004
Vendor:2GIG2GIG Wireless Flood/Temp Sensor (2GIG-FT100-345)
-
2GIG GCTouch Security and Control Panel with 7-inch Touchscreen, Bluetooth Disarm, Z-Wave Compatibility (2GIG-TOUCH-NA-VA)

Translation missing: en.products.product.sku: SKU# 4013
Vendor:2GIG2GIG GCTouch Security and Control Panel with 7-inch Touchscreen, Bluetooth Disarm, Z-Wave Compatibility (2GIG-TOUCH-NA-VA)
-
Alarm.com Car Connector with GPS and 4G LTE (ADC-3035L)

Translation missing: en.products.product.sku: SKU# 3359
Vendor:Alarm.comAlarm.com Car Connector with GPS and 4G LTE (ADC-3035L)
-
GoControl Z-Wave Dimmable LED Indoor Flood Light (LBR30Z-1)

Translation missing: en.products.product.sku: SKU# 1342AL
Vendor:GoControlGoControl Z-Wave Dimmable LED Indoor Flood Light (LBR30Z-1)
- Regular price
- $29.99
- Sale price
- $29.99
- Regular price
-
-
Kwikset 910 Signature Series Z-Wave Traditional Round Deadbolt

Translation missing: en.products.product.sku: SKU# 1392AL
Vendor:KwiksetKwikset 910 Signature Series Z-Wave Traditional Round Deadbolt
- Regular price
- $147.99
- Sale price
- $147.99
- Regular price
-
-
Qolsys IQ Hub Wireless Touchscreen Alarm Control Panel for 2GIG & Honeywell 345 MHz Sensors with a Built-In Verizon LTE Cell Card (IQPH052)

Translation missing: en.products.product.sku: SKU# 3684
Vendor:QolsysQolsys IQ Hub Wireless Touchscreen Alarm Control Panel for 2GIG & Honeywell 345 MHz Sensors with a Built-In Verizon LTE Cell Card (IQPH052)
-
2GIG 345S Wireless Dual Flood Water and Temperature Sensor (2GIG-FTD100-345)

Translation missing: en.products.product.sku: SKU# 4005
Vendor:2GIG2GIG 345S Wireless Dual Flood Water and Temperature Sensor (2GIG-FTD100-345)
-
2GIG 345S Recessed Door/Window Contact Sensor (2GIG-DWR100-345)

Translation missing: en.products.product.sku: SKU# 4002
Vendor:2GIG2GIG 345S Recessed Door/Window Contact Sensor (2GIG-DWR100-345)
-
Akuvox Smart Indoor 10-inch Monitor with Android Operating System, Dual Mics and Quad Speakers (S567A)

Translation missing: en.products.product.sku: SKU# 3969
Vendor:AkuvoxAkuvox Smart Indoor 10-inch Monitor with Android Operating System, Dual Mics and Quad Speakers (S567A)
-
Akuvox Premium Indoor 7-inch Touch Screen Monitor (C313W-2)

Translation missing: en.products.product.sku: SKU# 3978
Vendor:AkuvoxAkuvox Premium Indoor 7-inch Touch Screen Monitor (C313W-2)
-
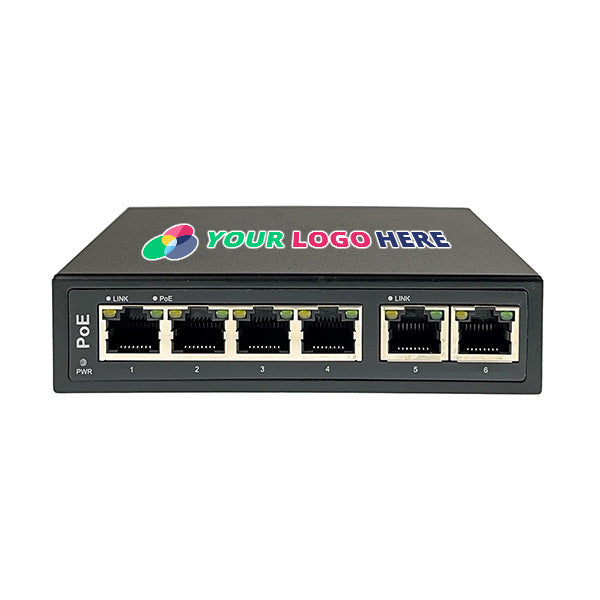
Private Labeled 4 Port PoE Switch for IP Cameras with 2 10/100 Uplink Ports (IPS-4P2G-AF)

Translation missing: en.products.product.sku: SKU# 3473
Vendor:Nelly's SecurityPrivate Labeled 4 Port PoE Switch for IP Cameras with 2 10/100 Uplink Ports (IPS-4P2G-AF)
- Regular price
- $44.99
- Sale price
- $44.99
- Regular price
-
-
Private Labeled 16 Port PoE+ Switch with Two Gigabit Uplinks for IP Security Cameras (IPS-16P2G-AF)

Translation missing: en.products.product.sku: SKU# 3475
Vendor:Nelly's SecurityPrivate Labeled 16 Port PoE+ Switch with Two Gigabit Uplinks for IP Security Cameras (IPS-16P2G-AF)
- Regular price
- $149.99
- Sale price
- $149.99
- Regular price
-
-
Private Labeled 8 Port PoE+ Switch with 2 10/100 Uplinks for IP Security Cameras (IPS-8P2G-AF)

Translation missing: en.products.product.sku: SKU# 3474
Vendor:Nelly's SecurityPrivate Labeled 8 Port PoE+ Switch with 2 10/100 Uplinks for IP Security Cameras (IPS-8P2G-AF)
- Regular price
- $79.99
- Sale price
- $79.99
- Regular price
-
-
Custom Branded 1U Server Rack Blank Plate Spacer Filler Panel - Pack of 10

Translation missing: en.products.product.sku: SKU# 3284
Vendor:Nelly's SecurityCustom Branded 1U Server Rack Blank Plate Spacer Filler Panel - Pack of 10
- Regular price
- $169.99
- Sale price
- $169.99
- Regular price
-
-
TP-Link Pharos Outdoor Long Range Wireless 5GHz Dual-Polarized Directional MIMO Antenna (CPE510)

Translation missing: en.products.product.sku: SKU# 3525
Vendor:TP-LinkTP-Link Pharos Outdoor Long Range Wireless 5GHz Dual-Polarized Directional MIMO Antenna (CPE510)
- Regular price
- $54.99
- Sale price
- $54.99
- Regular price
-
-
UNV 4-Port Power over Ethernet (PoE) Switch with 2 Additional Uplink Ports (NSW2020-6T-POE-IN)

Translation missing: en.products.product.sku: SKU# 3545
Vendor:UniviewUNV 4-Port Power over Ethernet (PoE) Switch with 2 Additional Uplink Ports (NSW2020-6T-POE-IN)
- Regular price
- $139.00
-
Omada Wireless Bridge Pair (Pre-Configured) 5 GHz 867 Mbps Indoor/Outdoor Access Points (EAP211-Bridge Kit)

Translation missing: en.products.product.sku: SKU# 3820
Vendor:TP-LinkOmada Wireless Bridge Pair (Pre-Configured) 5 GHz 867 Mbps Indoor/Outdoor Access Points (EAP211-Bridge Kit)
- Regular price
- $139.99
- Sale price
- $139.99
- Regular price
-
-
TP-Link Pharos Outdoor Long Range Wireless 2.4GHz Dual-Polarized Directional MIMO Antenna (CPE210)

Translation missing: en.products.product.sku: SKU# 3524
Vendor:TP-LinkTP-Link Pharos Outdoor Long Range Wireless 2.4GHz Dual-Polarized Directional MIMO Antenna (CPE210)
- Regular price
- $44.99
- Sale price
- $44.99
- Regular price
-
-
48 Port PoE+ Switch with Two Gigabit Uplink Ports for IP Security Cameras (IPS-48P2G-AF)

Translation missing: en.products.product.sku: SKU# 3477
Vendor:Nelly's Security48 Port PoE+ Switch with Two Gigabit Uplink Ports for IP Security Cameras (IPS-48P2G-AF)
- Regular price
- $399.99
- Sale price
- $399.99
- Regular price
-
-
Private Labeled 24 Port PoE+ Switch with Two Gigabit Uplink Ports for IP Security Cameras (IPS-24P2G-AF)

Translation missing: en.products.product.sku: SKU# 3476
Vendor:Nelly's SecurityPrivate Labeled 24 Port PoE+ Switch with Two Gigabit Uplink Ports for IP Security Cameras (IPS-24P2G-AF)
- Regular price
- $168.99
- Sale price
- $168.99
- Regular price
-
-
TP-Link Outdoor Long Range Wireless High-Gain Directional 2X2 MIMO Antenna with Dish for Long Distance Application (CPE710)

Translation missing: en.products.product.sku: SKU# 3526
Vendor:TP-LinkTP-Link Outdoor Long Range Wireless High-Gain Directional 2X2 MIMO Antenna with Dish for Long Distance Application (CPE710)
- Regular price
- $74.99
- Sale price
- $74.99
- Regular price
-
-
19" Wall Mounted 6U Server Rack W/ Hinged Front Glass Door

Translation missing: en.products.product.sku: SKU# 2069
Vendor:LinkedPro19" Wall Mounted 6U Server Rack W/ Hinged Front Glass Door
- Regular price
- $199.99
- Sale price
- $199.99
- Regular price
-
-
Private Labeled 24 Port PoE+ Switch with Two Gigabit Uplink Ports for IP Security Cameras (IPS-24P2G-EXAF)

Translation missing: en.products.product.sku: SKU# 3598
Vendor:Nelly's SecurityPrivate Labeled 24 Port PoE+ Switch with Two Gigabit Uplink Ports for IP Security Cameras (IPS-24P2G-EXAF)
- Regular price
- $189.99
- Sale price
- $189.99
- Regular price
-
-
Custom Branded 2U Server Rack Blank Plate Spacer Filler Panel – Pack of 10

Translation missing: en.products.product.sku: SKU# 3285
Vendor:Nelly's SecurityCustom Branded 2U Server Rack Blank Plate Spacer Filler Panel – Pack of 10
- Regular price
- $199.99
- Sale price
- $199.99
- Regular price
-
-
TP-Link Gigabit PoE++ Injector, Supplies up to 60W of Power (TL-POE170S)

Translation missing: en.products.product.sku: SKU# 3794
Vendor:TP-LinkTP-Link Gigabit PoE++ Injector, Supplies up to 60W of Power (TL-POE170S)
- Regular price
- $59.99
- Sale price
- $59.99
- Regular price
-
-
UNV 24 Port PoE+ Switch with Surveillance (Extend) Mode and Two Uplink Ports (NSW2020-24T1GT1GC-POE-IN)

Translation missing: en.products.product.sku: SKU# 3558
Vendor:UniviewUNV 24 Port PoE+ Switch with Surveillance (Extend) Mode and Two Uplink Ports (NSW2020-24T1GT1GC-POE-IN)
- Regular price
- $759.00
-
TP-Link AC1200 Wireless MU-MIMO Gigabit Indoor/Outdoor Access Point (EAP225-Outdoor)

Translation missing: en.products.product.sku: SKU# 3528
Vendor:TP-LinkTP-Link AC1200 Wireless MU-MIMO Gigabit Indoor/Outdoor Access Point (EAP225-Outdoor)
- Regular price
- $69.99
- Sale price
- $69.99
- Regular price
-
-
Private-Labeled 4-Port 802.3bt PoE-Powered Network Switch, Capable of Pushing 60 Watts per Port with 2 Uplink Ports (IPS-4P2G-BT1)

Translation missing: en.products.product.sku: SKU# 3673
Vendor:Nelly's SecurityPrivate-Labeled 4-Port 802.3bt PoE-Powered Network Switch, Capable of Pushing 60 Watts per Port with 2 Uplink Ports (IPS-4P2G-BT1)
- Regular price
- $89.99
- Sale price
- $89.99
- Regular price
-
$89.99
-
Private Labeled 8-Port PoE+ Switch with Two Gigabit Uplink Ports and Optional Extend Mode for IP Security Cameras (IPS-8P2G-EXAF)

Translation missing: en.products.product.sku: SKU# 3597
Vendor:Nelly's SecurityPrivate Labeled 8-Port PoE+ Switch with Two Gigabit Uplink Ports and Optional Extend Mode for IP Security Cameras (IPS-8P2G-EXAF)
- Regular price
- $89.99
- Sale price
- $89.99
- Regular price
-
-
UNV 8-Channel PoE+ Switch with Surveillance (Extend) Mode and Two Uplink Ports (NSW2020-10T-POE-IN)

Translation missing: en.products.product.sku: SKU# 3579
Vendor:UniviewUNV 8-Channel PoE+ Switch with Surveillance (Extend) Mode and Two Uplink Ports (NSW2020-10T-POE-IN)
- Regular price
- $189.00
-
UNV 16 Port PoE+ Switch Unmanaged with 2 Gigabit-Rated Uplink Ports and Surveillance Mode for Laying Cable Runs up to 820 Feet (NSW2010-16T2GC-POE-IN)

Translation missing: en.products.product.sku: SKU# 3337
Vendor:UniviewUNV 16 Port PoE+ Switch Unmanaged with 2 Gigabit-Rated Uplink Ports and Surveillance Mode for Laying Cable Runs up to 820 Feet (NSW2010-16T2GC-POE-IN)
- Regular price
- $569.00
-
19" Metal Server Rack Shelf

Translation missing: en.products.product.sku: SKU# 2068
Vendor:LinkedPro19" Metal Server Rack Shelf
- Regular price
- $40.00
- Sale price
- $40.00
- Regular price
-
-
19" Wall Mounted 9U Server Rack W/ Hinged Front Glass Door

Translation missing: en.products.product.sku: SKU# 2070
Vendor:LinkedPro19" Wall Mounted 9U Server Rack W/ Hinged Front Glass Door
- Regular price
- $219.99
- Sale price
- $219.99
- Regular price
-
-
TP-Link AC750 Wireless Wi-Fi Router Portable Travel Size (TL-WR902AC)

Translation missing: en.products.product.sku: SKU# 3654
Vendor:TP-LinkTP-Link AC750 Wireless Wi-Fi Router Portable Travel Size (TL-WR902AC)
- Regular price
- $39.99
- Sale price
- $39.99
- Regular price
-
-
TP-Link JetStream 8-Port PoE+ with 2 Uplink Ports (TL-SG2210MP)

Translation missing: en.products.product.sku: SKU# 3533
Vendor:TP-LinkTP-Link JetStream 8-Port PoE+ with 2 Uplink Ports (TL-SG2210MP)
- Regular price
- $174.99
- Sale price
- $174.99
- Regular price
-
-
TP-Link 5-Port Desktop Switch 10/100/1000Mbps (LS1005G)

Translation missing: en.products.product.sku: SKU# 3530
Vendor:TP-LinkTP-Link 5-Port Desktop Switch 10/100/1000Mbps (LS1005G)
- Regular price
- $16.99
- Sale price
- $16.99
- Regular price
-
-
TP-Link JetStream 18-Port Gigabit Smart Switch with 16-Port PoE+ and 2 SFP Ports (TL-SG2218P)

Translation missing: en.products.product.sku: SKU# 3796
Vendor:TP-LinkTP-Link JetStream 18-Port Gigabit Smart Switch with 16-Port PoE+ and 2 SFP Ports (TL-SG2218P)
- Regular price
- $259.99
- Sale price
- $259.99
- Regular price
-
-
TP-Link AX1800 Ceiling Mount 2.4 / 5 GHz Wi-Fi 6 Access Point (EAP610_V2)

Translation missing: en.products.product.sku: SKU# 3529
Vendor:TP-LinkTP-Link AX1800 Ceiling Mount 2.4 / 5 GHz Wi-Fi 6 Access Point (EAP610_V2)
- Regular price
- $94.99
- Sale price
- $94.99
- Regular price
-
-
UNV 16 Port PoE+ Switch with Surveillance (Extend) Mode and Two Uplink Ports (NSW2020-16T1GT1GC-POE-IN)

Translation missing: en.products.product.sku: SKU# 3686
Vendor:UniviewUNV 16 Port PoE+ Switch with Surveillance (Extend) Mode and Two Uplink Ports (NSW2020-16T1GT1GC-POE-IN)
- Regular price
- $559.00
-
Minuteman 450 VA Stand-by UPS with 8 Outlets (EN450G)

Translation missing: en.products.product.sku: SKU# 3699
Vendor:MinutemanMinuteman 450 VA Stand-by UPS with 8 Outlets (EN450G)
- Regular price
- $128.99
- Sale price
- $128.99
- Regular price
-
-
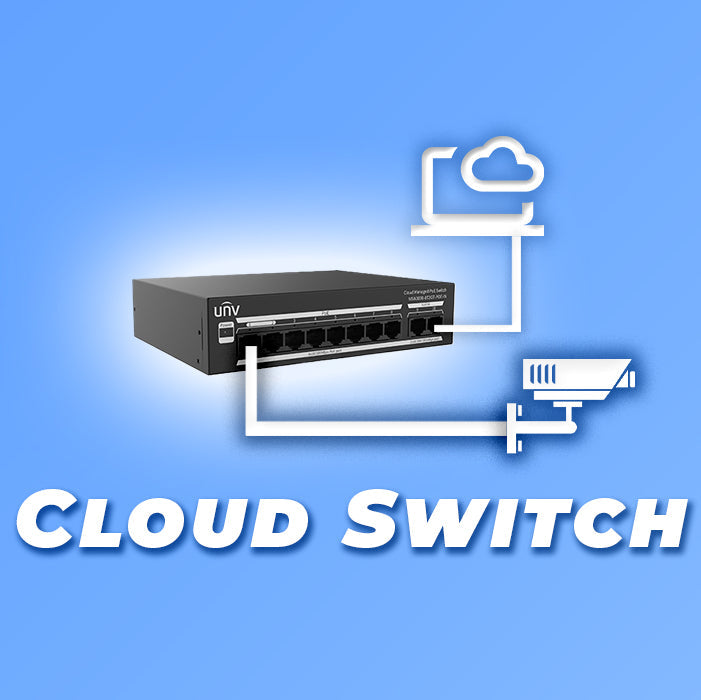
UNV 8 Port Cloud Managed POE Switch with 2 Gigabit Uplink Ports (NSW3000-8T2GT-POE-IN)

Translation missing: en.products.product.sku: SKU# 3963
Vendor:UniviewUNV 8 Port Cloud Managed POE Switch with 2 Gigabit Uplink Ports (NSW3000-8T2GT-POE-IN)
- Regular price
- $229.00
-
TP-Link AX3600 Wireless Dual Band Multi-Gigabit Ceiling Mount Access Point (EAP660)

Translation missing: en.products.product.sku: SKU# 3602
Vendor:TP-LinkTP-Link AX3600 Wireless Dual Band Multi-Gigabit Ceiling Mount Access Point (EAP660)
- Regular price
- $184.99
- Sale price
- $184.99
- Regular price
-
-
TP-Link AC1350 Wireless MU-MIMO Gigabit Ceiling Mount Access Point (EAP225)

Translation missing: en.products.product.sku: SKU# 3527
Vendor:TP-LinkTP-Link AC1350 Wireless MU-MIMO Gigabit Ceiling Mount Access Point (EAP225)
- Regular price
- $59.99
- Sale price
- $59.99
- Regular price
-
-
TP-Link JetStream 28-Port Gigabit Smart Switch with 24-Port PoE+ (TL-SG2428P)

Translation missing: en.products.product.sku: SKU# 3534
Vendor:TP-LinkTP-Link JetStream 28-Port Gigabit Smart Switch with 24-Port PoE+ (TL-SG2428P)
- Regular price
- $309.99
- Sale price
- $309.99
- Regular price
-
-
TP-Link Omada Hardware Controller (OC200)

Translation missing: en.products.product.sku: SKU# 3639
Vendor:TP-LinkTP-Link Omada Hardware Controller (OC200)
- Regular price
- $99.99
- Sale price
- $99.99
- Regular price
-
-
TP-Link Omada 5-Port IP55 Outdoor-Rated Managed Gigabit Smart Switch with 4 PoE+ Out Ports & 1 PoE++ In Port (SG2005P-PD)

Translation missing: en.products.product.sku: SKU# 3793
Vendor:TP-LinkTP-Link Omada 5-Port IP55 Outdoor-Rated Managed Gigabit Smart Switch with 4 PoE+ Out Ports & 1 PoE++ In Port (SG2005P-PD)
- Regular price
- $99.99
- Sale price
- $99.99
- Regular price
-
-
Tripp Lite 2U 1500V 900W UPS (SMART1500LCD)

Translation missing: en.products.product.sku: SKU# 3697
Vendor:Tripp LiteTripp Lite 2U 1500V 900W UPS (SMART1500LCD)
- Regular price
- $376.19
- Sale price
- $376.19
- Regular price
-
-
TP-Link JetStream 48-Port PoE+ Gigabit L2+ Managed Switch with 4 Uplink Ports (TL-SG3452P)

Translation missing: en.products.product.sku: SKU# 3535
Vendor:TP-LinkTP-Link JetStream 48-Port PoE+ Gigabit L2+ Managed Switch with 4 Uplink Ports (TL-SG3452P)
- Regular price
- $569.99
- Sale price
- $569.99
- Regular price
-
-
ENTRUST-LG® Compact Mini Tower Line-Interactive Uninterruptible Power Supply with 10 Outlets (ETR1500LGU)

Translation missing: en.products.product.sku: SKU# 3814
Vendor:MinutemanENTRUST-LG® Compact Mini Tower Line-Interactive Uninterruptible Power Supply with 10 Outlets (ETR1500LGU)
- Regular price
- $379.99
- Sale price
- $379.99
- Regular price
-
-
Kendall Howard 6u Wall Mount Enclosure Glass Door

Translation missing: en.products.product.sku: SKU# 3714
Vendor:Kendall HowardKendall Howard 6u Wall Mount Enclosure Glass Door
- Regular price
- $375.00
- Sale price
- $375.00
- Regular price
-
-
Custom Branded 4U Server Rack Blank Plate Spacer Filler Panel - Pack of 8

Translation missing: en.products.product.sku: SKU# 3287
Vendor:Nelly's SecurityCustom Branded 4U Server Rack Blank Plate Spacer Filler Panel - Pack of 8
- Regular price
- $209.99
- Sale price
- $209.99
- Regular price
-
-
Custom Branded 3U Server Rack Blank Plate Spacer Filler Panel - Pack of 10

Translation missing: en.products.product.sku: SKU# 3286
Vendor:Nelly's SecurityCustom Branded 3U Server Rack Blank Plate Spacer Filler Panel - Pack of 10
- Regular price
- $229.99
- Sale price
- $229.99
- Regular price
-
-
PoE Powered 3 Port Switch & Network Cat5 Cat6 Midspan Cable Range Extender Pass Through Repeater for IP Cameras - Run Cables up to 1148 (IPCP-EXT3-10)

Translation missing: en.products.product.sku: SKU# 4053
Vendor:IPCamPowerPoE Powered 3 Port Switch & Network Cat5 Cat6 Midspan Cable Range Extender Pass Through Repeater for IP Cameras - Run Cables up to 1148 (IPCP-EXT3-10)
- Regular price
- $34.99
- Sale price
- $34.99
- Regular price
-
-
Kendall Howard 9u Wall Mount Enclosure Glass Door

Translation missing: en.products.product.sku: SKU# 3715
Vendor:Kendall HowardKendall Howard 9u Wall Mount Enclosure Glass Door
- Regular price
- $385.00
- Sale price
- $385.00
- Regular price
-
-
Uniview NDAA Compliant 16 channel Cloud Management Switch (NSW3000-16T1GT1GC-LPOE-IN)

Translation missing: en.products.product.sku: SKU# 4023
Vendor:UniviewUniview NDAA Compliant 16 channel Cloud Management Switch (NSW3000-16T1GT1GC-LPOE-IN)
- Regular price
- $469.00
-
Uniview NDAA Compliant 24 channel Cloud Management Switch (NSW3000-24T1GT1GC-POE-IN)

Translation missing: en.products.product.sku: SKU# 4022
Vendor:UniviewUniview NDAA Compliant 24 channel Cloud Management Switch (NSW3000-24T1GT1GC-POE-IN)
- Regular price
- $839.00
-
Citel Surge Protector for IP Cameras & POE Switches & POE NVRs, Gigabit Rated, Din Rail Mounted (MJ8-POE-A)

Translation missing: en.products.product.sku: SKU# 3716
Vendor:CitelCitel Surge Protector for IP Cameras & POE Switches & POE NVRs, Gigabit Rated, Din Rail Mounted (MJ8-POE-A)
- Regular price
- $69.00
- Sale price
- $69.00
- Regular price
-
-
Citel Outdoor-Rated Surge Protector for IP Cameras & POE Switches and POE NVRs, Gigabit Rated (CGMJ8-POE-A-C5E)

Translation missing: en.products.product.sku: SKU# 3717
Vendor:CitelCitel Outdoor-Rated Surge Protector for IP Cameras & POE Switches and POE NVRs, Gigabit Rated (CGMJ8-POE-A-C5E)
- Regular price
- $120.00
- Sale price
- $120.00
- Regular price
-
-
Kendall Howard SFF CPU Bracket (KH-1915-1-300-00)

Translation missing: en.products.product.sku: SKU# 3696
Vendor:Kendall HowardKendall Howard SFF CPU Bracket (KH-1915-1-300-00)
- Regular price
- $50.25
- Sale price
- $50.25
- Regular price
-
-
Uniview NDAA Compliant 24 channel Cloud Management Switch (NSW3000-24T1GT1GC-LPOE-IN)
Translation missing: en.products.product.sku: SKU# 4024
Vendor:UniviewUniview NDAA Compliant 24 channel Cloud Management Switch (NSW3000-24T1GT1GC-LPOE-IN)
- Regular price
- $659.00
A Division of Rackmount Solutions
Nelly's Security
Our excellent security solutions are one small part of a larger family of businesses serving the information technology space. As a division of Rackmount Solutions, we're now proud to offer you industry-leading support and expertise in verticals beyond security, including critical power, data center infrastructure, and more. Rackmount Solutions is your one-stop-solution for all your IT needs.